
Connect Claude, ChatGPT or Cursor to your apps
Add Tadabase as an MCP connector in Claude, ChatGPT or Cursor so the assistant can read and build your apps with your own access, and disconnect it later.
- Verified Nov 17, 2026
- Classic builder
- Tadabase AI
On this page
An MCP connection lets an AI assistant such as Claude, ChatGPT or Cursor work in your Tadabase apps from the chat: read the schema, work with records, and build tables, fields and workflows. You add one server address to the assistant and approve it in your browser; there is no key to copy.
This page covers the three most common assistants. For Claude Code, VS Code, other MCP clients and troubleshooting, see the full guide: Connect Tadabase to Claude, ChatGPT, Cursor or VS Code.
What a connected assistant can do #
- Read an app: its tables, fields, roles and workflows.
- Work with data: list, create, update and delete records.
- Build: create tables, add fields, and create or change workflows.
- Run and check workflows, and read their run logs.
Before you start #
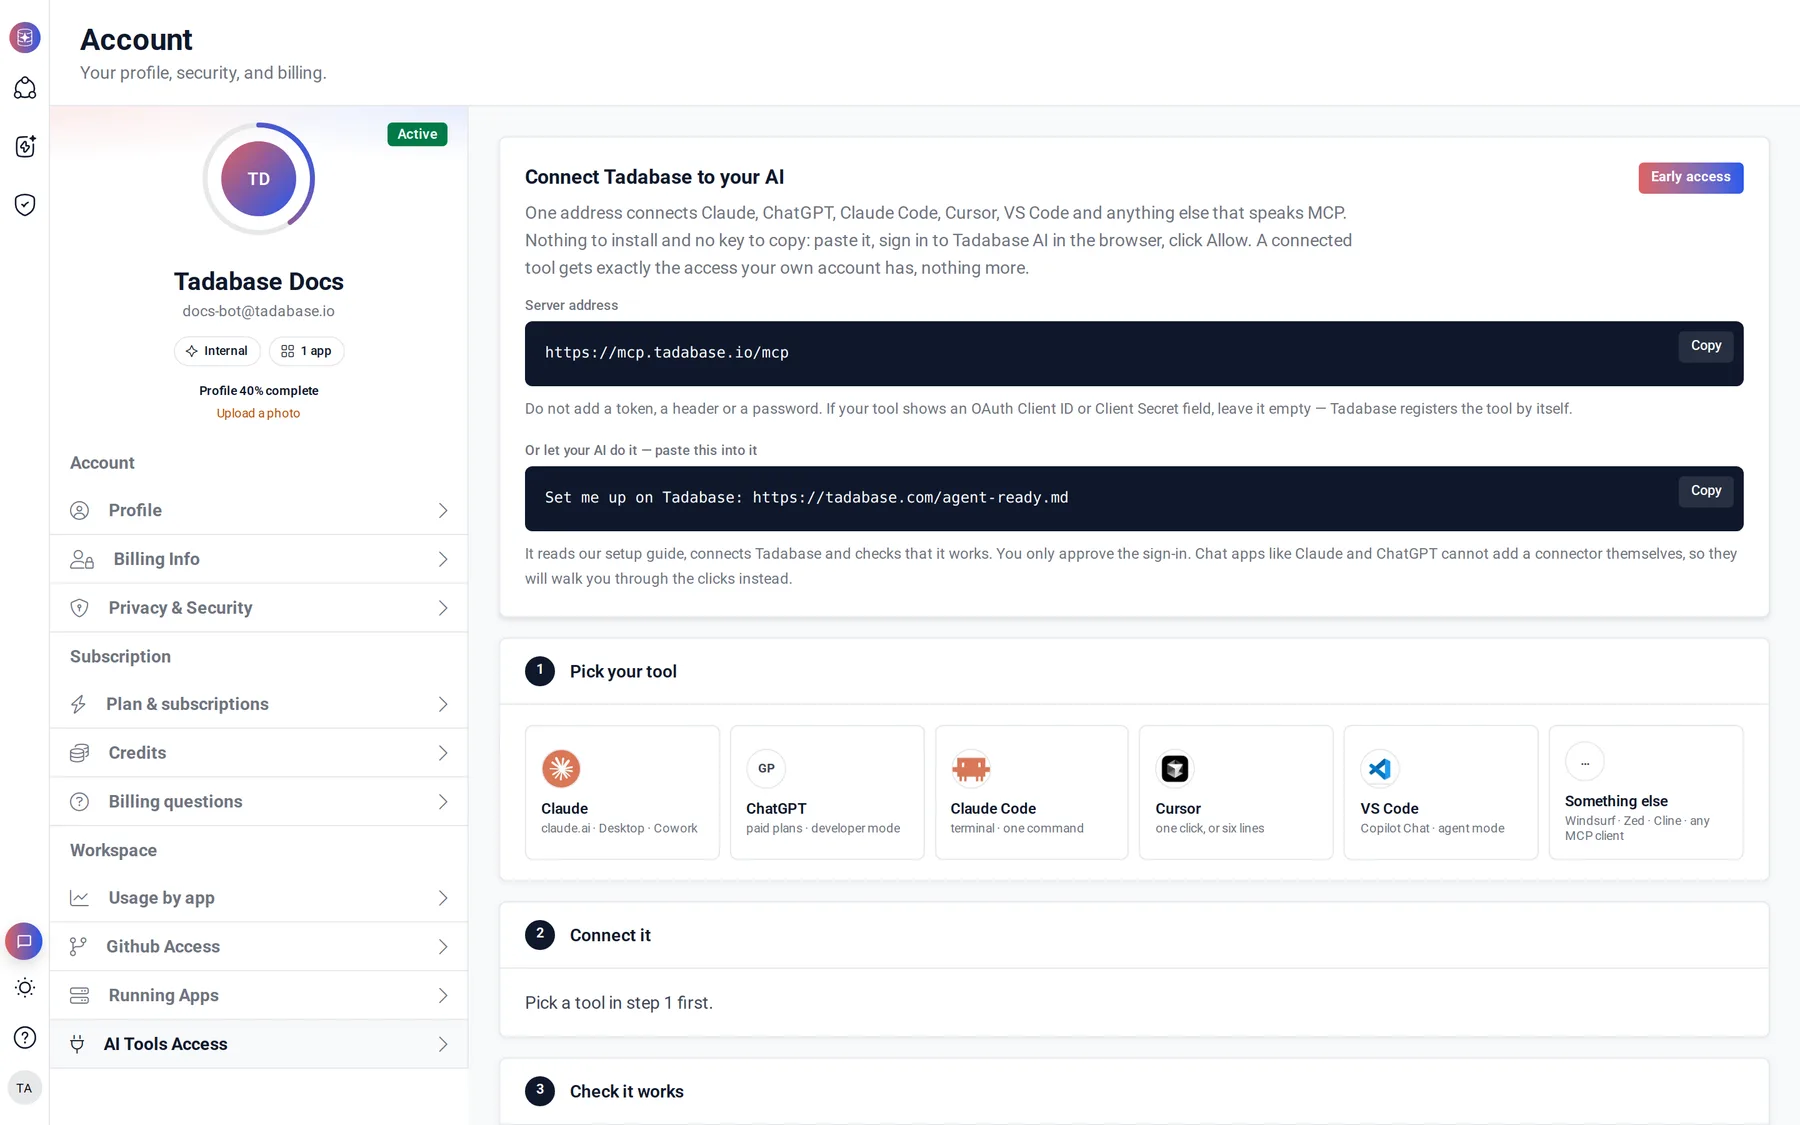
- The server address is
https://mcp.tadabase.io/mcp. It is the same for every assistant. - You start the connection in the AI assistant, not in the classic builder. The builder has no connection page; the address, per-tool steps and your list of connections are on the AI Tools Access page in Tadabase AI (open your profile menu, choose Settings, then AI Tools Access).
- Do not add a token, header or password. If your assistant shows OAuth Client ID or Client Secret fields, leave them empty: Tadabase registers the assistant by itself.
Connect Claude #
The steps are the same at claude.ai, in Claude Desktop and in Cowork. Custom connectors need a paid Claude plan.
- Open the connectors settings In Claude, open Settings from the menu next to your name, then Connectors under Customize.
- Add a custom connector Click Add at the top right, then Add custom connector. Do not use Browse connectors; Tadabase is not in that directory.
- Name it and paste the address Name it
Tadabaseand pastehttps://mcp.tadabase.io/mcpas the server URL. Leave any OAuth Client ID and Client Secret fields empty. - Approve it in Tadabase AI A Tadabase AI window opens. Sign in if asked, choose which apps Claude may reach, and click Allow. The window closes by itself. If nothing opens, find Tadabase in the connector list and click Connect.
- Turn it on in a chat Connectors are off in a new conversation. Click + in the message box, choose Connectors and switch Tadabase on.
Connect ChatGPT #
ChatGPT allows custom MCP servers only with developer mode, which needs a paid plan. On a Business, Enterprise or Edu workspace an administrator may have to allow it first.
- Turn on developer mode In ChatGPT, go to Settings, Security and login, and turn on Developer mode.
- Create an app Open the plugins page and click Create app.
- Name it and paste the address Name it
Tadabaseand pastehttps://mcp.tadabase.io/mcpas the server URL. Leave Authentication on OAuth; there is nothing to fill in under the advanced OAuth settings. - Create it Tick the acknowledgement checkbox, then click Create. Create stays greyed out until the box is ticked.
- Sign in and approve Click the sign-in button. A Tadabase AI window opens: sign in if asked, choose which apps to allow, and click Allow. If nothing happens, your browser blocked the pop-up.
- Pick it in a chat Open the tools menu in the message box and pick Tadabase for the message.
Connect Cursor #
- Add the server On the AI Tools Access page, pick Cursor and click Add to Cursor; Cursor opens and asks you to confirm. Or add the server to
~/.cursor/mcp.json(all projects) or.cursor/mcp.json(this project only). - Sign in In Cursor, open Settings, then MCP, find tadabase and click Login. Approve in the browser window that opens; the indicator turns green.
{
  "mcpServers": {
    "tadabase": {
      "url": "https://mcp.tadabase.io/mcp"
    }
  }
}
The approval screen #
Every assistant ends at the same Tadabase AI screen, titled Connect followed by the assistant's name. It shows the account you are signed in as and asks Which apps:
| Option | What the assistant can reach |
|---|---|
| All my apps, now and in future | Every app you can open, including apps you create later. This is the default. |
| Only the apps I pick | Only the apps you tick in the list. You must tick at least one. |
Click Allow to connect, or Deny to refuse. If you are trying this for the first time, pick one app.
Check it works #
Ask the assistant: "List my Tadabase apps." If it answers with your apps, the connection is live. Then try something like "Show me the tables in my CRM app."
Disconnect an assistant #
- Open AI Tools Access In Tadabase AI, open your profile menu, choose Settings, then AI Tools Access.
- Revoke the connection Under Active tokens, find the assistant and click Revoke, then Yes, revoke. Its access ends immediately.
- Remove it from the assistant Optionally, also delete the Tadabase connector in the assistant's own settings so it stops trying to connect.
Common problems #
| What you see | What to do |
|---|---|
| "AI tool access isn't switched on for your account yet" | AI tool access is being released gradually. Contact support to have it turned on for your account. |
| "AI tool access is not included in your plan" on the approval screen | Nothing was granted. Contact support or change your plan, then connect again. |
| "AI tool access is temporarily unavailable" | Nothing is wrong with your account. Try again shortly. |
| "Unknown AI tool" | The assistant did not register itself. Start the connection again from the assistant, and make sure the OAuth Client ID and Client Secret fields are empty. |
| No sign-in window opens | Your browser blocked the pop-up. Allow pop-ups for the assistant's site and try again. |
Was this page helpful?
Something wrong or missing on this page? Tell us.