
Brand your app's emails with an email layout
Design a branded header, footer and styling once as an email layout, then wrap form emails and workflow Simple Emails in it.
- Verified Nov 17, 2026
- Classic builder
On this page
An email layout is the branded shell around an email: header, logo, footer, colors and styling. Build it once in Email Settings, and each email you wrap in it keeps the same look while its own content goes in the middle.
Create a layout #
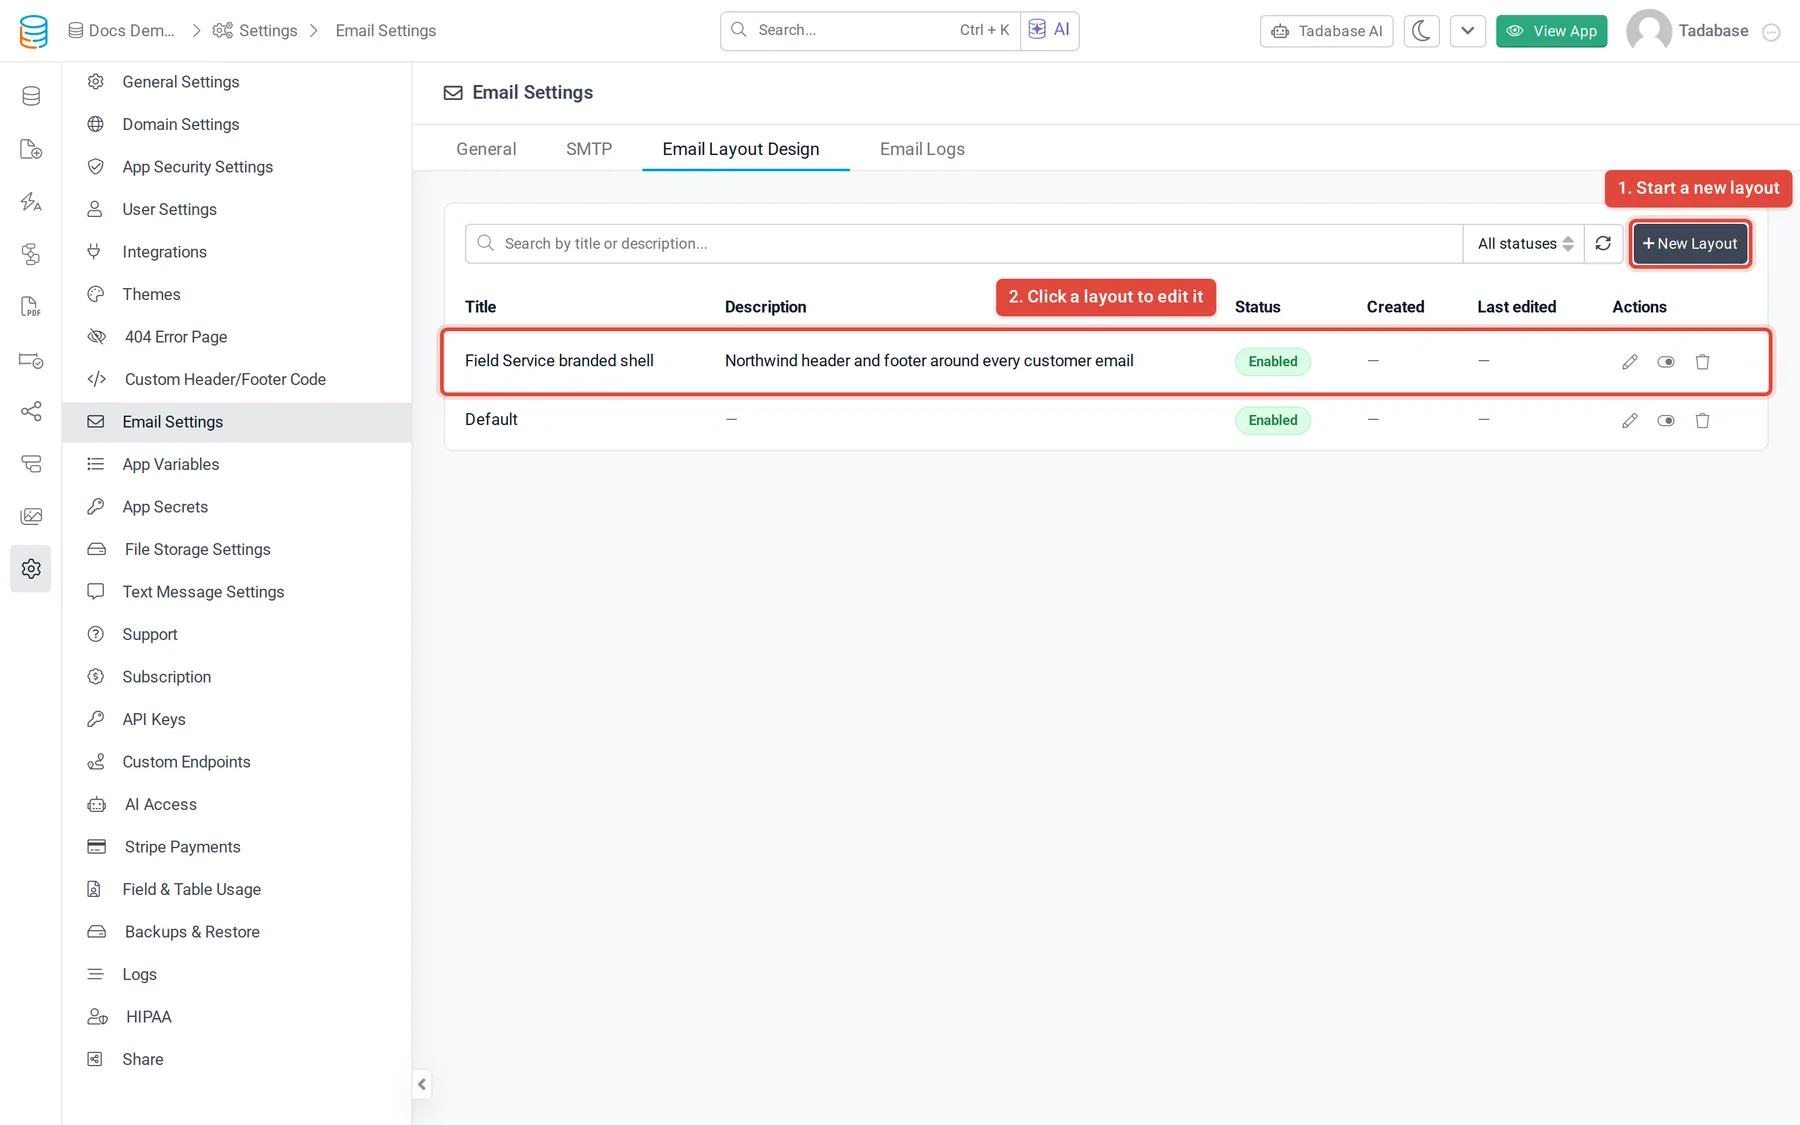
- Open the layouts In the builder, open Settings > Email Settings and click the Email Layout Design tab.
- Start a layout Click New Layout. The New Email Layout window opens.
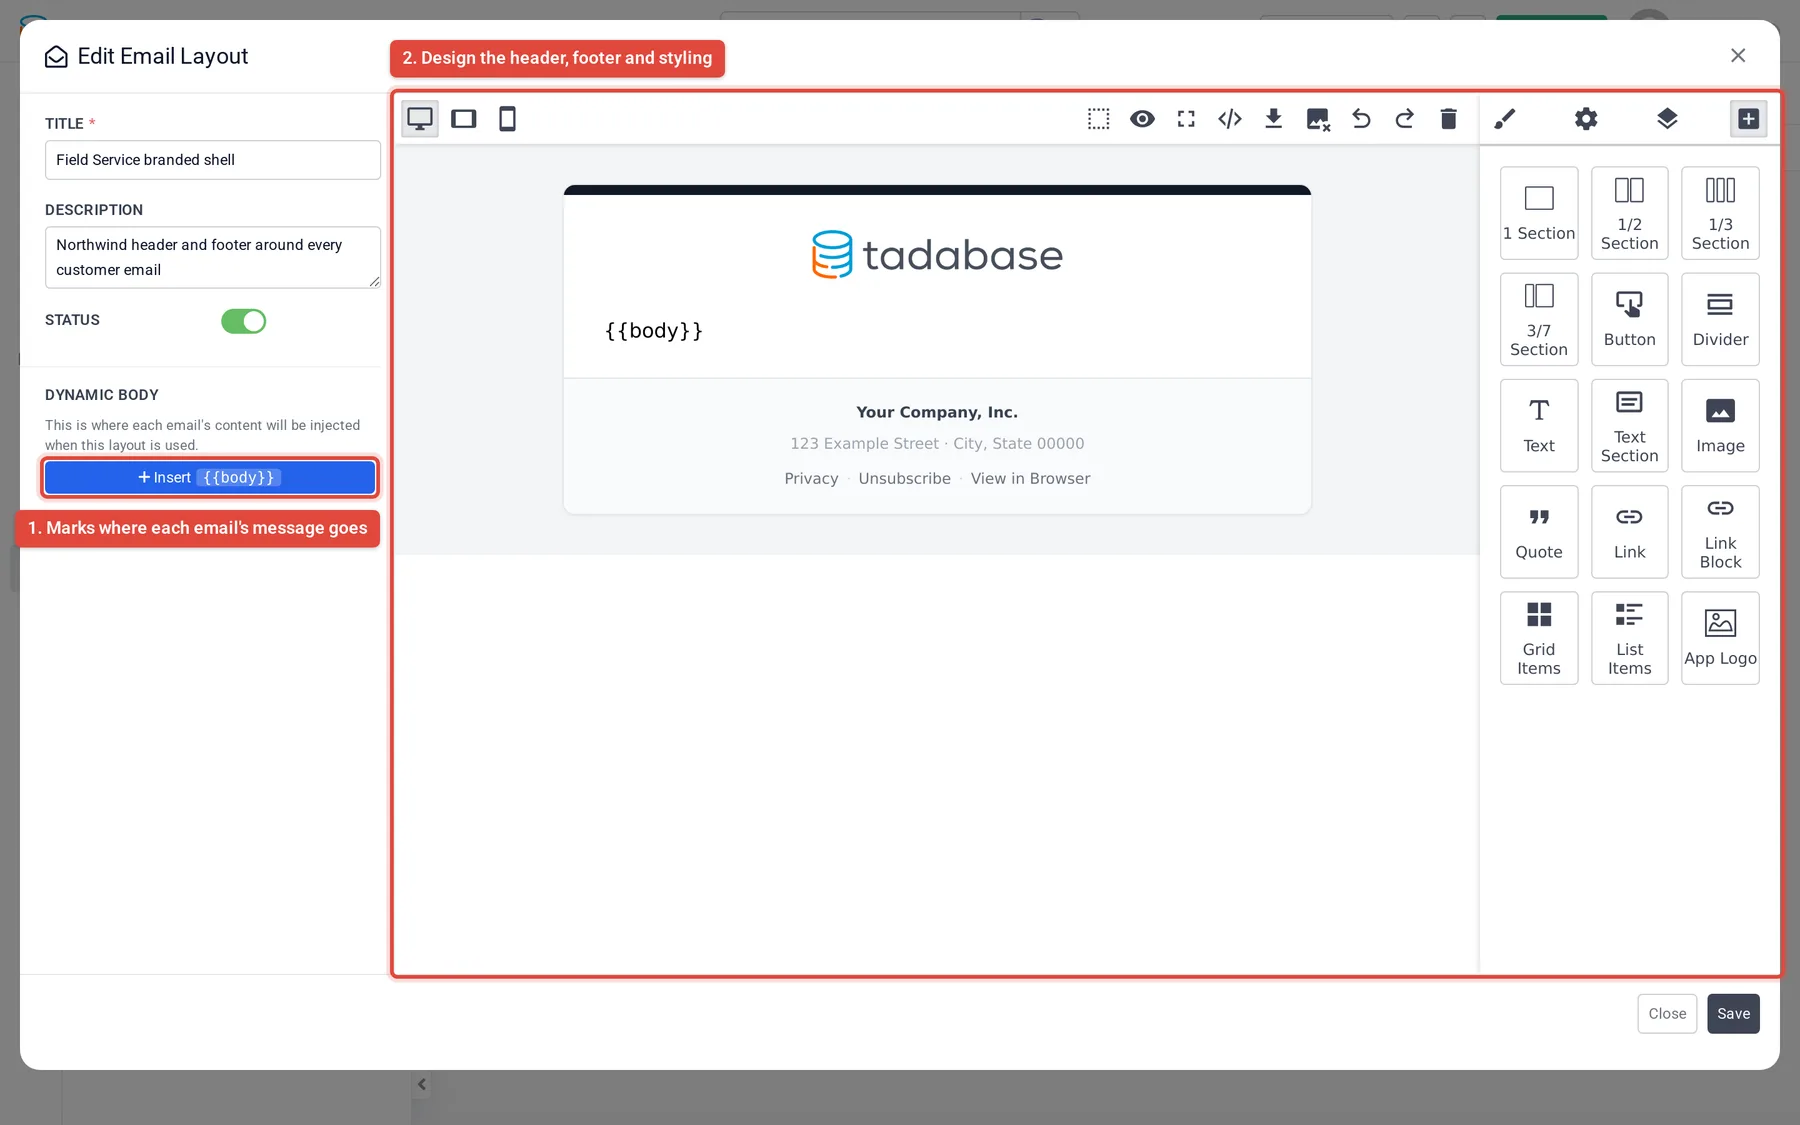
- Name it Enter a Title (required, up to 120 characters, and unique in the app) and, if you like, a Description. Leave Status on Enabled so the layout can be picked.
- Design the shell Build the header, footer and styling in the editor on the right.
- Mark where the message goes In the editor, select the block the message should come after (or nothing, to add it at the end), then click Insert {{body}} under Dynamic Body.
- Save Click Save.
The {{body}} placeholder #
{{body}} is where the email's own message is placed when the layout is used. You can save a layout without it, but then it cannot hold any message: the list marks it with No {{body}}, and emails that pick it are sent without the layout.
Use a layout #
| Where to pick the layout | |
|---|---|
| Form email | In the form's Notifications > Emails, on an email whose Type is Basic Email or Custom Email, choose the layout under Email Layout. |
| Workflow Send Email action | With Simple Email chosen as the Email source, open Email Layout and choose the layout. |
Only layouts with Status Enabled appear in these lists. Choose None (no layout) to send the email as it is. Email templates are not wrapped in a layout; design their look in the template itself.
Edit, turn off or delete a layout #
- Click a layout's row, or its pencil, to edit it. Changes apply to the next email that uses it.
- Use the toggle in the Actions column to set it to Enabled or Disabled. Emails that pick a disabled layout are sent without it.
- Use the bin to delete it. This cannot be undone.
- Search by title or description, or filter by status, above the list.
Check it worked #
There is no preview send on the layout screen. Pick the layout on a form email or Send Email action, turn on Temp Mail Mode on the General tab of Email Settings, and trigger the email: it is captured in Settings > Temp Mail Box, where you can see it wrapped in the layout. See Set your app's default sender name and email.
Plans #
Email layouts depend on your plan, and your plan sets how many layouts an app can have. On a plan without them, the Email Layout Design tab shows an upgrade button, the Email Layout choice is hidden on form emails and Send Email actions, and emails that already pick a layout are sent without it.
Was this page helpful?
Something wrong or missing on this page? Tell us.