
Show live data from Airtable, Stripe, HubSpot and more
Connect an outside app such as Airtable, Stripe or HubSpot under Data, External Sources, and show its records live in your pages, without copying them.
- Verified Nov 17, 2026
- Classic builder
- Available on: Business Pro, Business Elite
On this page
External Sources reads records from another app, such as Airtable, Stripe or HubSpot, each time they are shown. The data stays in that app and nothing is copied into Tadabase. Use it when the other app stays the place where the data is kept and your Tadabase app needs to show it.
Apps you can read from #
These apps can be connected as an external source: Airtable, Caspio, ClickUp, Custom API, Freshdesk, HubSpot, Knack, Monday.com, Quickbase, Shopify, Stripe and Trello.
Custom API reads paths on a base URL you enter when you connect the account, for an API that has no ready-made connector.
Connect a source #
- Start the connect flow In the Data Builder, find External Sources in the left panel under your tables and click Connect external data. You can also open the Add Data Table menu and choose Connect external data, or click Connect external data at the top of the External Sources screen.
- Choose the app In the Connect external data window, click the app whose data you want to read. Type in Search apps... to find it.
- Choose or connect an account If this Tadabase app already signs in to that app, the Choose an account step lists those accounts: click Use this account, or Connect a different account. Otherwise the Connect window opens straight away.
- Sign in In the Connect window, pick how to sign in under Sign in with if there is a choice, give it an Account name, and fill in the key or token fields the app asks for. Click Connect & test, or Save & Authorize for an app you sign in to through its own login page.
- Pick the data In Pick the data, choose what to read. The choices depend on the app; for Airtable you pick a Base and then a Table. A choice that depends on another one stays disabled until the first is set.
- Check the preview and name it Once every required choice is made, a preview shows the first rows from the app. Check them, then set Name in Tadabase. It starts with a suggested name; pages, workflows and AI will call the source by this name.
- Save Click Add to Data. The window says the source was added to Data. Click Open source to open it, or Done to go back to the list.
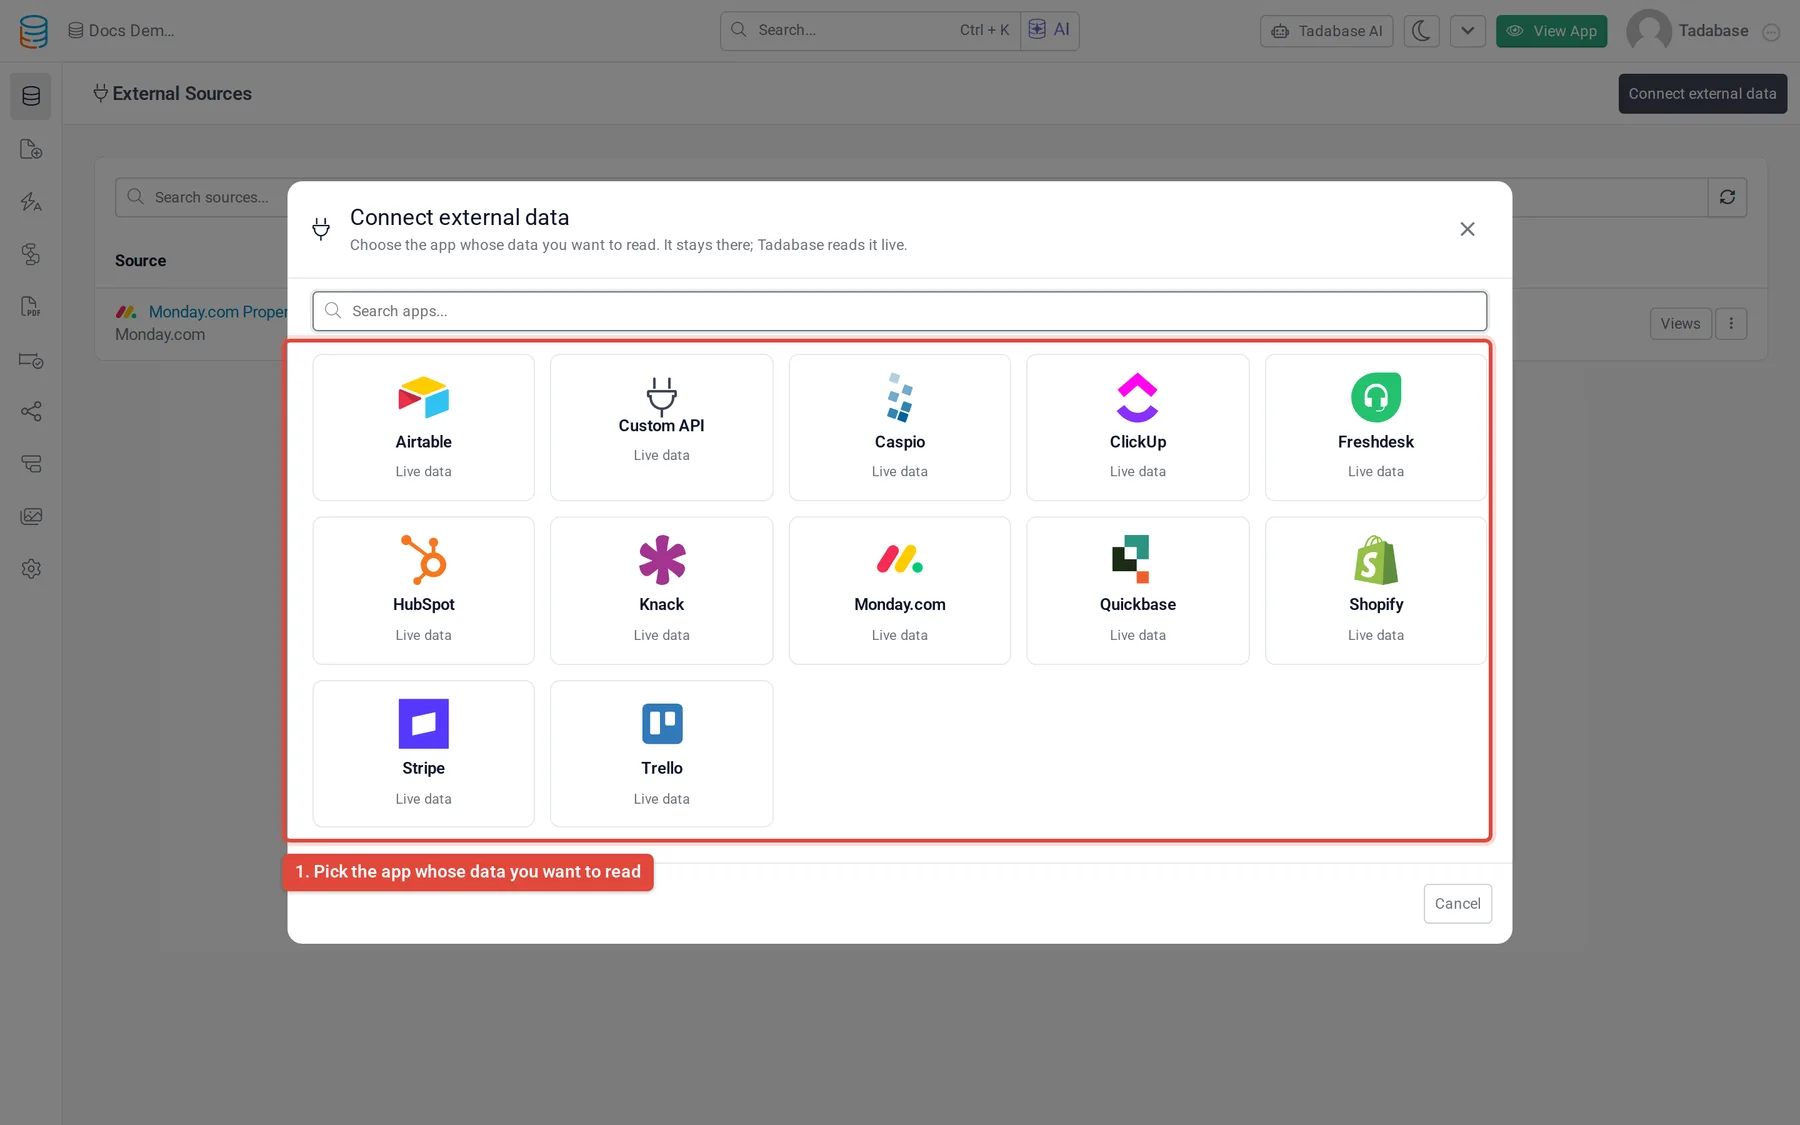
If you close the window after signing in, the account stays saved. The next time you connect a source for the same app, it is offered under Choose an account.
The External Sources screen #
The External Sources screen lists every saved source with its account, what uses it, and its status. Click a source's name to open it. The menu at the end of each row has Views, Manage account, Open and Remove.
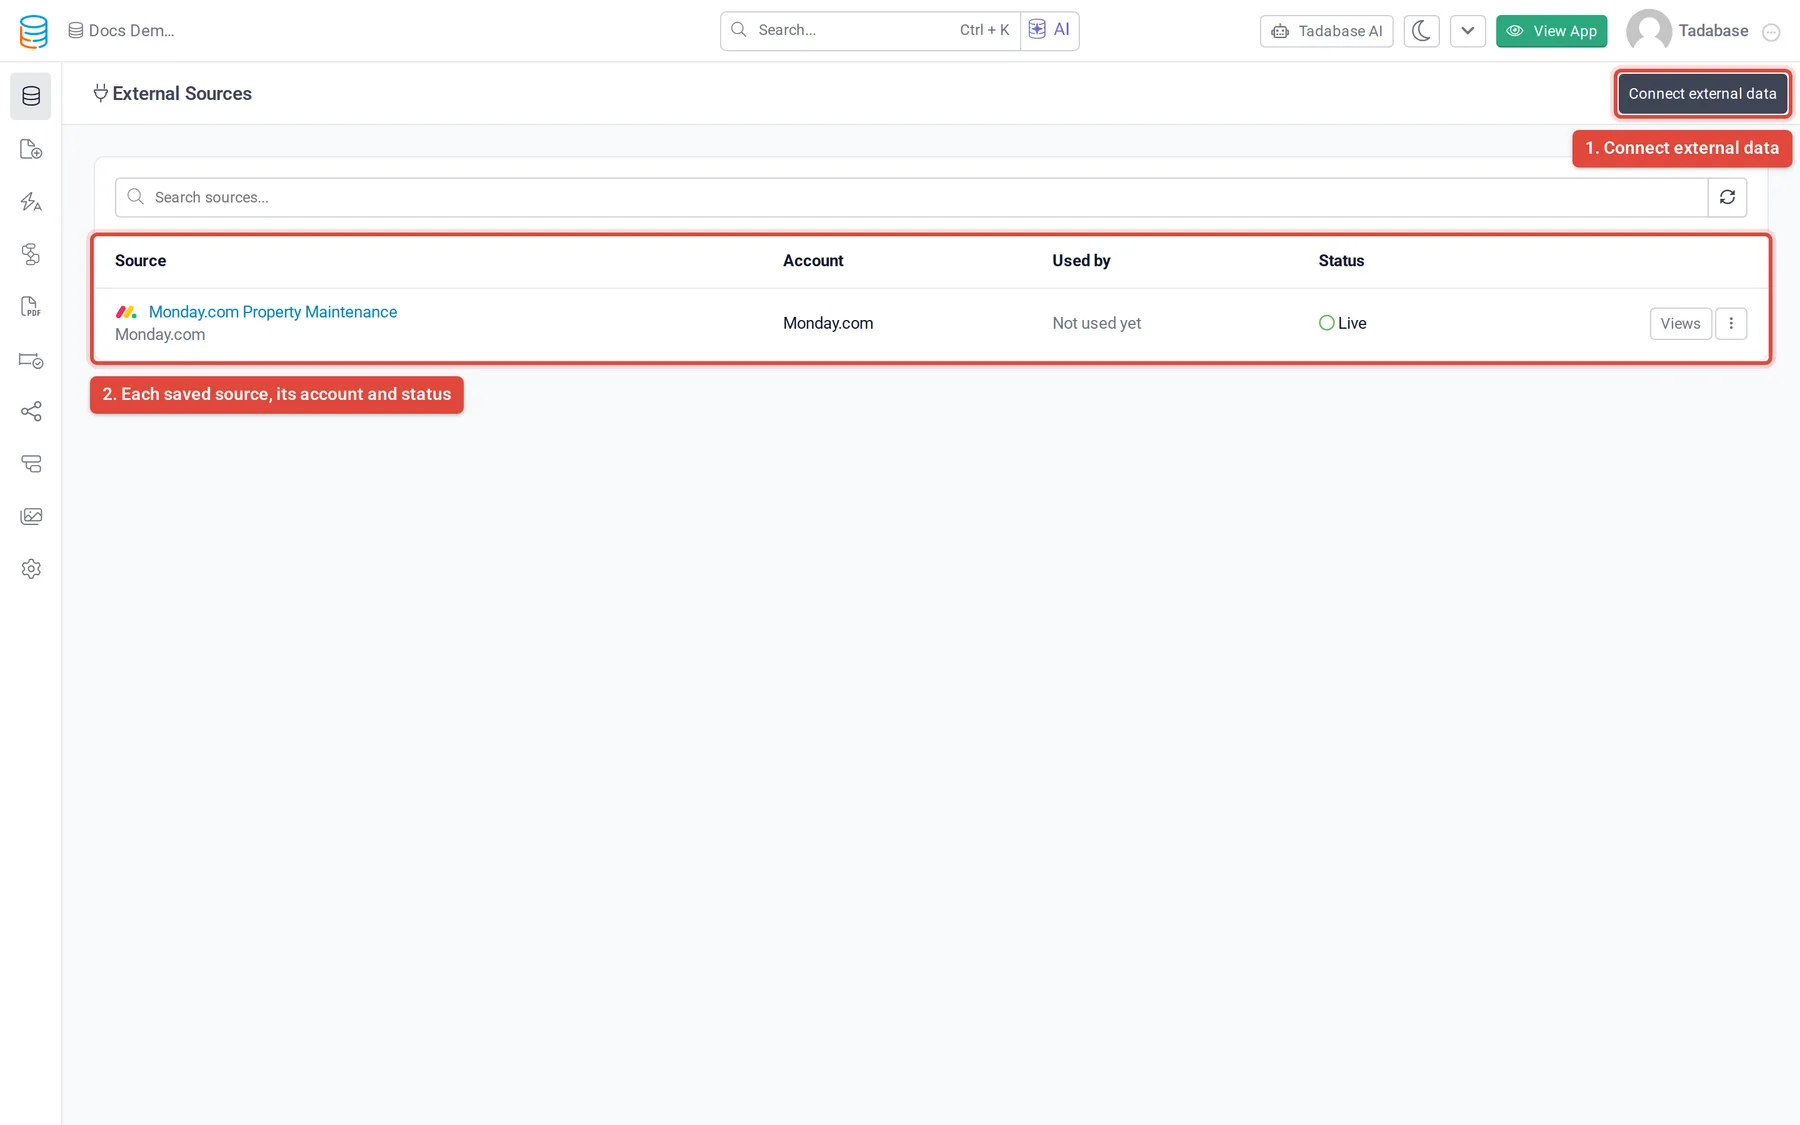
| Status | Meaning |
|---|---|
| Live | The source can be read. |
| Reconnect | The account it signs in through failed, needs signing in again, or was removed. See Reconnect an account. |
| Locked | The app's plan does not include external sources. See Plans and limits. |
What you see when you open a source #
| Tab | What it shows |
|---|---|
| Records | The records read live from the app, 25 per page, with Prev and Next and a refresh button. Data is read from the app each time; nothing is stored in Tadabase. |
| Columns | Each column with its path in the other app and its type. Columns are saved the first time records are read. |
| Used by | The page components, views and workflows that use this source. |
| Views | Open views lets you make Table and List views of the source's account, used by pages and apps. |
| Settings | Name in Tadabase and Description, plus Remove source and Manage account. The source's slug, which the App Schema and the AI agent use, does not change when you rename it. |
Use the source in your app #
- On a page: add a Table or List component, and in its Data Source step pick the source under Saved sources.
- For apps and AI: open the source and add a view on its Views tab.
- In workflows: the External Data Source trigger runs a workflow when someone clicks a row button that starts it on a record shown from an external source. The workflow runs on that record. See Workflow triggers.
Reconnect an account #
When an account's sign-in expires, is revoked or its key changes, the builder shows a banner: A connected account needs to be reconnected. Imports, workflows and external sources that use it stop until you click Reconnect next to the account and sign in again. Every source using that account works again afterwards.
Manage account opens the Integrations settings page only when your plan includes it. On other plans it tells you that page is on a higher plan; connect and reconnect accounts from the connect flow and the banner instead.
Remove a source #
Open the source's Settings tab and click Remove source, or choose Remove from the row's menu, then confirm. The account and its sign-in stay. Removal is refused while a page, view or workflow still uses the source, and the message names what uses it; check the Used by tab first.
Plans and limits #
- External Sources is included on the Business Pro and Business Elite plans. On other plans, External Sources and Connect external data do not appear in the Data Builder.
- A plan can cap the number of saved sources. When the cap is reached, Source limit reached on this plan shows next to Connect external data, and clicking it says to remove a source or upgrade the plan.
- If an app's plan stops including external sources, for example after a downgrade, its saved sources stay listed as Locked. Their setup and the pages using them are kept, and they work again as soon as the plan includes external sources. The screen then shows Show live data from the tools you already use with Upgrade and Explore with sample data, which shows made-up rows so you can see what a source looks like.
Was this page helpful?
Something wrong or missing on this page? Tell us.