
Send text messages with Twilio
Connect your Twilio account, then send SMS messages when a form is submitted or when a user clicks a Send a Text Message button on a record.
- Verified Nov 17, 2026
- Classic builder
- Available on: Business Growth, Business Pro, Business Elite
On this page
Your app can send SMS messages through your own Twilio account: automatically after a form is submitted, or when a user clicks a Send a Text Message button on a record. You need a Twilio account with a phone number that can send SMS.
Connect your Twilio account #
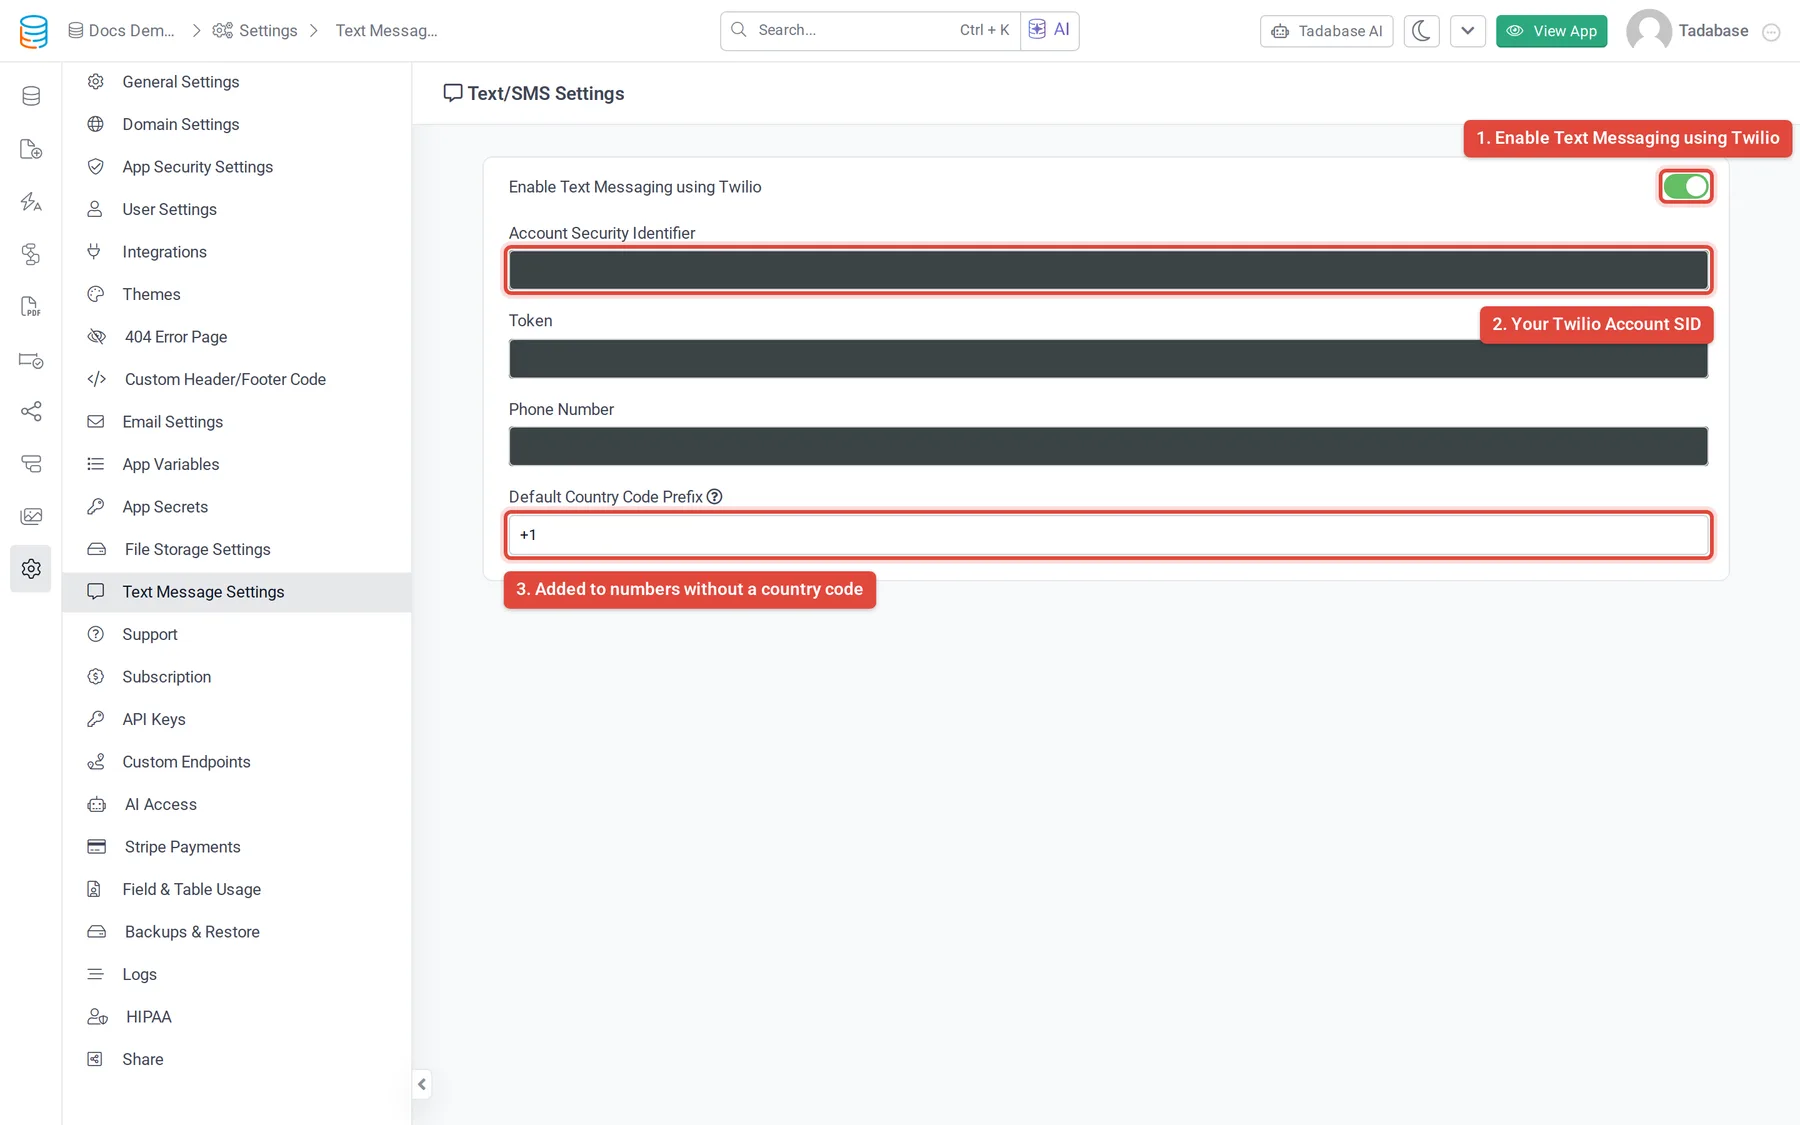
- Open the settings In the builder, open Settings > Text Message Settings. The screen is titled Text/SMS Settings.
- Turn it on Switch Enable Text Messaging using Twilio to Enable.
- Enter your Twilio details From your Twilio console, copy your Account SID into Account Security Identifier and your Auth Token into Token. In Phone Number, enter the Twilio number texts are sent from, with its country code (for example
+12065550100). - Set a default country code Optional. In Default Country Code Prefix, enter a code such as
+1. It is added to any recipient number that does not start with+. Spaces, dashes and brackets in numbers are removed before sending. - Save Save the settings.
Send a text when a form is submitted #
- Edit the form Open the page with your form and edit the Form component.
- Open Text Messages Open the Notifications tab, then Text Messages, and click Add New Text Message. The button is greyed out until text messaging is enabled in your app settings.
- Choose who receives it Set Type to Basic Text Message and type a number in Send, or choose Custom Text Message to add several recipients. For each, pick custom number and type it, or field and pick a phone field from the record.
- Add a condition (optional) Click Add New Condition to send the text only when the submitted record matches it.
- Write the message Type the text in Message. Use the field list next to it (search with Find a field) to insert values from the record; they are filled in when the text is sent.
- Save the form Save the component. Each text you add gets its own tab (Text 1, Text 2 and so on).
Send a text from a button on a record #
Table, List, Details, Kanban and Custom components can show a Send a Text Message action on each record, shown as a link or button. When a user clicks it, the text is sent about that record.
- Add the action In the component's columns or fields, add the Send a Text Message action. It is disabled, with the note "Please enable text messaging from your app settings", until Twilio is connected.
- Choose the recipients Under Send, pick custom number and type a number, or field and pick a phone field. Click the plus button to add more.
- Write the message Type the text in Message. Use Add Field to insert values from the record.
Check a text was sent #
- Texts go out from your Twilio account, so every message, its status and any error appear in your Twilio console's messaging logs.
- Tadabase records each text it hands to Twilio with the recipient, sender, message and Twilio's status. A message accepted by Twilio can still fail later: final delivery depends on Twilio, the carrier and the recipient's phone.
- If nothing arrives, check the number has a country code (or set Default Country Code Prefix), and that your Twilio number can send to that country.
Was this page helpful?
Something wrong or missing on this page? Tell us.