
Create and reuse email templates
Write an email once as an email template, with parameters and attachments, then send it from form emails and workflow Send Email actions.
- Verified Nov 17, 2026
- Classic builder
On this page
An email template is an email you write once, with placeholders for the values that change, and then send from any form or workflow. Change the template and every email that uses it changes too.
Create a template #
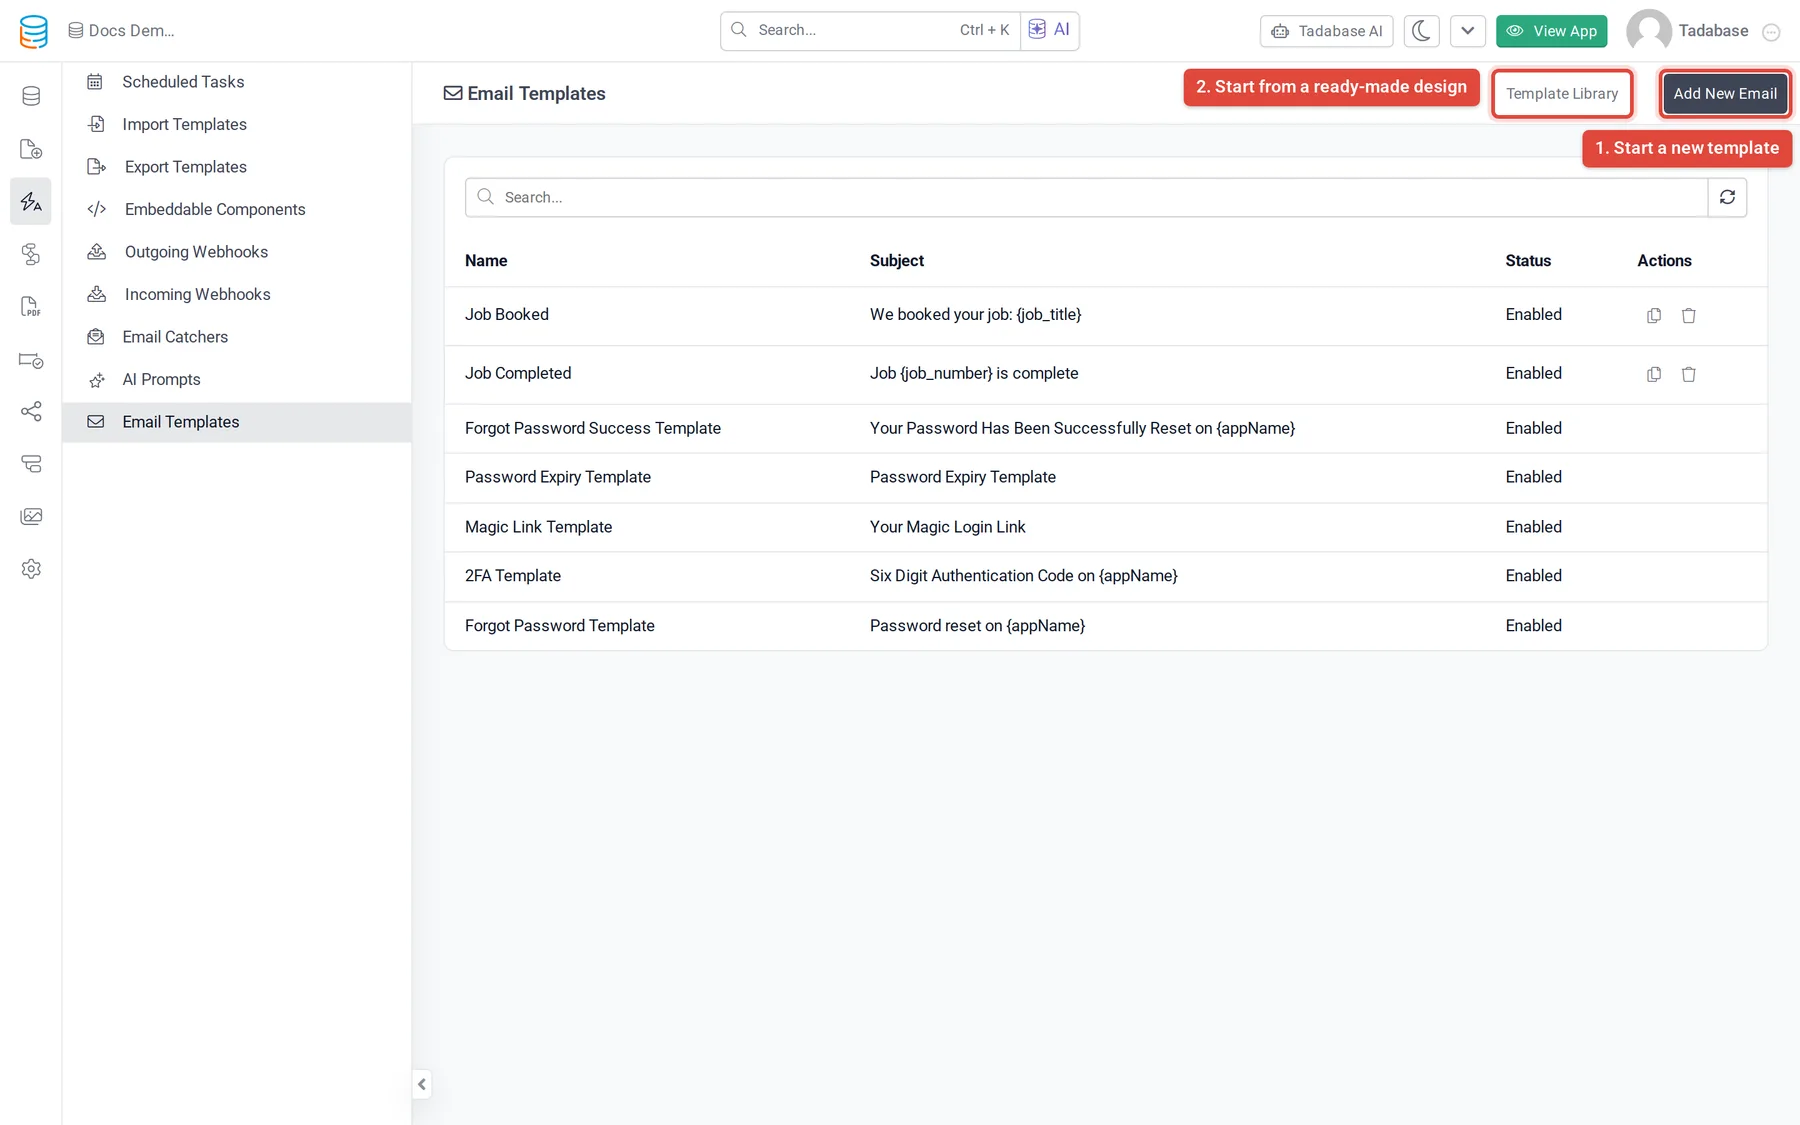
- Open Email Templates In the builder, go to Automation > Email Templates.
- Start a template Click Add New Email (or Add New Template if the list is empty). To start from a ready-made design, click Template Library instead, pick one and click Create Template.
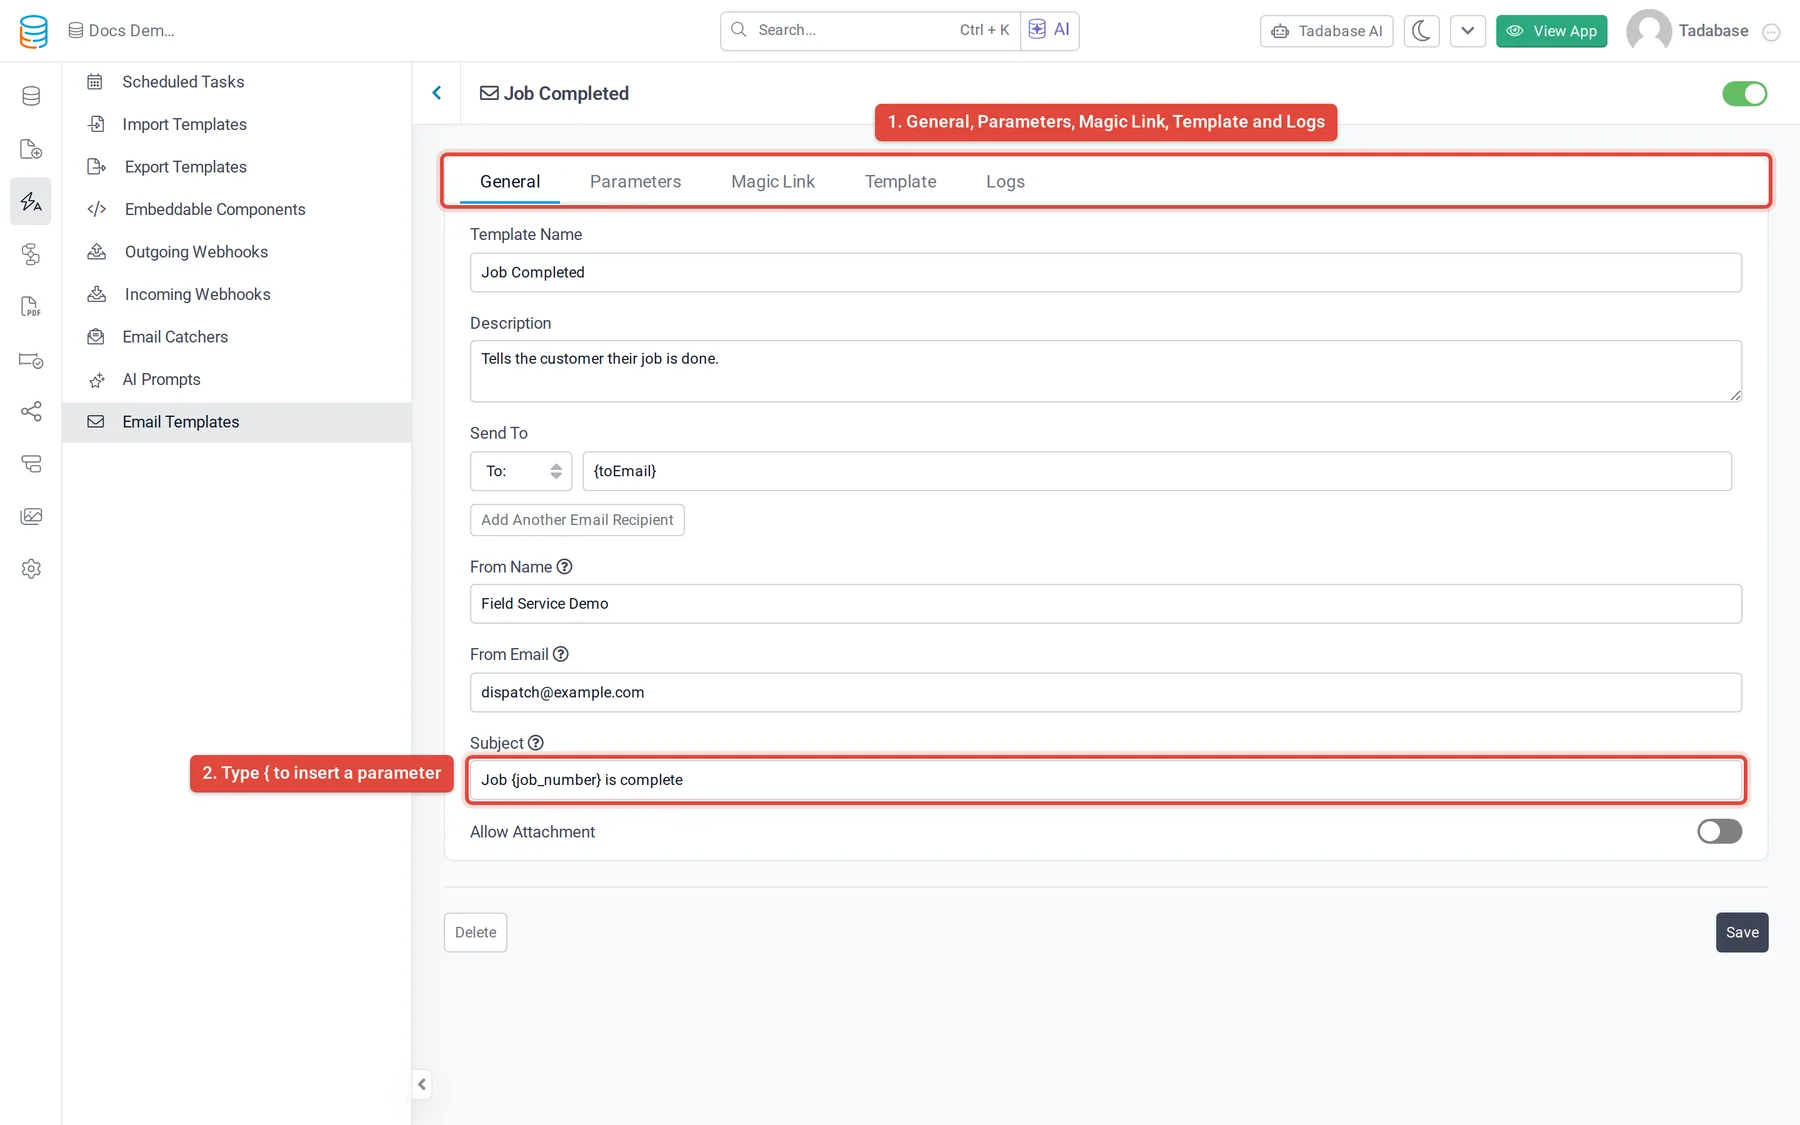
- Fill in the General tab Enter a Template Name, the recipients under Send To, and a Subject. The other fields are optional (see the table below).
- Add parameters On the Parameters tab, click Add New Parameter for each value that changes from email to email, such as a customer name or job number.
- Write the email On the Template tab, design the email in the editor. Type a parameter as
{key}where its value should appear. - Save Click Save. The switch at the top right sets the template to Enabled or Disabled.
General tab #
| Field | What it does |
|---|---|
| Template Name | Required. The name you pick the template by in forms and workflows. |
| Description | A note for builders about what the template is for. |
| Send To | Recipients. Choose To:, Cc:, Bcc: or Reply-To: and enter an address. Click Add Another Email Recipient for more. |
| From Name and From Email | Optional. If left blank, the app's defaults from Email Settings are used. See default sender. |
| Subject | The subject line. Type { to pick a parameter. |
| SMTP Configuration | Shown when your app has more than one SMTP setting. Picks which one sends this template. Default uses the main settings. See your own SMTP server. |
| Allow Attachment | Shown when your plan allows attachments in email templates. When Enabled, the template gets an ATTACHMENT_URL parameter for a file to attach. |
Parameters #
Each parameter has a Key, an optional Default Value used when no value is passed, and Required set to Yes or No. In the subject and the email, write the key in single braces: a parameter with the key job_number is written {job_number}.
The form or workflow that sends the template fills in each parameter, for example from a field of the record. A template's own recipients can also use parameters, such as {customer_email} in Send To.
Magic Link, Template and Logs tabs #
- Magic Link: shown when magic links are available in your app. Click Add Magic Link, pick a saved magic link under Select Magic Link, choose whether it is inserted as Full HTML or a URL, and where the user lands after signing in under Redirect Upon Login.
- Template: the drag-and-drop editor for the email itself.
- Logs: shown after the template is saved. Lists the emails sent with this template. All of the app's emails are in the email logs.
Attach a file #
- Allow attachments On the template's General tab, set Allow Attachment to Enabled and save.
ATTACHMENT_URLappears on the Parameters tab. - Map the file when you send In the workflow's Send Email action, under Template Parameters, set
ATTACHMENT_URLto a file field of the record. The file is attached to the email.
Attachments in email templates depend on your plan. If your plan does not include them, Allow Attachment is hidden and emails are sent without the file.
Send a template #
| From | How |
|---|---|
| A workflow | Add a Send Email action and pick the template under Email source. Fill in its values under Template Parameters. Under Overrides (optional) you can replace the Subject, From Name or From Email for this step. See Communication actions. |
| A form | Open the form component, then Notifications > Emails > Add New Email. Set Type to Email Template and pick the template under Email Template. See Form component. |
Older apps may still send emails from Record Rules or Scheduled Tasks. Those features were replaced by workflows, so use a Send Email action for new emails.
Built-in templates #
Your app may list built-in templates for system emails, such as the Forgot Password Template, Magic Link Template and 2FA Template. You can edit their content, but their recipients are filled in automatically, and they cannot be duplicated or deleted. Built-in templates do not count toward your plan's template limit.
Plans and limits #
Email templates depend on your plan. Without them, Email Templates shows an upgrade button instead of the list. Your plan also sets how many templates an app can have. When you reach it, Add New Email is hidden and a plan-limit icon shows next to Template Library.
Was this page helpful?
Something wrong or missing on this page? Tell us.