
Take a card payment when a form is submitted
Add your Stripe keys, put a Stripe Payments element in a form, and charge the card for an amount and currency you choose when the form is submitted.
- Verified Nov 17, 2026
- Classic builder
On this page
A Stripe Payments element in a form asks the user for card details and charges the card through your own Stripe account when they submit the form. Use it for one-off payments such as an order, a booking or a fee. To charge app users a recurring subscription, see Charge app users with Stripe subscriptions instead.
Add your Stripe keys #
- Copy your keys from Stripe In your Stripe dashboard, copy the publishable key and the secret key, for both live mode and test mode.
- Open Stripe Payments In the builder, open Settings > Stripe Payments. The screen is titled Stripe Settings.
- Turn it on Set Status to Yes. The key fields appear.
- Paste the keys Under Live API Details, paste the publishable key into API Key and the secret key into API Secret. Do the same with your test keys under Test API Details. Then save.
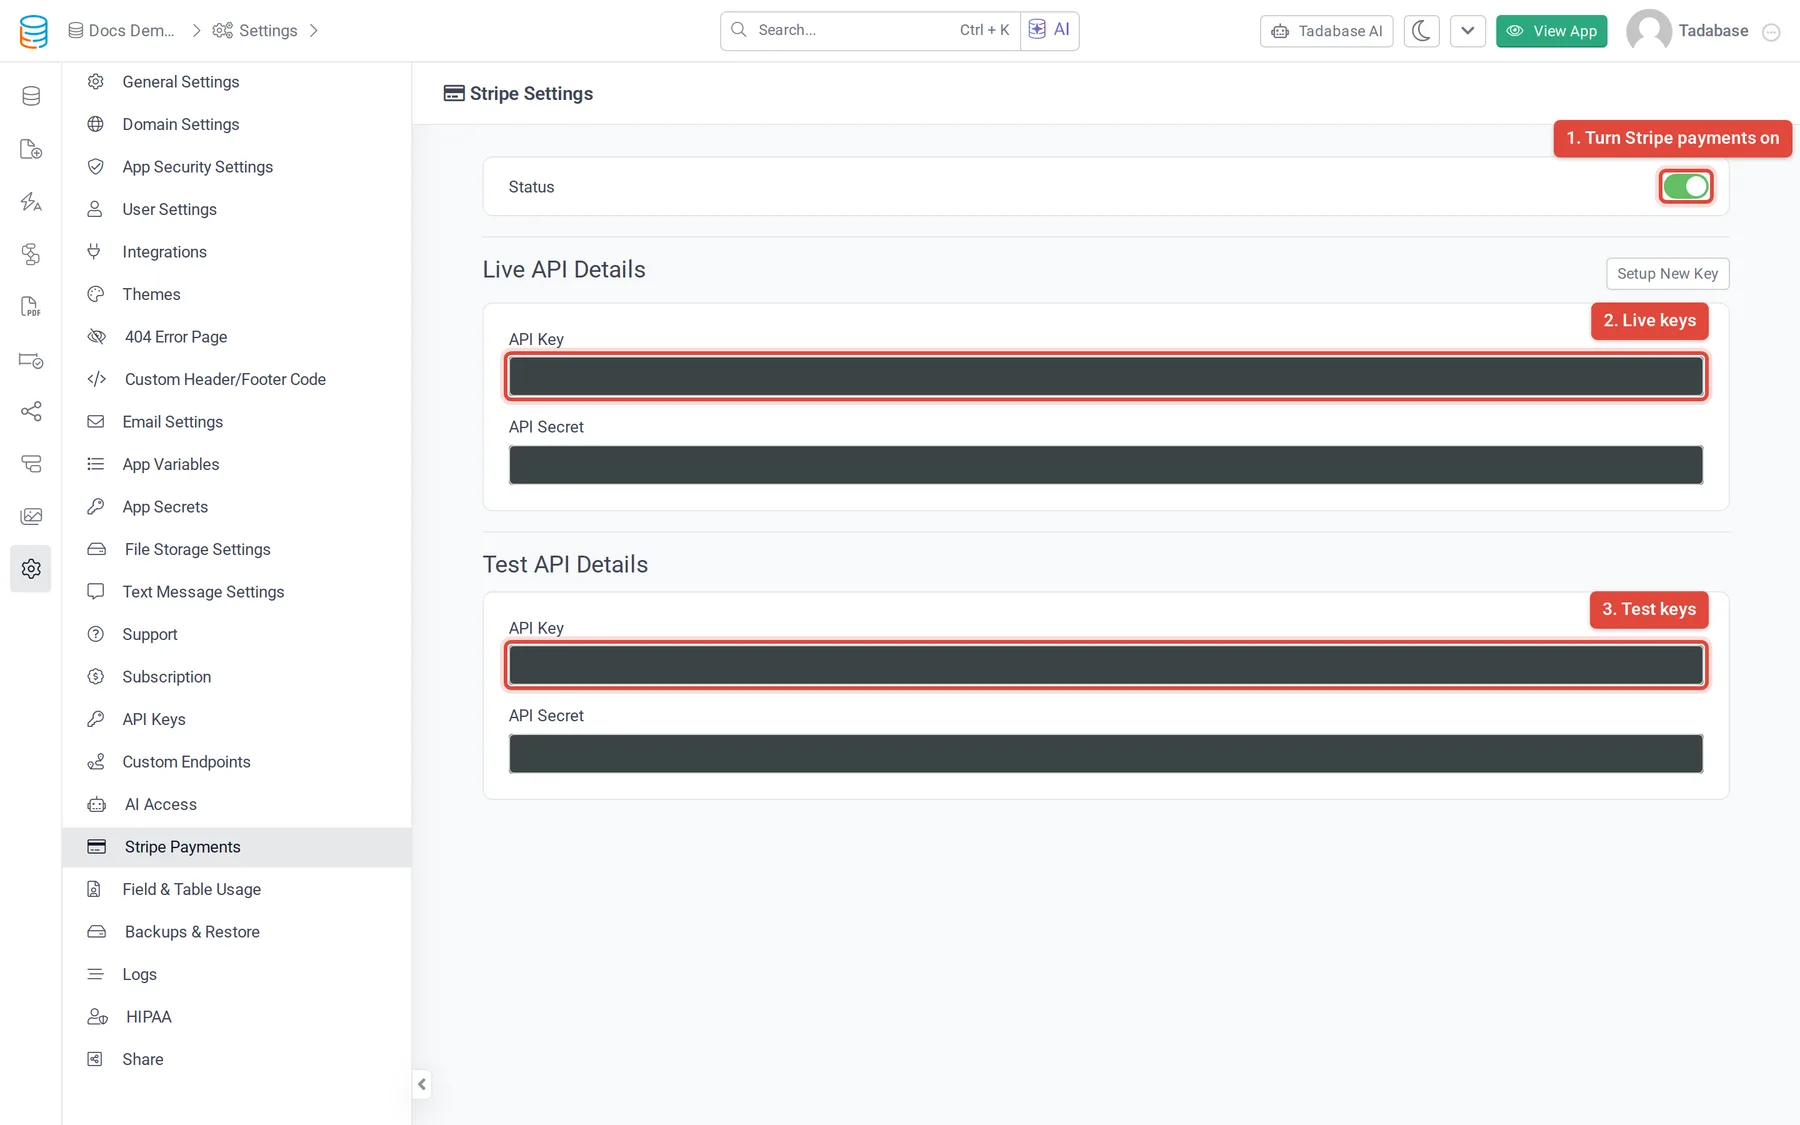
To take payments into more than one Stripe account, click Setup New Key and give the key set a name. Each set has its own live and test keys, on its own tab next to Default. A form's Stripe element then chooses which set to use.
Add the Stripe element to a form #
- Edit the form Open the page with your form and edit the Form component.
- Add Stripe Payments On the Inputs tab, click Stripe Payments in the list of fields. It is added to the form with the title "Enter your card details". A form can have only one Stripe element, so the option disappears once it is added.
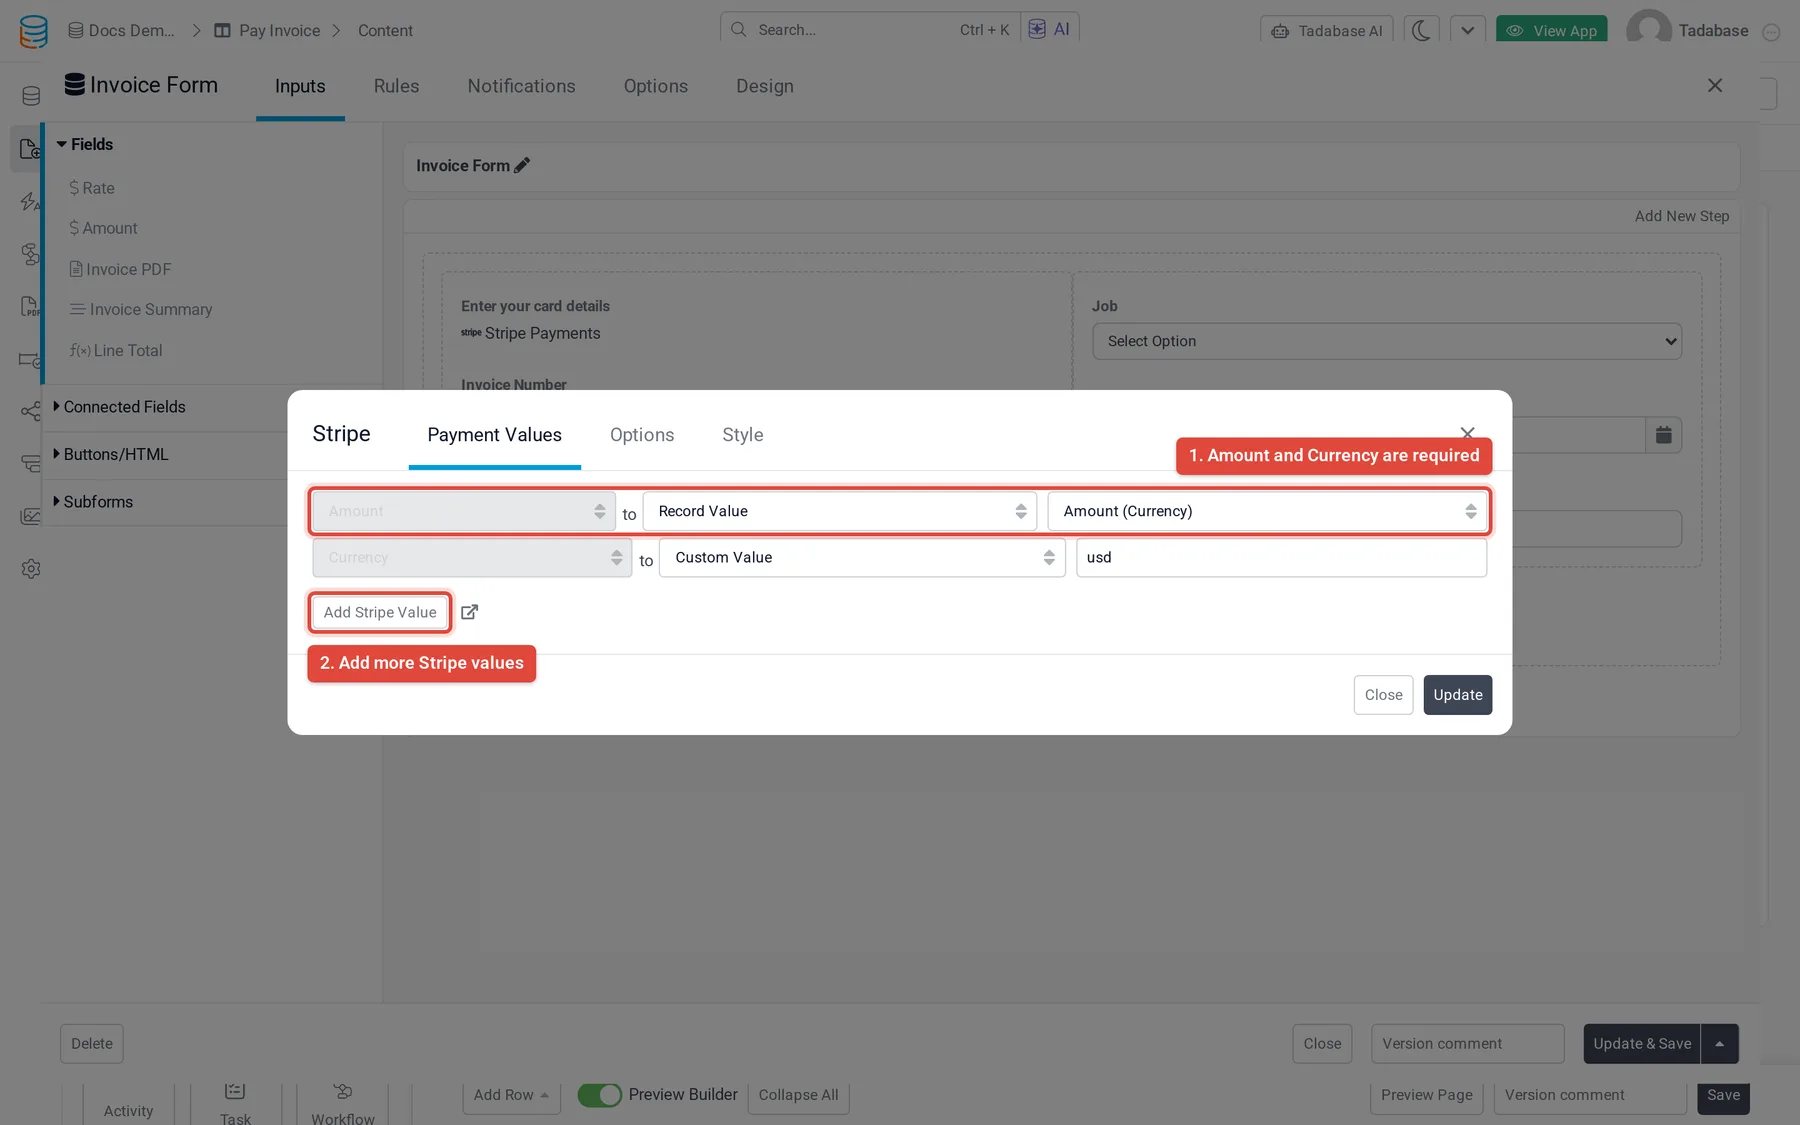
- Open its settings Click the Stripe element in the form layout. Its settings open with three tabs: Payment Values, Options and Style.
Set the payment values #
Payment Values decide what is sent to Stripe with the charge. Amount and Currency are always listed and must have a value; the payment is refused with "Amount or Currency is blank." if either is empty.
| Value | What to enter |
|---|---|
| Amount | The amount in the currency's main unit, for example 25.50 for $25.50. Tadabase converts it to cents before sending it to Stripe. |
| Currency | A three-letter currency code that Stripe accepts, for example usd or eur. |
| Description | Optional. Text that appears with the payment in your Stripe dashboard. |
| Custom | Any other parameter of Stripe's create-a-charge API, typed exactly as Stripe names it. For example, receipt_email set to the logged-in user's email asks Stripe to email a receipt. |
Click Add Stripe Value to add a value. For each one, choose where its value comes from:
- Custom Value: a fixed value you type, such as
usd. - Form Value: what the user entered in a field of this form. Only fields placed in the form are listed, and formula and auto-increment fields are left out.
- Record Value: shown when the form edits an existing record. It reads a value already saved on the record, including equation fields.
- Logged In User's Field: a field from the logged-in user's record.
- Browser Local Storage or Browser Session Storage: a value stored in the user's browser under the key you type, when the page offers these options.
Options and style #
| Option | What it does |
|---|---|
| Title | The label shown above the card field. |
| Stripe Keys | Which key set to charge with: Default or one you added with Setup New Key. Shown only when you have added extra key sets. |
| Test Mode | When on, the charge uses your Test API Details keys, so you can use Stripe's test card numbers. Turn it off to charge real cards with your live keys. |
| Show Postal Code | Asks for the card's postal code. On by default. |
| Show Icon | Shows a card icon in the field, in the Icon Style you pick. On by default. |
| Locale | The language of the card field. Auto Detect follows the user's browser. |
The Style tab sets CSS class names Stripe adds to the card field in each state (Base Class, Complete Class, Focus Class, Empty Class, Invalid Class and Webkit Auto Fill Class), so you can style it from your app's custom CSS.
Test before you go live #
- Turn on Test Mode In the Stripe element's Options, turn on Test Mode and click Update, then save the form.
- Submit the form Open the page in your live app and submit the form with one of Stripe's test card numbers.
- Check Stripe In your Stripe dashboard, switch to test mode and find the payment with the amount, currency and description you set.
- Go live Turn Test Mode off and save. From now on, real cards are charged with your live keys.
Take payments with a Stripe card reader #
Instead of a typed card, the Stripe element can collect the payment from a Stripe Terminal card reader.
- Turn on the reader In the Stripe element's Options, set Enable Stripe Reader to Yes.
- Enter the location In Stripe Reader Id, enter the ID of the Stripe Terminal location your reader is registered to (it starts with
tml_). When the form loads, it connects to the first reader it finds at that location.
Was this page helpful?
Something wrong or missing on this page? Tell us.