
Plan and create your data tables
Decide which tables your app needs, add a table in the Data Builder, and set its record name, display field and default sort.
- Verified Nov 17, 2026
- Classic builder
On this page
A data table holds one kind of thing in your app, such as customers or jobs. Each table has fields (the details you store) and records (one entry each). Plan your tables first, then add them in the Data Builder.
Plan your tables #
Make one table for each kind of thing you track. If you think of a spreadsheet, a table is one sheet, a field is a column and a record is a row.
For a field service business, that could be:
| Table | One record is | Example fields |
|---|---|---|
| Customers | a customer | Name, Email, Phone, Address |
| Jobs | a job | Job title, Status, Scheduled date, Customer |
| Technicians | a technician | Name, Skills, Phone |
| Invoices | an invoice | Amount, Due date, Job |
- Name tables in the plural (Customers, not Customer). Tadabase fills in the singular name for you.
- Do not repeat the same details in two tables. Store the customer's email once in Customers, and connect each job to its customer with a connection field.
- Add the tables that others belong to first. Jobs belong to customers, so create Customers before Jobs; then the Jobs connection field has a table to point to.
- Every app has a Users table for the people who log in. Add their details there instead of making a separate people table for them. The Users table cannot be deleted.
Add a table #
- Open the Data Builder In the builder, open Data Builder. Your tables are listed on the left.
- Click Add Data Table Click Add Data Table above the table list, then choose Create Data Table.
- Name the table Type a name in Table Name. As you type, Tadabase may suggest a matching table; pick a suggestion to add its recommended fields.
- Add fields (optional) Click Add Field to list fields now, each with a name and a type. You can also add fields later on the table's Fields tab. If you add none, Tadabase adds a text field named after the record, such as Customer Name.
- Create it Click Create Table. The table appears in the list on the left.
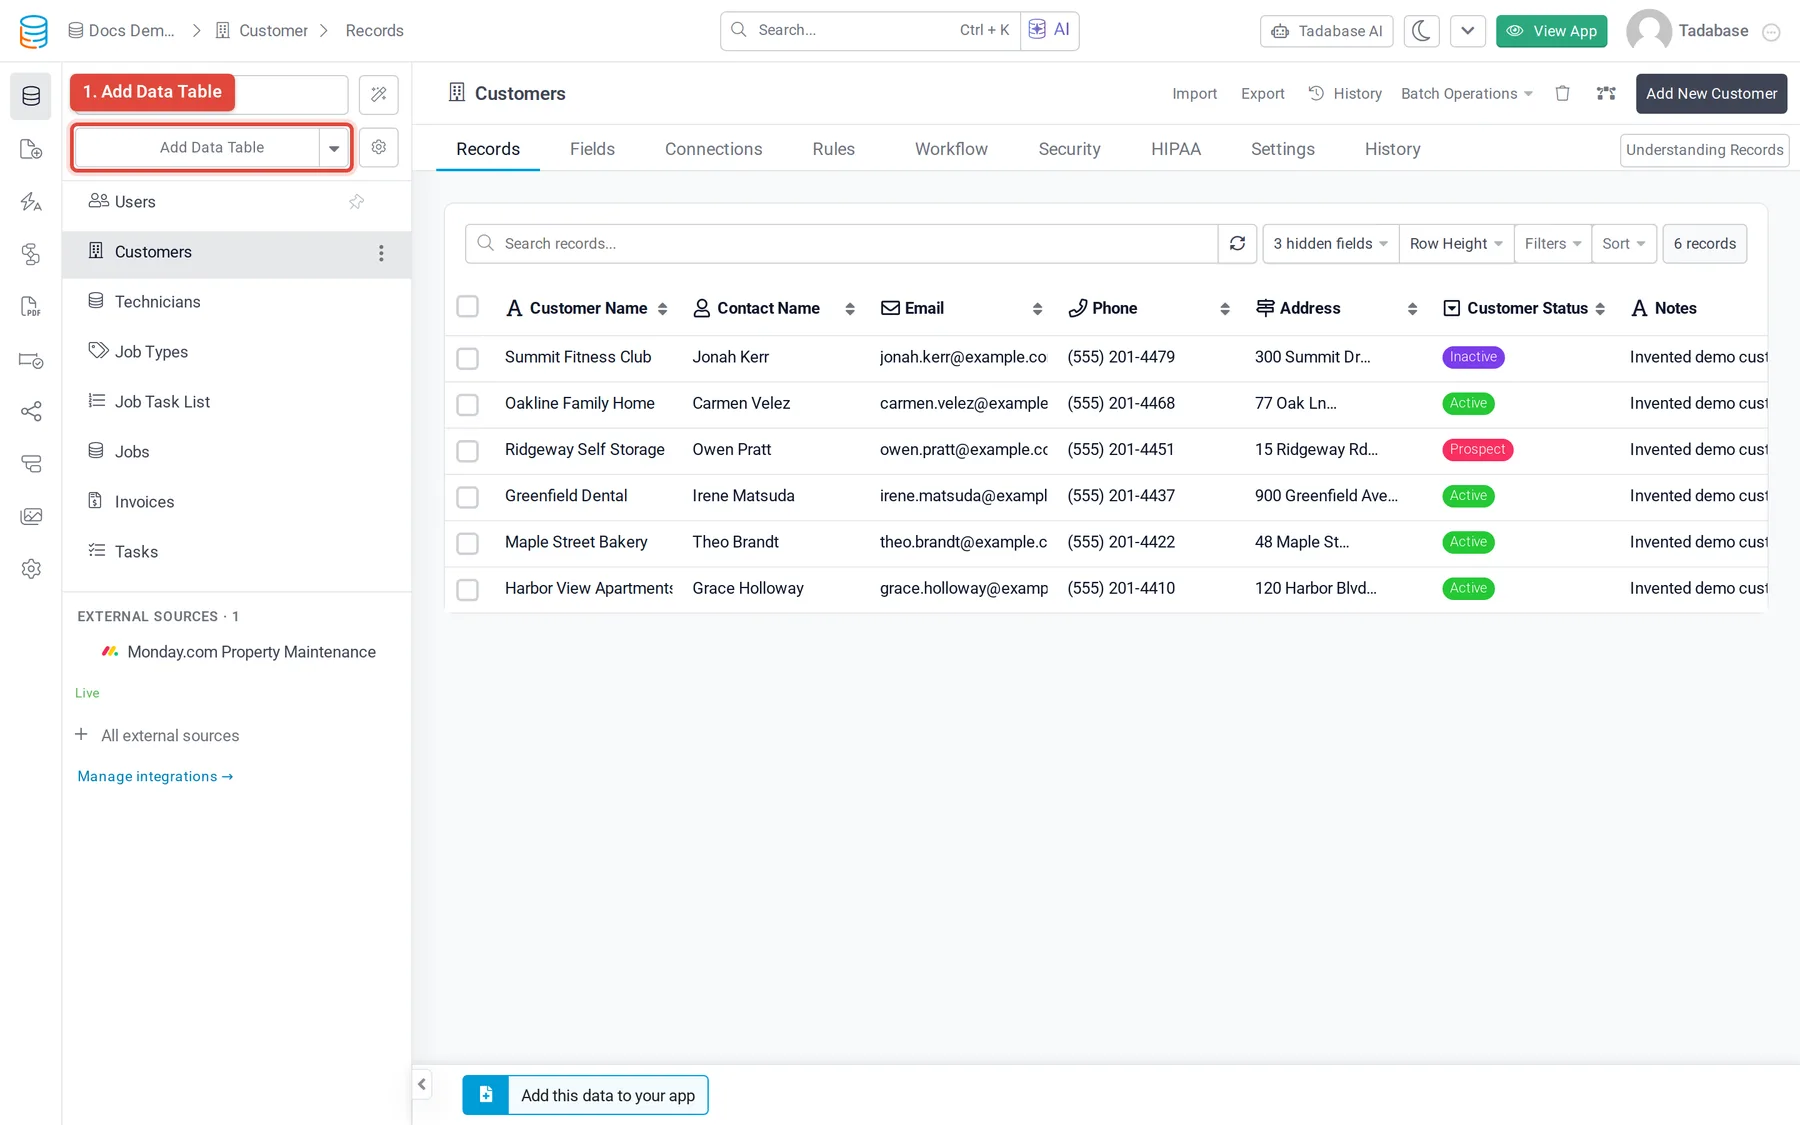
The arrow on the right of Add Data Table opens more ways to start a table:
| Option | What it does |
|---|---|
| Add table from scratch | Opens the same New Data Table window as above. |
| Add table from CSV | Creates the table and its fields from a CSV file, then imports its rows as records. |
| Add table from Import | Names a new table and opens the import wizard. Shown only when your plan includes the newer importer. |
| Connect external data | Links a table to data stored outside Tadabase. Shown only on plans that include external sources. |
Add Data Table Blueprints (in the window that opens when you click Add Data Table) inserts a ready-made set of tables and fields for a common business need.
Rename a table and set its defaults #
Open the table and click its Settings tab.
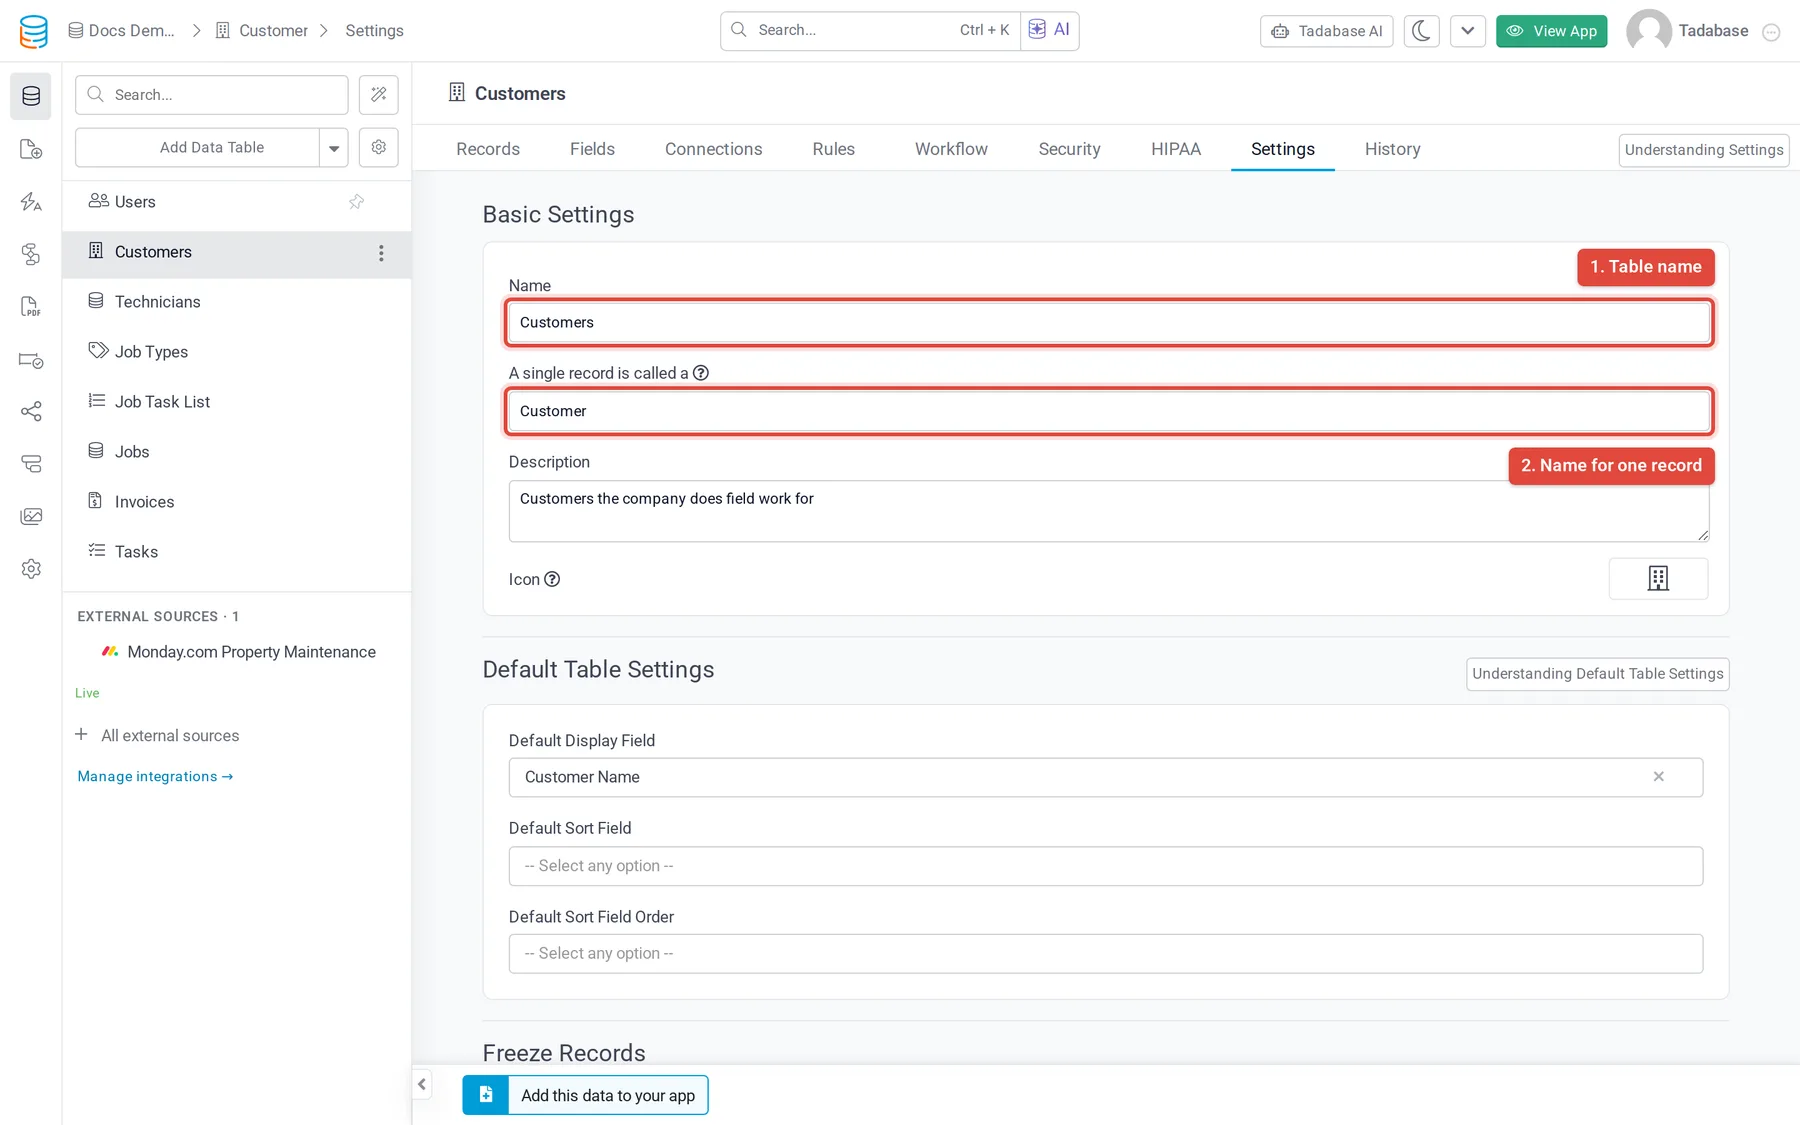
| Setting | What it does |
|---|---|
| Name | The table's name in the builder. |
| A single record is called a | The name for one record, such as Customer. The builder uses it on buttons like Add New Customer and to describe connections. |
| Description | A note for builders. It is not shown in your app. |
| Icon and Table Color | How the table looks in the table list. |
| Default Display Field | The field that names a record. A new connection field that points to this table starts with this field as its display field. |
| Default Sort Field and Default Sort Field Order | The field records are sorted by, and whether the order is ASC (A to Z, low to high) or DESC. |
When you change something, an Unsaved Changes bar appears at the bottom. Click Save to keep the change or Discard to drop it.
Some plans show more sections here, such as Record Tracking for record logs and SEO Settings for search-friendly record URLs.
Delete or restore a table #
- Open the table settings Open the table and click its Settings tab.
- Click Delete Click Delete at the bottom of the page.
- Check what uses it Tadabase lists everything that uses the table, such as connection fields on other tables, pages and workflows. Items under Blocks delete must be fixed first.
- Confirm Type the confirmation word shown and click Delete table.
A deleted table moves to Deleted tables with its fields, its records and the connection fields that pointed to it. The message shown right after the delete has an Undo button. Later, open Settings > Field & Table Usage > Deleted tables and click Restore. The delete dialog tells you how many days a table can still be restored. Delete forever removes it for good.
Next steps #
Was this page helpful?
Something wrong or missing on this page? Tell us.