
Let people sign in to your app
Set up the Users table, create roles, add users, require login on pages and show each signed-in user only their own records.
- Verified Nov 17, 2026
- Classic builder
On this page
Every Tadabase app has a Users table: anyone who signs in to your app is a record in it. Give each user a role, then use roles to decide which pages they can open and which records they see. This page walks through the whole setup once; the linked pages cover each part in depth.
The Users table #
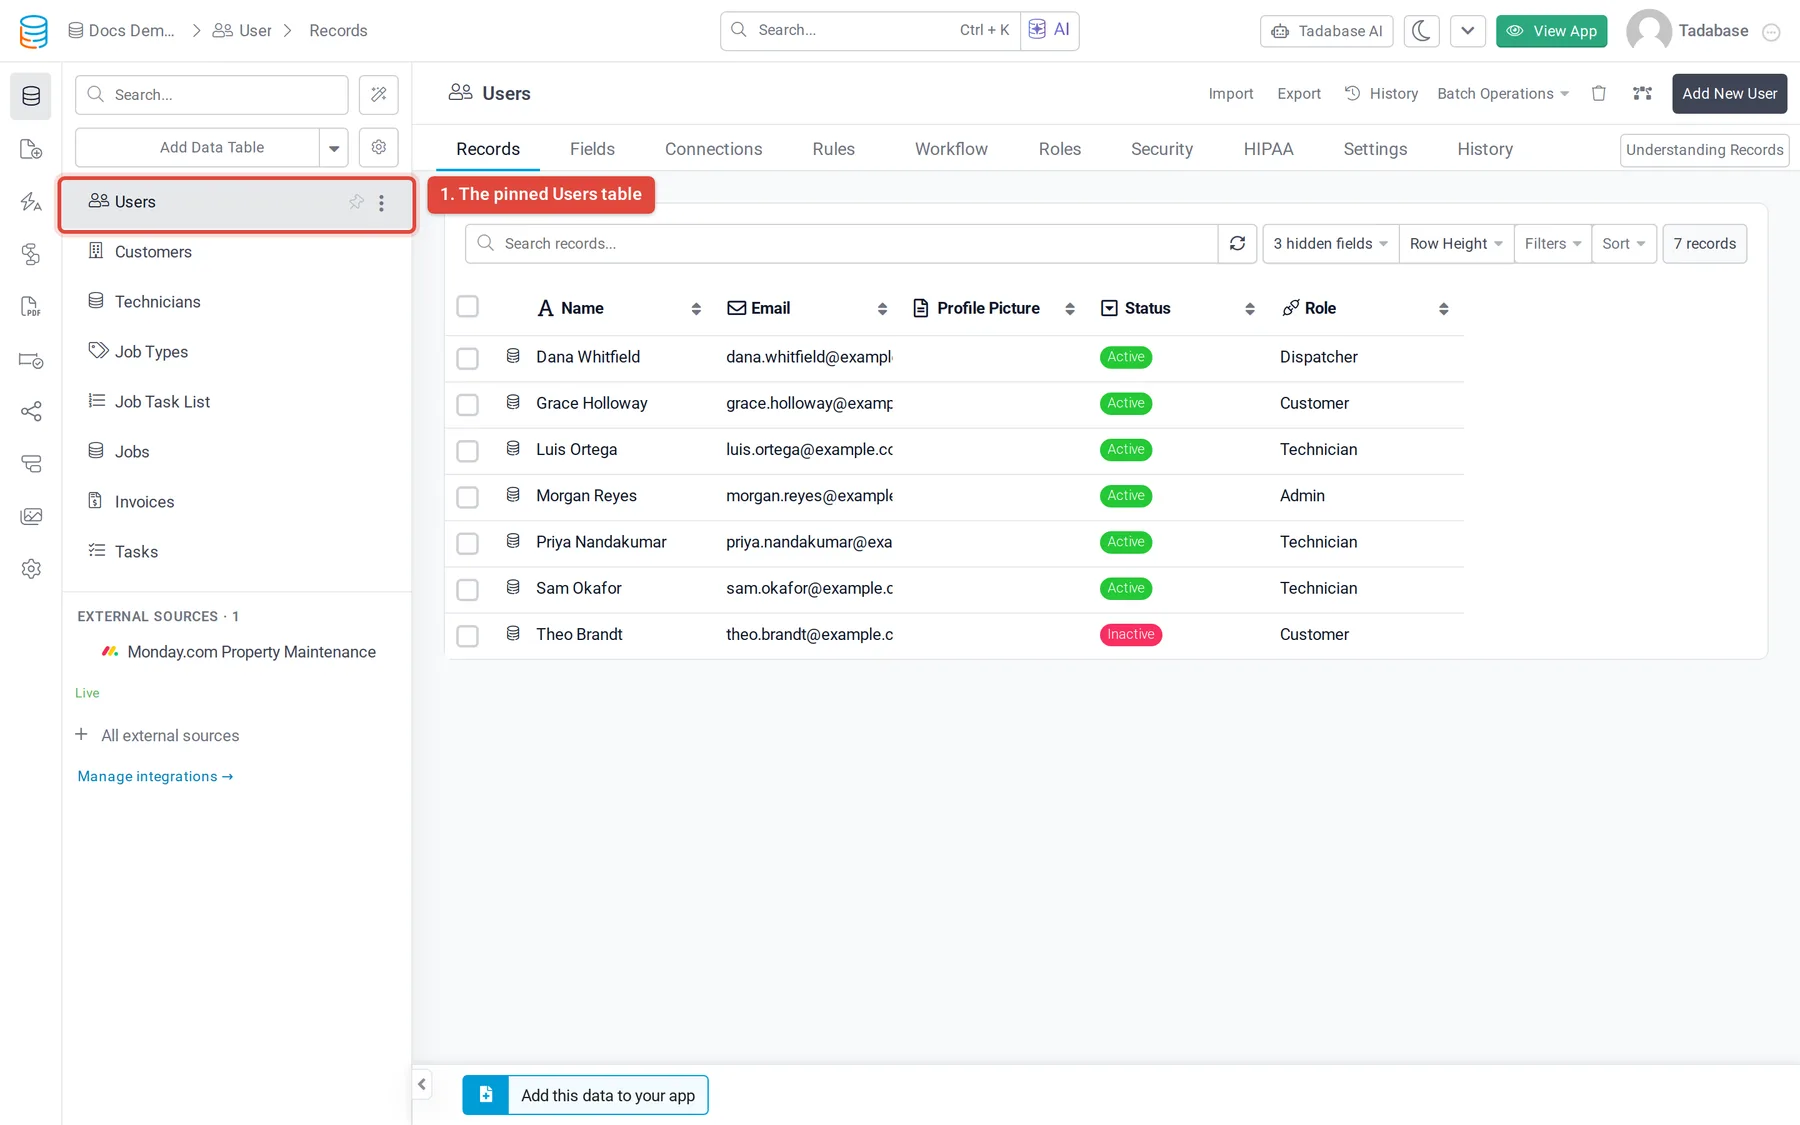
In the Data Builder, the Users table is marked with a pin icon in the table list (its tooltip reads "This is a default table to add the users that will log into your app."). You can add your own fields to it, and it always keeps these built-in fields:
| Field | What it holds |
|---|---|
| Name | The user's full name. |
| The address the user signs in with. It must be unique. | |
| Password | The user's password. |
| Status | Active, Inactive or Not Verified. New users default to Active, and only active users can sign in. |
| Role | The user's role, chosen from the roles you create on the Roles tab. |
Create roles #
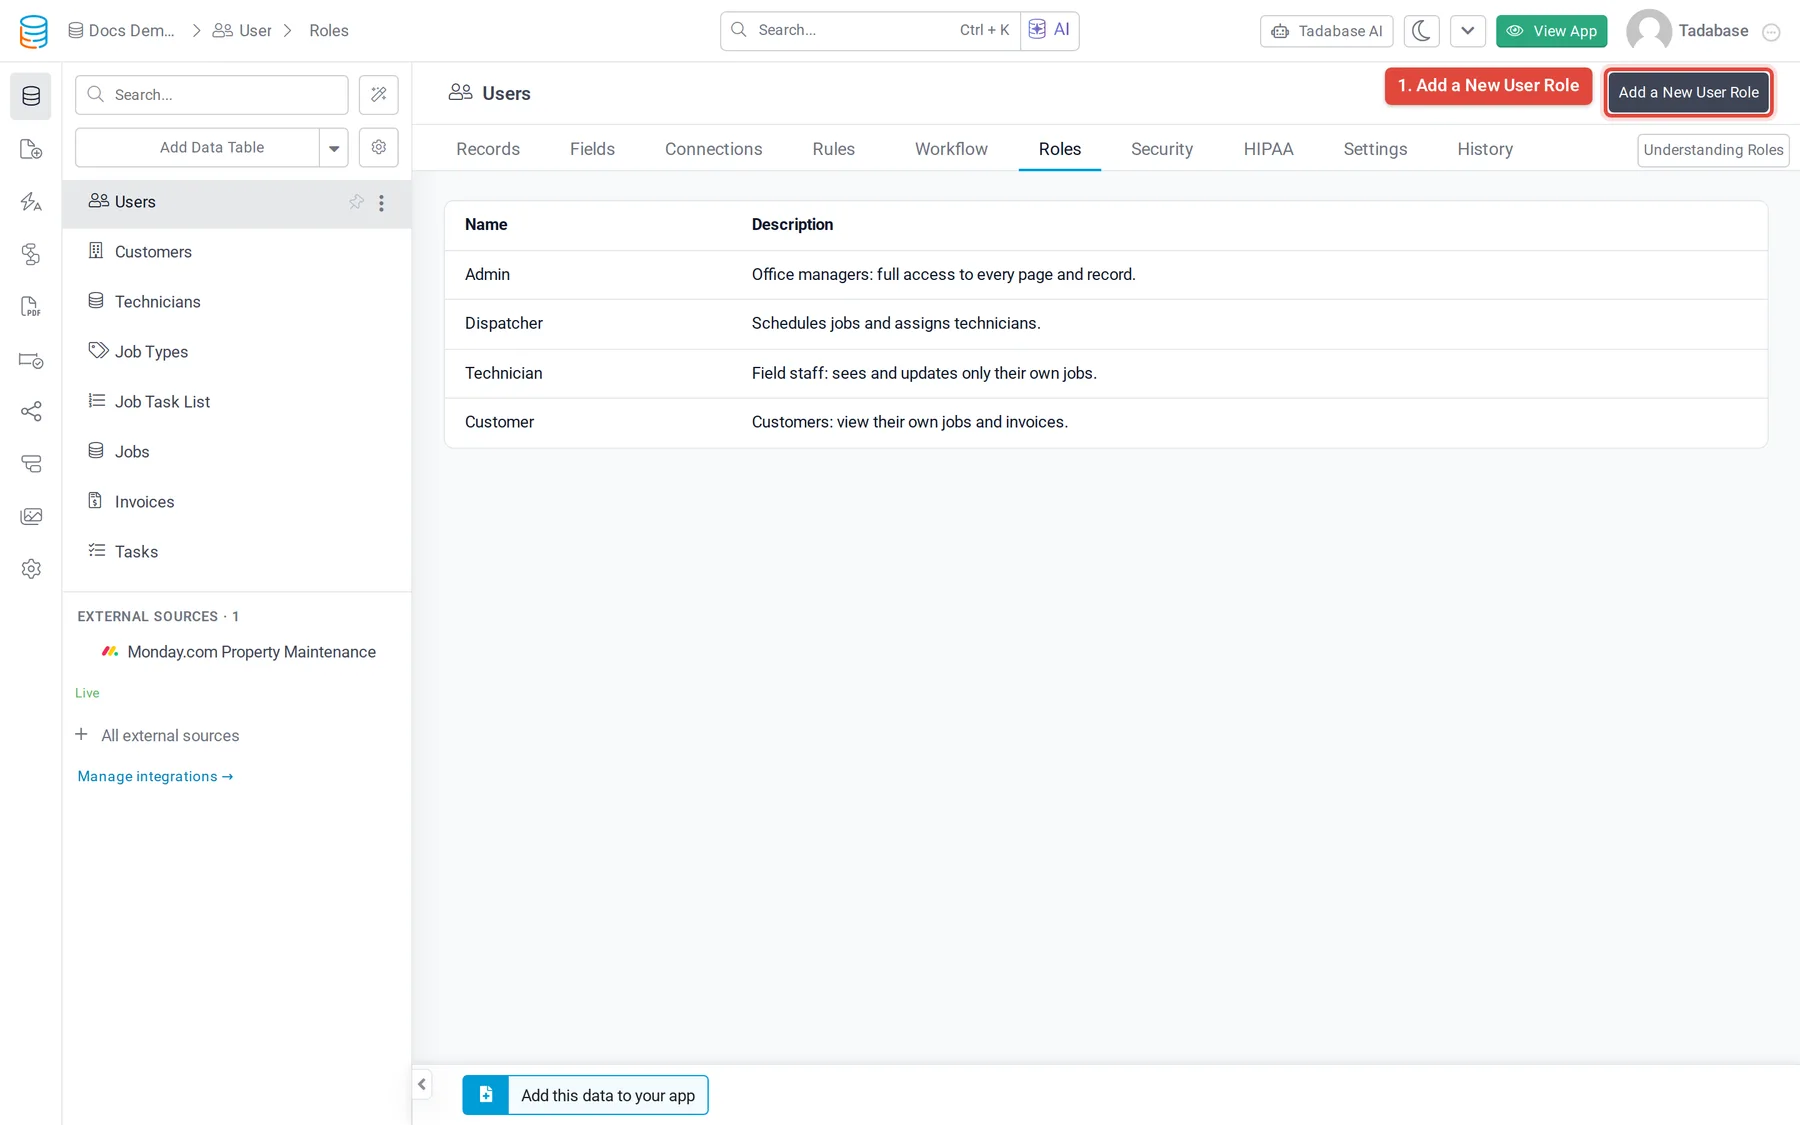
A role groups users who need the same access. A field service company, for example, might use four roles: Admin (runs the app), Dispatcher (schedules jobs), Technician (works the jobs assigned to them) and Customer (sees their own jobs and invoices).
- Open the Roles tab In the Data Builder, open the Users table and click the Roles tab. This tab only appears on the Users table.
- Add a role Click Add a New User Role.
- Name it Enter a Name and, if you like, a Description.
- Save Click Save. The role is now available in every user's Role field and in page and table security settings.
Add users #
Add users the same way you add records to any table: open the Users table, click the Add New button on the Records tab, fill in Name, Email and Password, and pick a Role. People can also create their own account on the app's signup page.
See Users for more on managing users.
The login, signup and profile pages #
Every app comes with a login page, a signup page and a profile page. In the Page Builder they are listed under Default Pages, each marked with a pin icon. Open one to change its design and text like any other page.
Choose how people sign in (email and password, magic links or single sign-on) in Email and password logins and Single sign-on (SSO). On Business plans you can also require a second sign-in step with an emailed code.
Require login on a page #
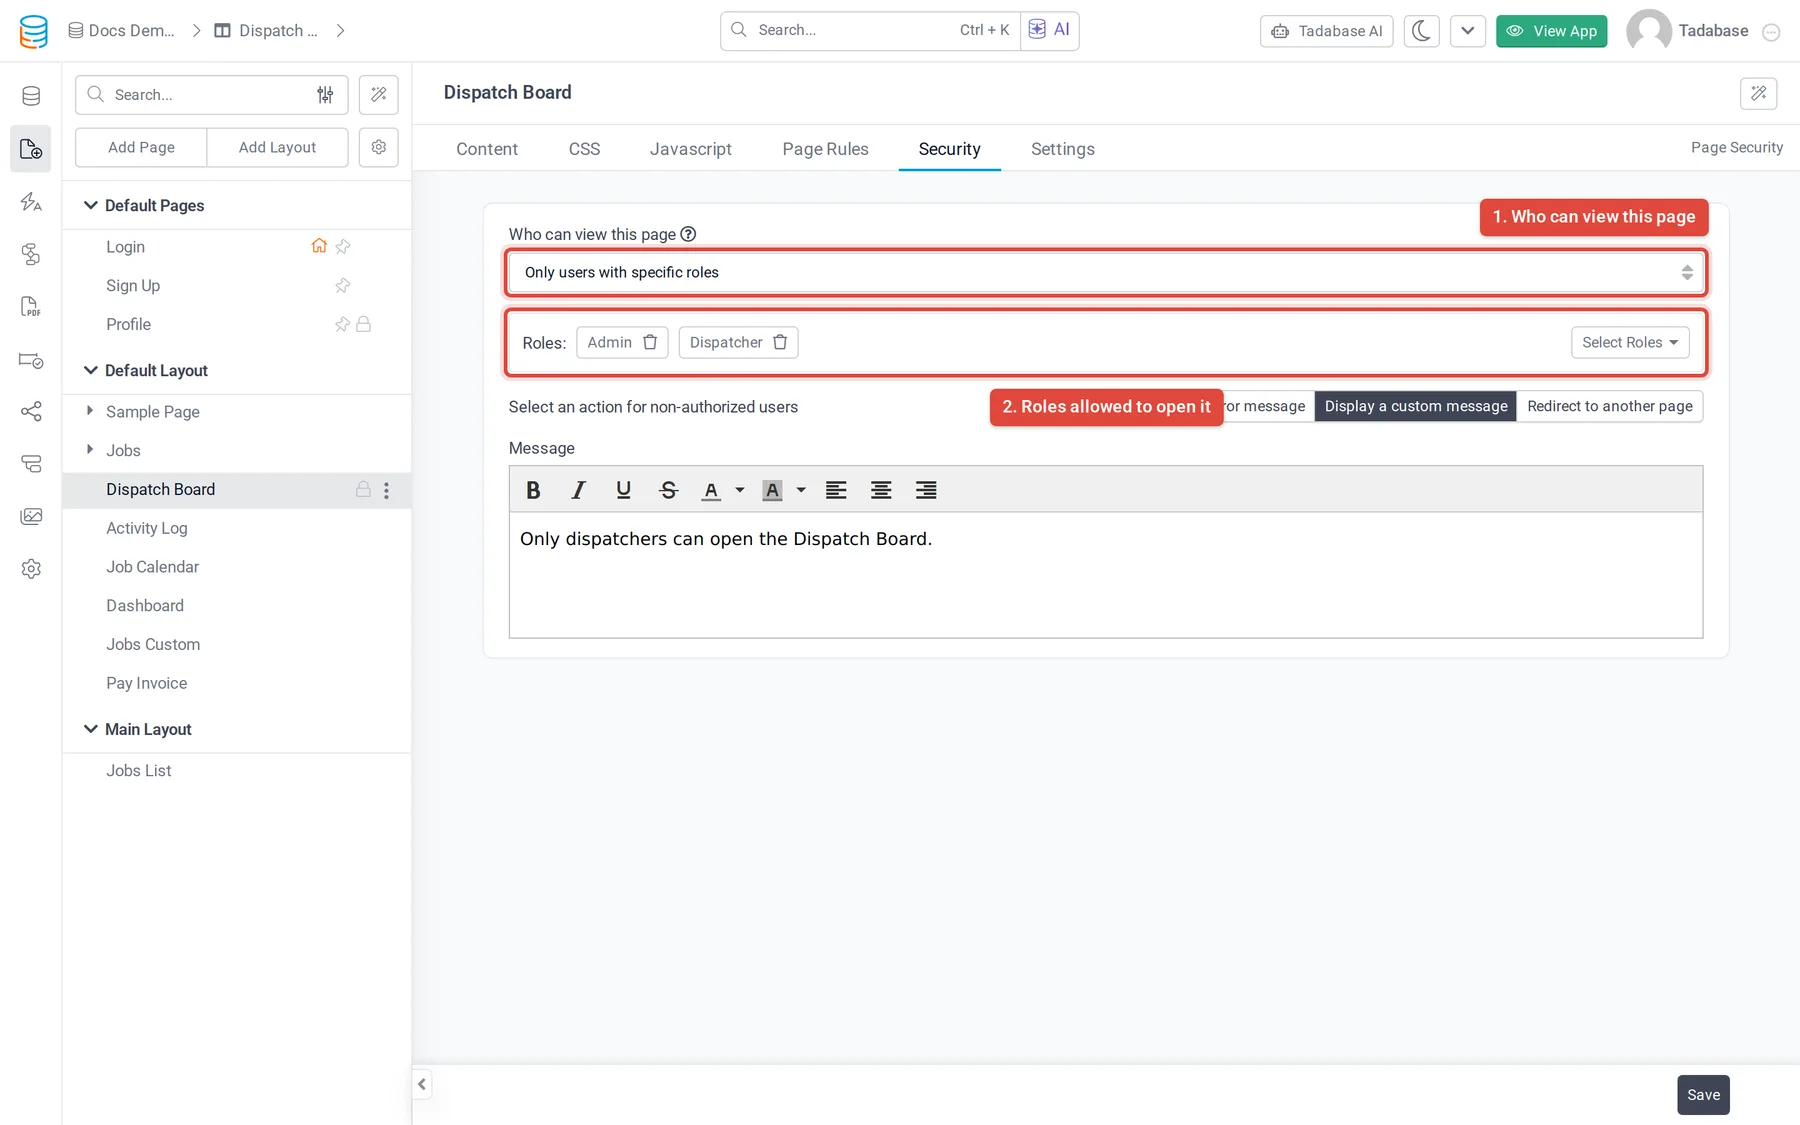
- Open the page's security settings In the Page Builder, open the page and click the Security tab.
- Choose who can view it Under Who can view this page, choose Any logged in user, or Only users with specific roles and then pick the roles with Select Roles. If you pick no roles, the page is open to All User Roles.
- Choose what others see Under Select an action for non-authorized users, choose Display default error message, Display a custom message or Redirect to another page.
- Save Click Save. A lock icon appears next to the page name in the page list.
A top-level page set to Inherit from Layout uses the security of its layout, and a child page set to Inherit from parent uses its parent page's setting. To protect every page in a layout at once, open the layout's Security tab and choose Any logged in user or Only users with specific roles there.
Show each user only their own records #
Requiring login controls who can open a page, not which records they see on it. To show a signed-in user only their records, the table needs a connection field to the Users table (for example, a Jobs table with a field for the assigned technician).
When you add a data component, pick the table under Records connected to the logged in user. The component then shows only records whose connection field points to the person viewing the page. Filtering data explains this and the other logged-in-user filters.
Learn more #
- Users: the Users table and user settings in detail.
- Roles: more on creating and using roles.
- Email and password logins: login options, password rules and signup.
- Single sign-on (SSO): sign in with Google, Azure, Okta and other providers.
- Limit which records each user can see: row-level security policies.
Was this page helpful?
Something wrong or missing on this page? Tell us.