
Add fields to a table
Add a field to a table, pick its type, reorder, edit and delete fields, restore a deleted field, and see where a field is used.
- Verified Nov 17, 2026
- Classic builder
On this page
Fields are the details you store about each record, such as a customer's name or a job's date. Each field has a type, and the type decides how values are entered, shown, filtered and calculated.
Add a field #
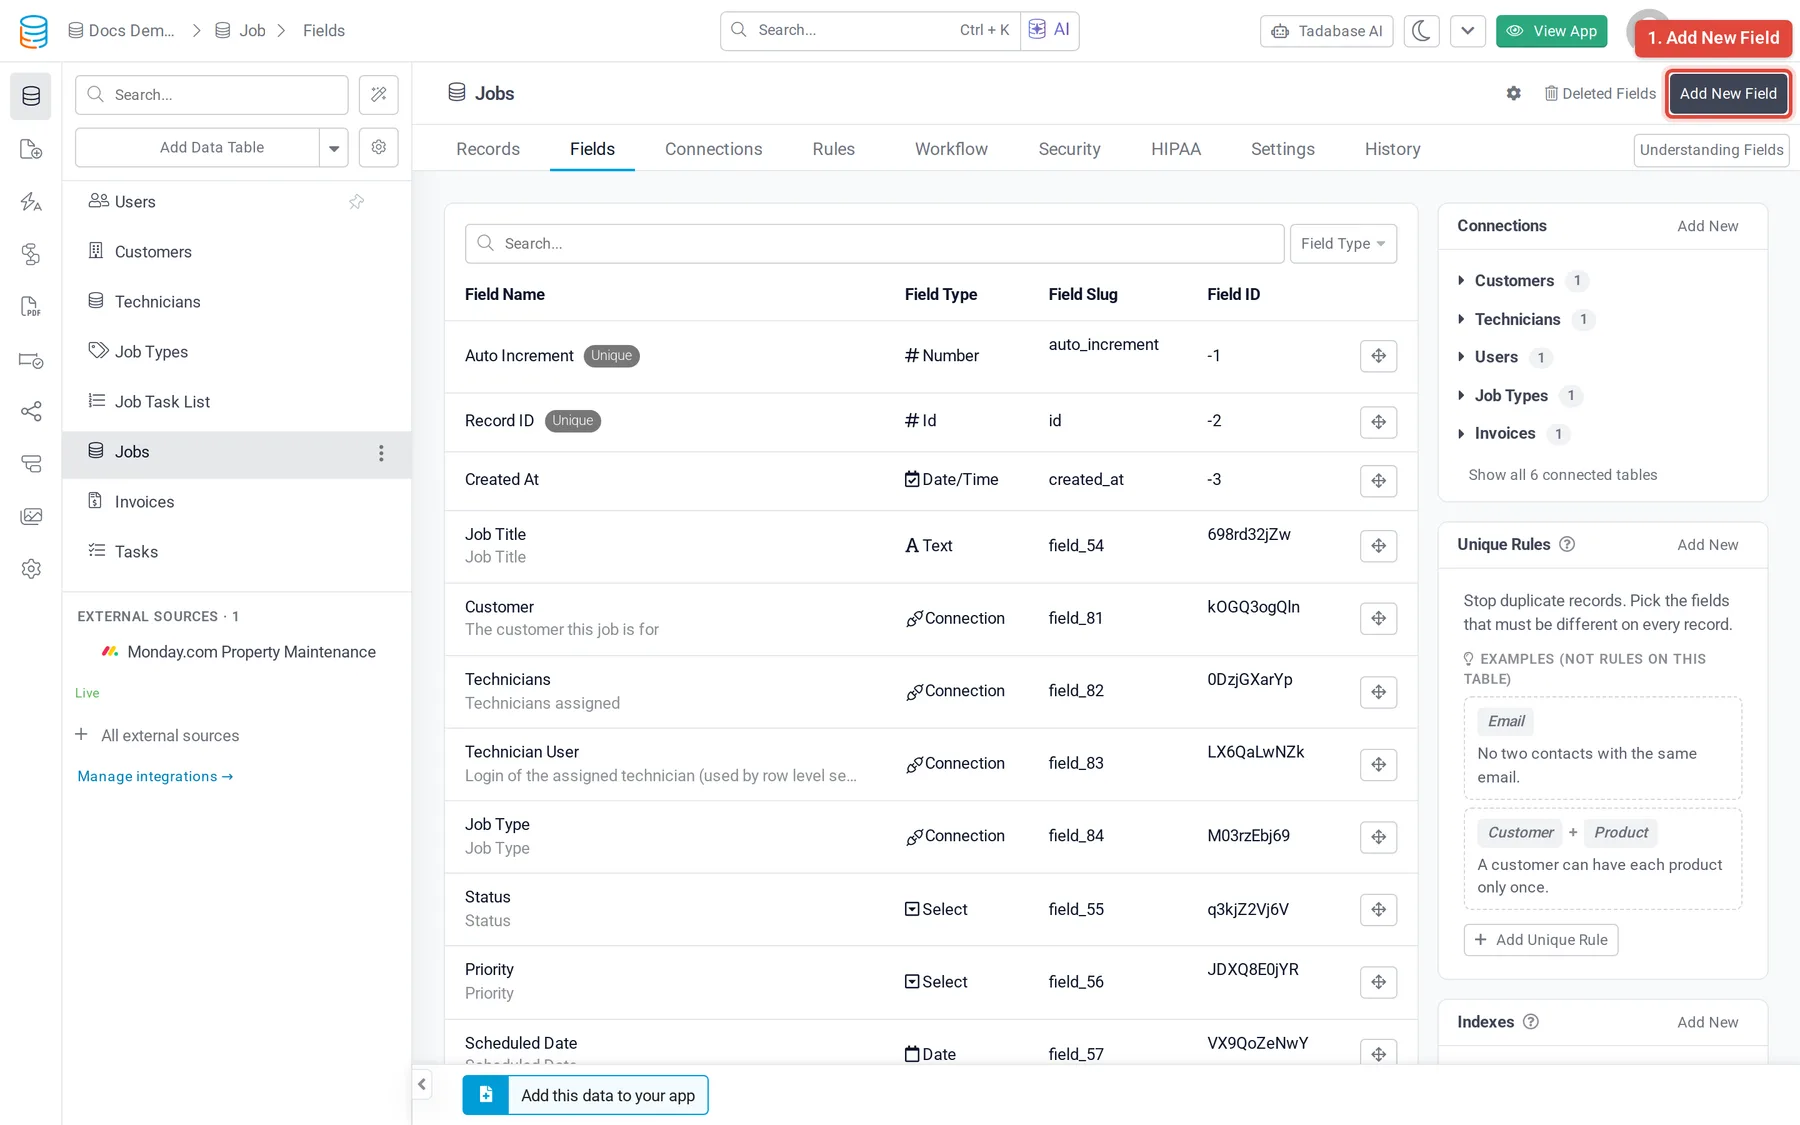
- Open the Fields tab In the Data Builder, open the table and click its Fields tab.
- Click Add New Field Click Add New Field at the top right.
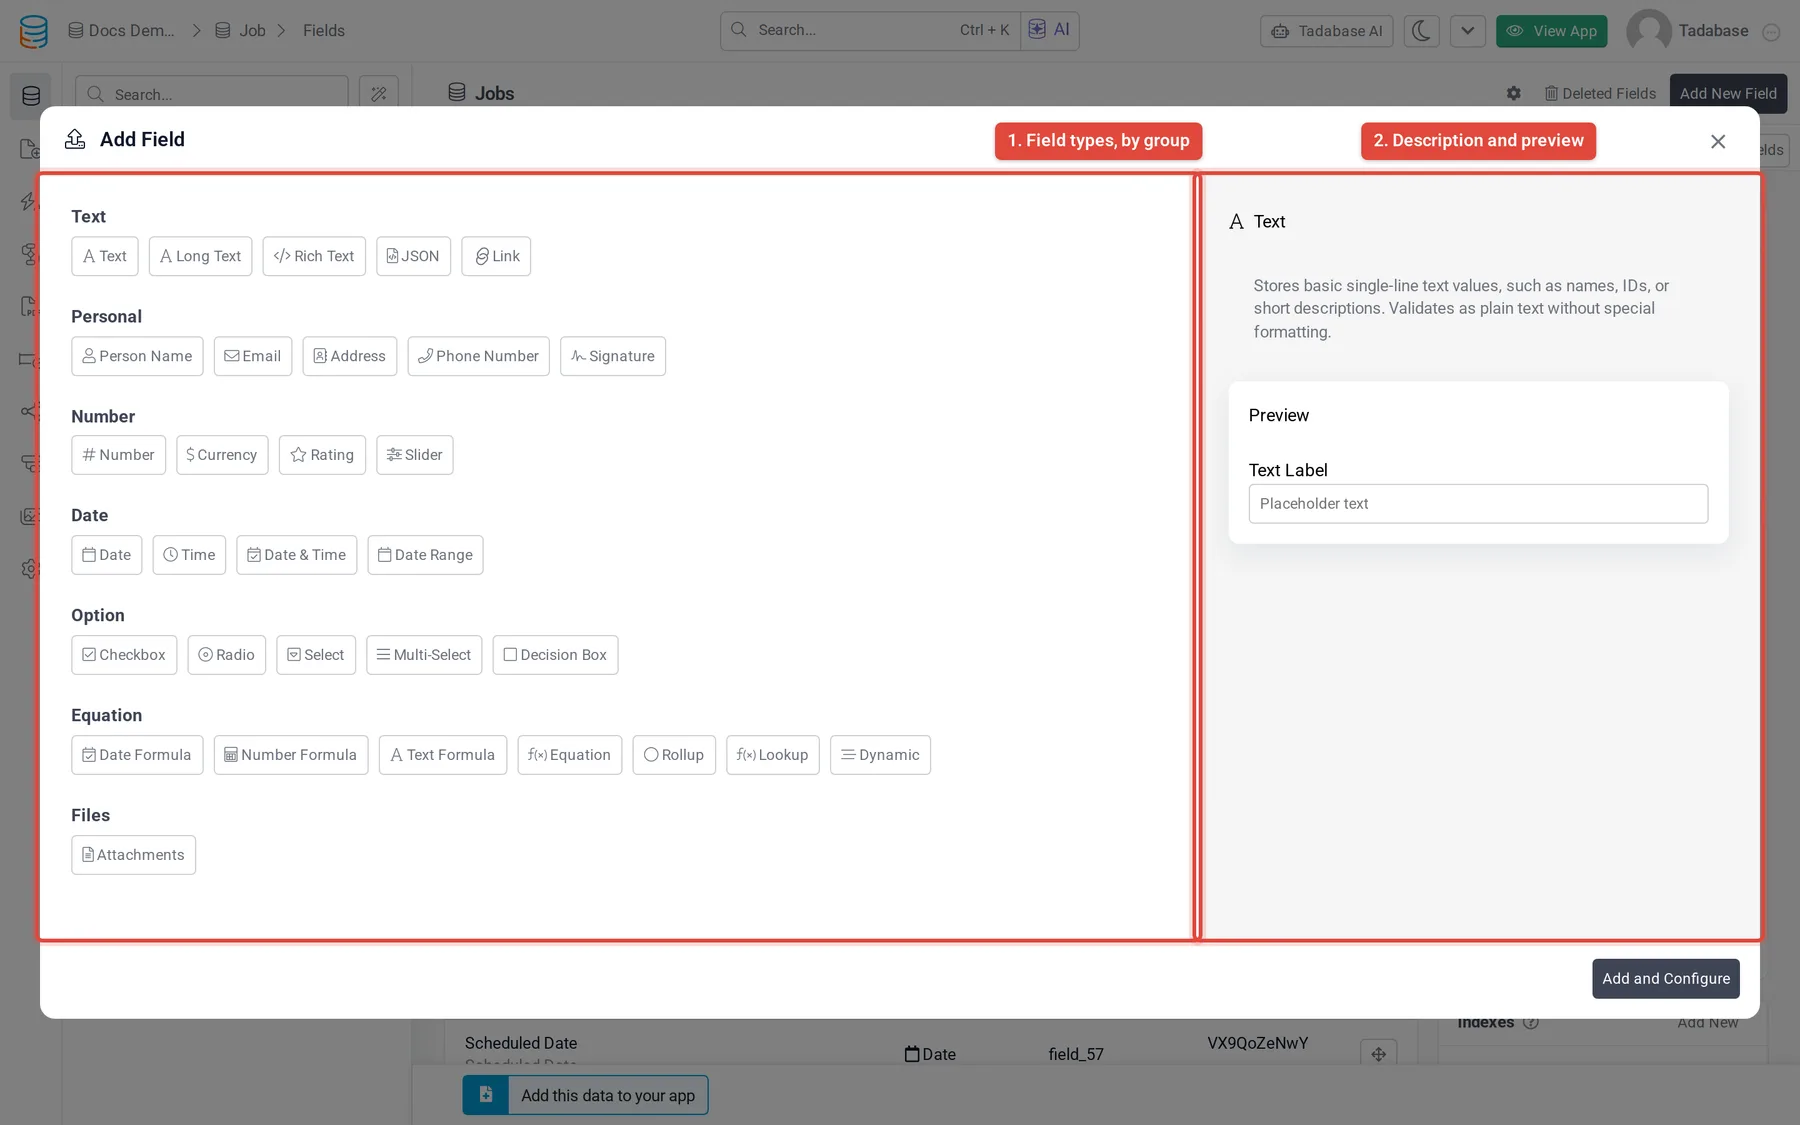
- Pick a type Click a field type. The right side describes it and shows a preview.
- Configure it Click Add and Configure. Give the field a Name and set its options.
- Save Click Save.
Choose a field type #
Pick the type that matches the data. A date stored in a Date field can be filtered by date and shown on a calendar; the same date typed into a Text field cannot. The Add Field window groups the types like this:
| Group | Field types | More |
|---|---|---|
| Text | Text, Long Text, Rich Text, JSON, Link | Text fields |
| Personal | Person Name, Email, Address, Phone Number, Signature | Personal fields |
| Number | Number, Currency, Rating, Slider | Number fields |
| Date | Date, Time, Date & Time, Date Range | Date fields |
| Option | Checkbox, Radio, Select, Multi-Select, Decision Box | Option fields |
| Equation | Date Formula, Number Formula, Text Formula, Equation, Rollup, Dynamic | Equation fields |
| Files | Attachments | Attachments |
Dynamic appears only on plans that include it. Equation-type fields calculate their value, so you do not type into them.
To link records in two tables, use a connection field. It is added from the Connections panel instead of this window: see Connect tables with connection fields.
Unique and required values #
- Must be Unique: Text, Number, Phone and Email fields have this switch. When it is on, two records cannot hold the same value.
- Required: whether a value must be filled in is set on each form, not on the field. In the form component, edit the field and turn on Required. See Form component.
Edit and reorder fields #
- To edit a field, click it on the Fields tab, change its settings and click Save. On the Records tab you can also double-click a column header.
- To change a field's type, open the field and use the type menu at the top right. It lists only the types this field can change to; when there are none, the type is shown without a menu.
- To reorder fields, drag the arrows handle on the right of a field on the Fields tab.
See where a field is used #
Before you change or delete a field, check what uses it:
- On the Fields tab, click the gear at the top and turn on Show Used In to add a Used in column.
- Open Settings > Field & Table Usage for the whole app. Its views include Unused (safe to delete), Broken references (deleted fields that something still names) and At risk if deleted.
Delete and restore a field #
- Open the field On the Fields tab, click the field.
- Delete it Click Delete at the bottom and confirm.
A deleted field moves to Deleted Fields. To bring it back with its values, click Deleted Fields at the top of the Fields tab and click Restore next to it. The Restorable for column shows how long you have; after that the field is removed for good.
Default fields that Tadabase adds to a table have no Delete button.
Next steps #
- Connect tables with connection fields
- Add records
- Every field type in detail: Fields overview
Was this page helpful?
Something wrong or missing on this page? Tell us.