
Manage Freshdesk tickets with the Freshdesk pipe
Install the Freshdesk pipe with your helpdesk name and API key, then create and update tickets, contacts and agents from your app.
- Verified Nov 17, 2026
- Classic builder
On this page
The Freshdesk pipe calls version 2 of the Freshdesk API for your helpdesk. Use it to open tickets from your app, keep contacts in step with your records, and manage agents.
What you need from Freshdesk #
- Your helpdesk name: the part before
.freshdesk.comin your helpdesk address. Foracme.freshdesk.comit isacme. - Your API key: in Freshdesk, click your profile picture, open Profile settings, and copy the API key shown there. Calls made with it act as you, with your Freshdesk permissions.
Install the pipe #
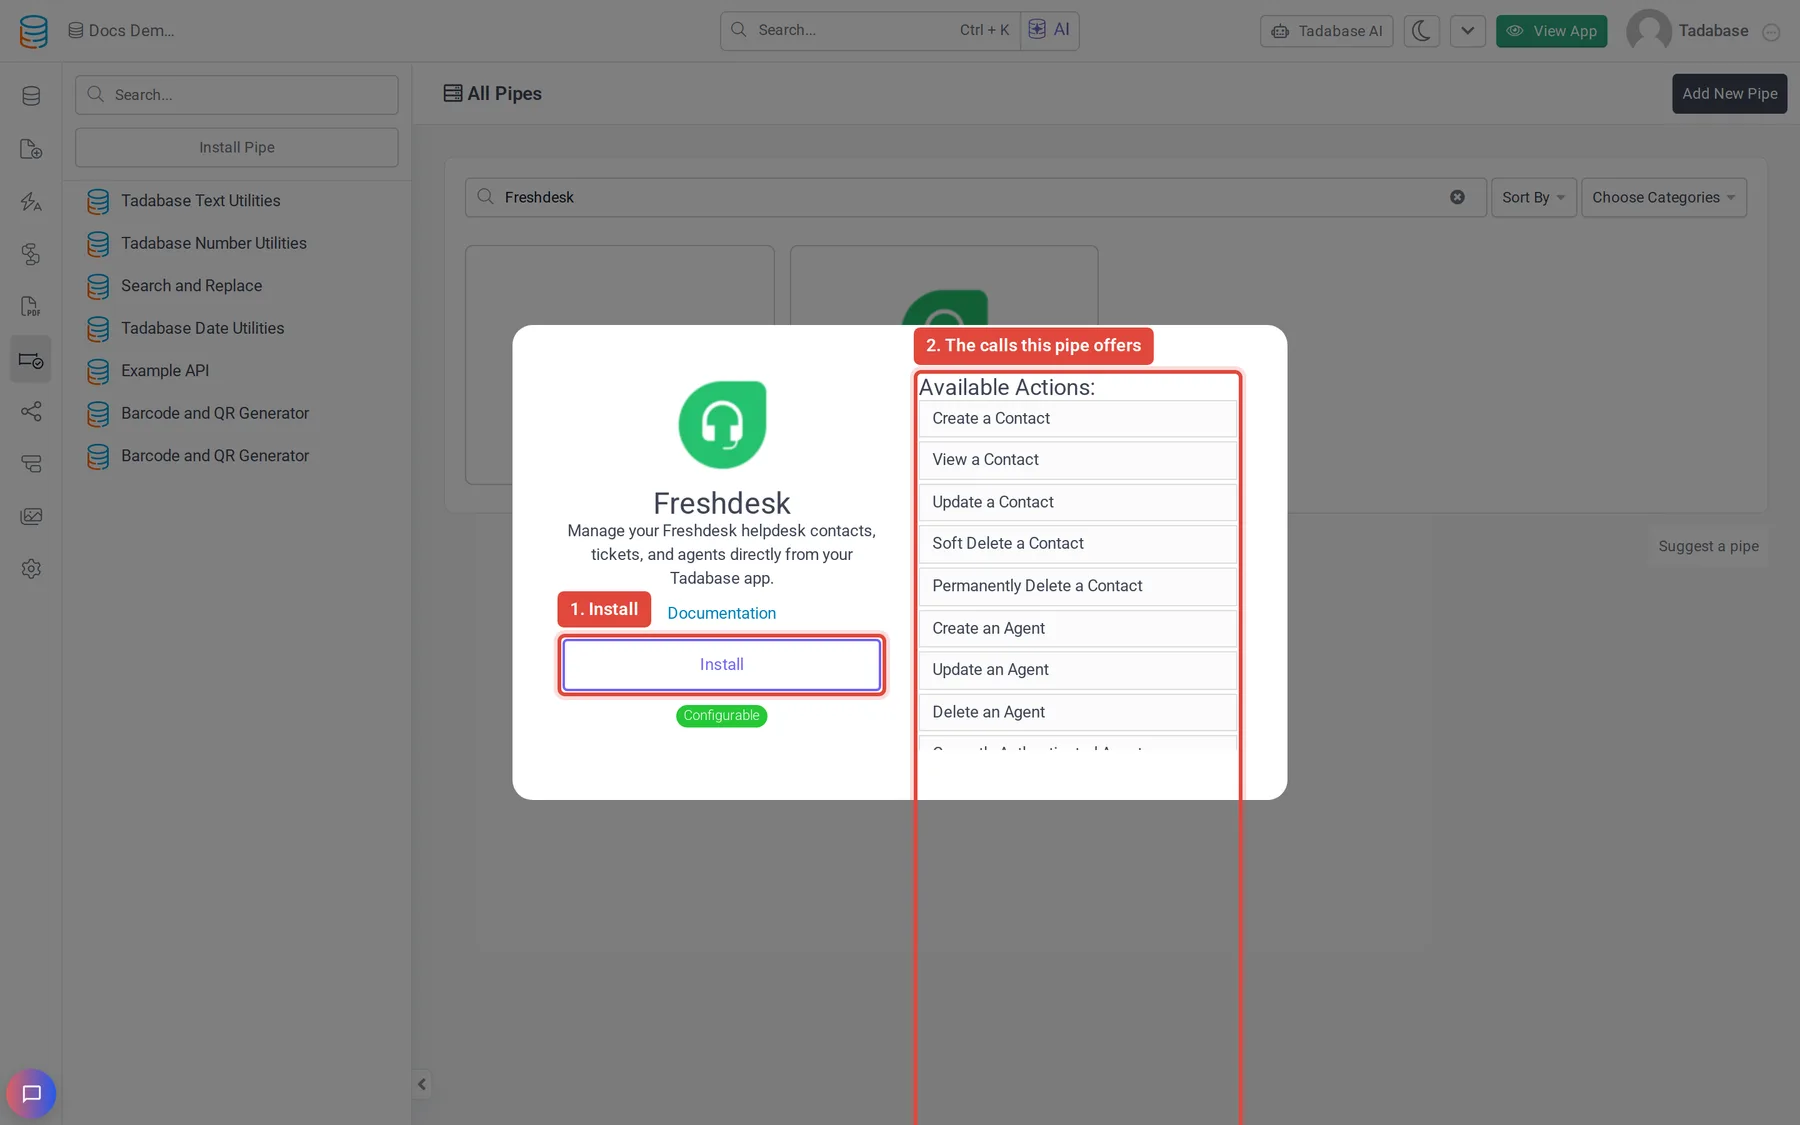
- Open Pipes In the builder, click the Pipes icon in the left menu. The All Pipes page lists every pipe you can install.
- Find the pipe Type
Freshdeskin the Search... box and click the Freshdesk card. The window shows what the pipe does and its Available Actions: the calls it offers. - Click Install Click Install. If your plan does not include pipes, an upgrade button shows instead.
- Enter your details Enter your key in Freshdesk API Key and your helpdesk name in Freshdesk Domain Name. Both are required. Click Install.
To change them later, open the installed pipe, click Global Parameters, change the value and click Save.
Calls in the pipe #
| Resource | Call | Parameters |
|---|---|---|
| Tickets | Create a Ticket | Description, Subject, Email (required); Priority, Status |
| Tickets | Create an Outbound Email | Description, Subject, Email, Email Config ID; Priority, Status |
| Tickets | View a Ticket | Ticket ID |
| Tickets | Update a Ticket | Ticket ID, Priority, Status |
| Tickets | Delete a Ticket | Ticket ID |
| Tickets | Restore a Ticket | Ticket ID |
| Tickets | Forward a Ticket | Ticket ID, Body, To Emails |
| Tickets | Add watcher | Ticket ID, Agent ID |
| Tickets | Remove watcher | Ticket ID |
| Tickets | View Email Config ID | None (lists your email configurations, for Create an Outbound Email) |
| Contacts | Create a Contact | Name, Email, Phone |
| Contacts | View a Contact | Contact ID |
| Contacts | Update a Contact | Contact ID, Name, Email, Phone |
| Contacts | Soft Delete a Contact | Contact ID |
| Contacts | Permanently Delete a Contact | Contact ID |
| Agents | Create an Agent | Email, Name, Ticket Scope |
| Agents | Update an Agent | Agent ID, Email, Name, Ticket Scope |
| Agents | Delete an Agent | Agent ID |
| Agents | Currently Authenticated Agent | None (returns the agent whose API key the pipe uses) |
Priority and Status are numbers:
| Parameter | Values | Default |
|---|---|---|
| Priority | 1 = Low, 2 = Medium, 3 = High, 4 = Urgent | 1 |
| Status | 2 = Open, 3 = Pending, 4 = Resolved, 5 = Closed | 2 |
Use it in a workflow #
You can run any call of an installed pipe from a workflow with the Trigger Pipe action, and use what it returns in later steps. Pipes can also run in other parts of your app, as described in Using pipes.
Example: open a Freshdesk ticket when someone submits a support request in your app, and keep the ticket number.
- Add a Ticket ID field In your Support Requests table, add a text field named Freshdesk Ticket ID.
- Start a workflow Create a workflow that runs when a support request record is created.
- Add a Trigger Pipe step Add the Trigger Pipe action and choose the Freshdesk pipe's Create a Ticket call in Pipe Method. Set Subject, Description and Email from the record, and Priority to a number from the table above.
- Save the ticket number Add an Update Record step and set Freshdesk Ticket ID to the pipe's Ticket ID response.
More from Freshdesk #
For every field these calls accept and return, see the Freshdesk API reference.
Was this page helpful?
Something wrong or missing on this page? Tell us.