
Run a pipe from a form, field, component or workflow
Choose where an installed pipe runs: a workflow's Trigger Pipe action, a form button, validation rules, data component columns or an HTML component.
- Verified Nov 17, 2026
- Classic builder
On this page
An installed pipe runs only where you add it. Wherever you add it, you do the same three things: pick the pipe and one of its calls, fill the call's parameters, and choose what happens with the response values the call maps.
Pick the right place #
| You want to | Use |
|---|---|
| Call an API when a record is created or changed, on a schedule, or from a button, and save or act on the result | A workflow's Trigger Pipe action |
| Fill form fields from an API while the user fills in the form | A Trigger Pipe field in the form |
| Stop a form from submitting based on what an API returns | A pipe in the form's Validation Rules |
| Show values from an API next to each record in a table, list or details component | The component's Pipes data source settings |
| Show values from an API inside text you write | The Pipes tab of an HTML component |
In a workflow: the Trigger Pipe action #
- Add the action In a workflow, add an action and choose Trigger Pipe (it is with the utility actions).
- Choose the call In Pipe Method, pick the pipe and the call to run. If the call has no parameters, you see "This method requires no parameters."
- Map the parameters Under Parameters, pick each parameter and say where its value comes from, for example a field of the record that started the workflow, a value from an earlier step, a logged-in user field or a value you type. Required parameters are marked with
*. - Use the response The values the call maps on its Response tab are available to later steps, for example to write them into a field with a data action or to test them in a condition.
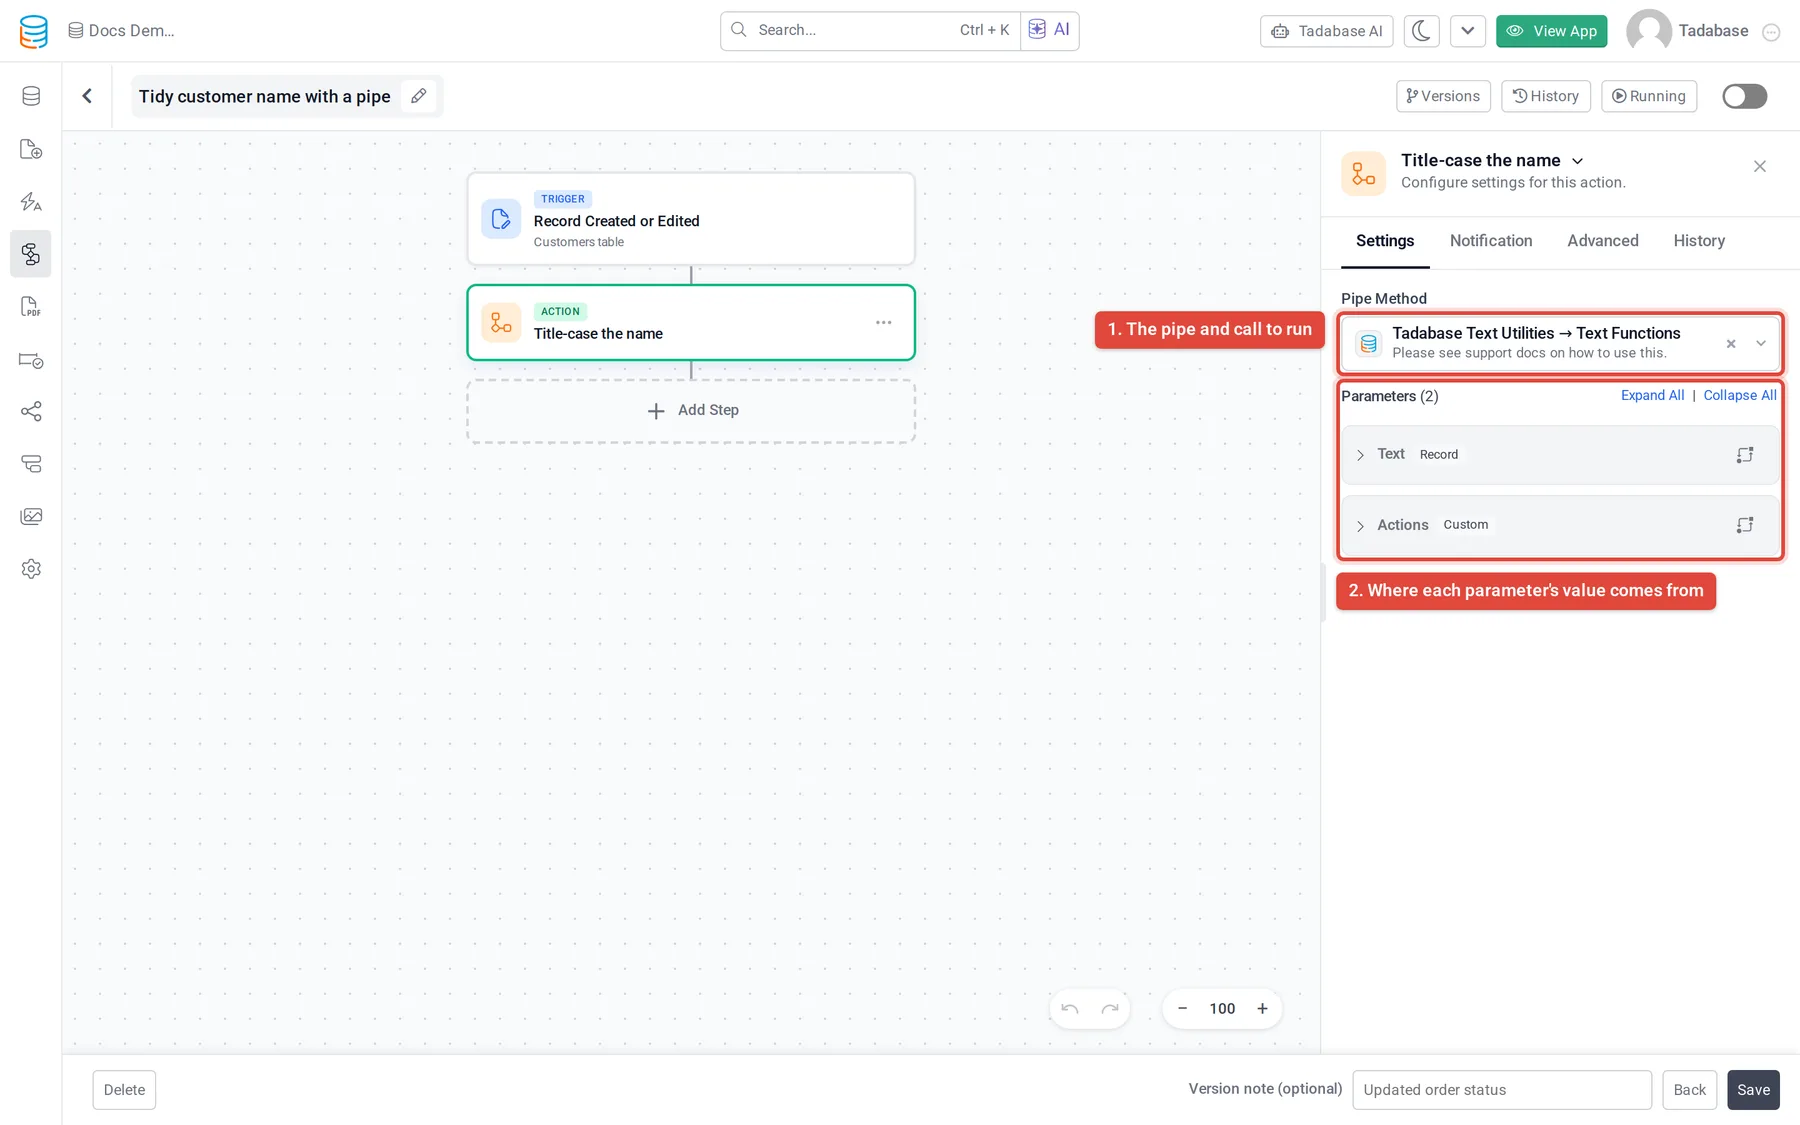
See Run a pipe from a workflow for the full steps, and Utility actions for the other utility actions.
In a form: the Trigger Pipe field #
A Trigger Pipe field adds a button to a form. When the user clicks it, the pipe runs and its response fills other fields in the form, before the form is saved. For example, the user enters a VIN, clicks the button, and the make and model fields fill in.
- Add the field Edit the form component in the page builder and add Trigger Pipe from the list of fields. It is offered once your app has at least one pipe.
- Choose the pipe and call Open the field's settings and go to the Pipe Settings tab. Pick the pipe in Select a Pipe and the call in Select Method, then set its parameters under Set ... Parameters. A parameter can take a Record Value (a field in the form), a Custom Value and other value types.
- Choose which fields to fill Under Set, pick a form field on the left and a response value on the right. Add a row for each field to fill. To fill an element that is not a form field, choose (CSS Selector) and enter the selector.
- Label the button On the field's General tab, change Pipe Button Title if you want something clearer than the default Trigger Pipe.
In a form's validation rules #
A validation rule can call a pipe and compare its response before the form is submitted. For example, check that an address is inside your service area and show an error if it is not.
- Open the rules Edit the form component, open the Rules tab, then Validation Rules, and add a rule.
- Add the pipe In the rule, click Add New Pipe, choose the pipe and call, and set its parameters from the form's fields.
- Compare the response In the rule's conditions, the call's mapped values are listed under Pipe Response. Compare one with a value, and enter the Message to show when the rule fails.
In a table, list or details component #
A data component can run a pipe for the records it shows and display the response as extra fields. For example, show a live shipping status next to each order.
- Add the pipe to the data source Edit the component and open its data source settings. On Pipes, click Add New Pipe.
- Choose the call and parameters Pick the pipe and call, then set each parameter. Use Record Value to send a field of each record, for example the order's tracking number.
- Show the response When you add fields to the component, the call's mapped values are listed under Pipe Fields. Add them like any other field.
In an HTML component #
- Add the pipe Edit the HTML component and open its Pipes tab (shown once your app has a pipe). Click Add New Pipe, pick the pipe and call, and set its parameters, for example from the logged-in user.
- Insert the values Back on the General tab, a button named after the pipe, ... (Pipe) Fields, lists the call's mapped values. Click one to insert it into the text where your cursor is.
From your own JavaScript #
If your plan includes JavaScript in pipes, you can copy code that runs a call of a custom or Configurable pipe from your app's JavaScript. See Run a call from your own JavaScript.
Check that it worked #
- For a workflow, open the workflow's logs and look at the Trigger Pipe step: it shows the pipe, the call, the outcome and the values returned.
- For a page, turn on Enable Debug Mode on the pipe's General tab, open the page in the live app and read the response in the browser's developer console.
- If no values come back, open the pipe's call, run it on the Test tab with the same parameter values, and check that the keys you need are mapped on the Response tab.
Was this page helpful?
Something wrong or missing on this page? Tell us.