
Choose what happens after a form is submitted
Use submit rules to show a confirmation message or send people to a page, a connected record's page or another website after they submit a form.
- Verified Nov 17, 2026
- Classic builder
On this page
Submit rules decide what people see after they submit a form: a confirmation message, another page in your app, or another website. Every form has a default rule; add rules with conditions to send people to different places depending on what they entered.
The default rule #
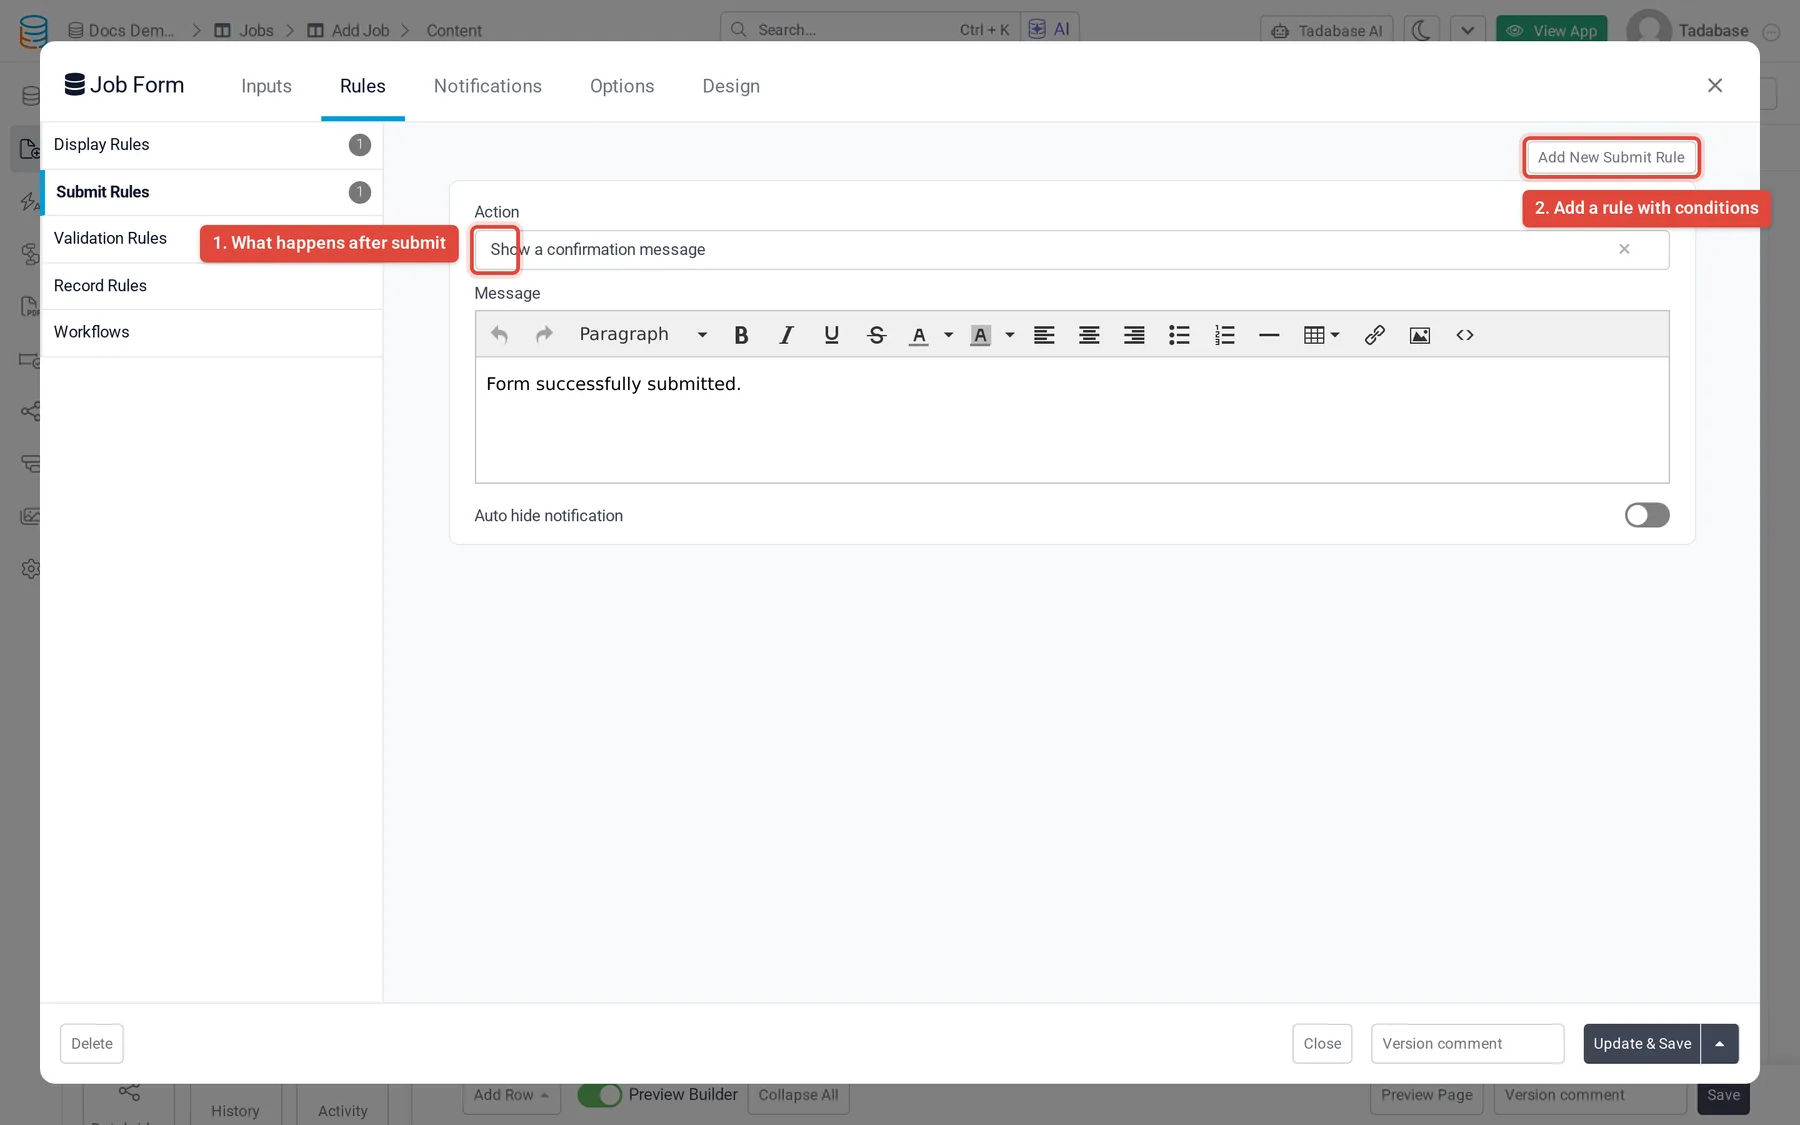
The first rule on the Submit Rules tab is the form's default. On a new form it shows the message Form successfully submitted. It has no conditions, runs on every submit and cannot be removed, but you can change its message or its Action.
Add a submit rule #
- Open the form In the Page Builder, hover over the form and click the pencil (Edit).
- Open Submit Rules Click Rules, then Submit Rules on the left.
- Add the rule Click Add New Submit Rule and pick the Action (see the table below).
- Set the conditions Click Add New Condition, then pick a field, an operator and a value. Click Add Another Condition for more. A rule without conditions runs on every submit.
- Save Click Update & Save. To remove a rule later, click Remove Rule under it.
Actions #
| Action | What it does |
|---|---|
| Show a confirmation message | Shows your Message. Turn on Auto hide notification to hide it after about five seconds. |
| Redirect to existing (record) Details page | Opens the Page you pick from your app's pages. The label names the form's table, for example Redirect to existing Job Details page. |
| Redirect to connected page | Opens a page for a record connected to the submitted one. Pick the Connection Field, then the Page. If the field holds several records, the first one is used. If it is empty, the form shows the message under Show success message if field is empty instead. |
| Redirect to a parent page | Goes back to the page above the form's page; in a pop-up form, closes the pop-up. Offered only when the form's page sits below another page. |
| Redirect to another website URL | Opens the URL you enter. Use Add Field to put a form value in the URL. Turn on Include custom URL parameters? to add parameters under Set Parameters:, each with a name and a Custom Value or Form Value. |
How the rules combine #
After a successful submit, the default rule runs first. Then every other rule whose conditions are true runs, from top to bottom. A matching message rule replaces the default message, and a matching redirect takes people away (after a short pause if a message is showing). Rules run in the order you added them; they cannot be dragged into a new order.
- Write conditions that do not overlap, so that only one rule besides the default matches a submit.
- Use Match All conditions. To react to any one of several values, add one rule per value.
Change records after a submit #
Submit rules only decide where people go. To create or update records, send emails or run other steps when a form is saved, use a workflow on the form's table with the Record Created trigger (forms that add records) or Record Updated (forms that edit records). See Workflow triggers. Older forms may still use record rules, which workflows replaced: see Table rules, record rules and action links.
Check it works #
Submit the form in your live app once for each rule, with values that match its conditions, and once with values that match none. The last submit should show only the default rule's result.
Was this page helpful?
Something wrong or missing on this page? Tell us.