
Create a PDF from a workflow
Use Create PDF Page or Create PDF Form in a workflow to make a PDF for a record, save it to a file field and attach it to an email.
- Verified Nov 17, 2026
- Classic builder
On this page
Two workflow actions make a PDF: Create PDF Page prints one of your PDF Pages for a record, and Create PDF Form fills one of your PDF Forms with values. Use them to produce an invoice, a work order or a certificate automatically, then save it on the record or email it.
For CSV or JSON files, see Export records to a CSV or JSON file. For a table inside an email, see Put a table of records in an email.
Before you start #
- Build the PDF first. In the builder's left bar, click the PDF icon, then PDF Pages or PDF Forms. See Create a PDF from a page and PDF Forms.
- For Create PDF Page, use a Detail PDF Page built on the table of the record you will print.
- To keep the PDF on the record, add a file field to the workflow's table, for example Invoice PDF.
- PDF Pages and PDF Forms are plan features. Without them, the actions show a lock icon in the picker.
Create PDF Page #
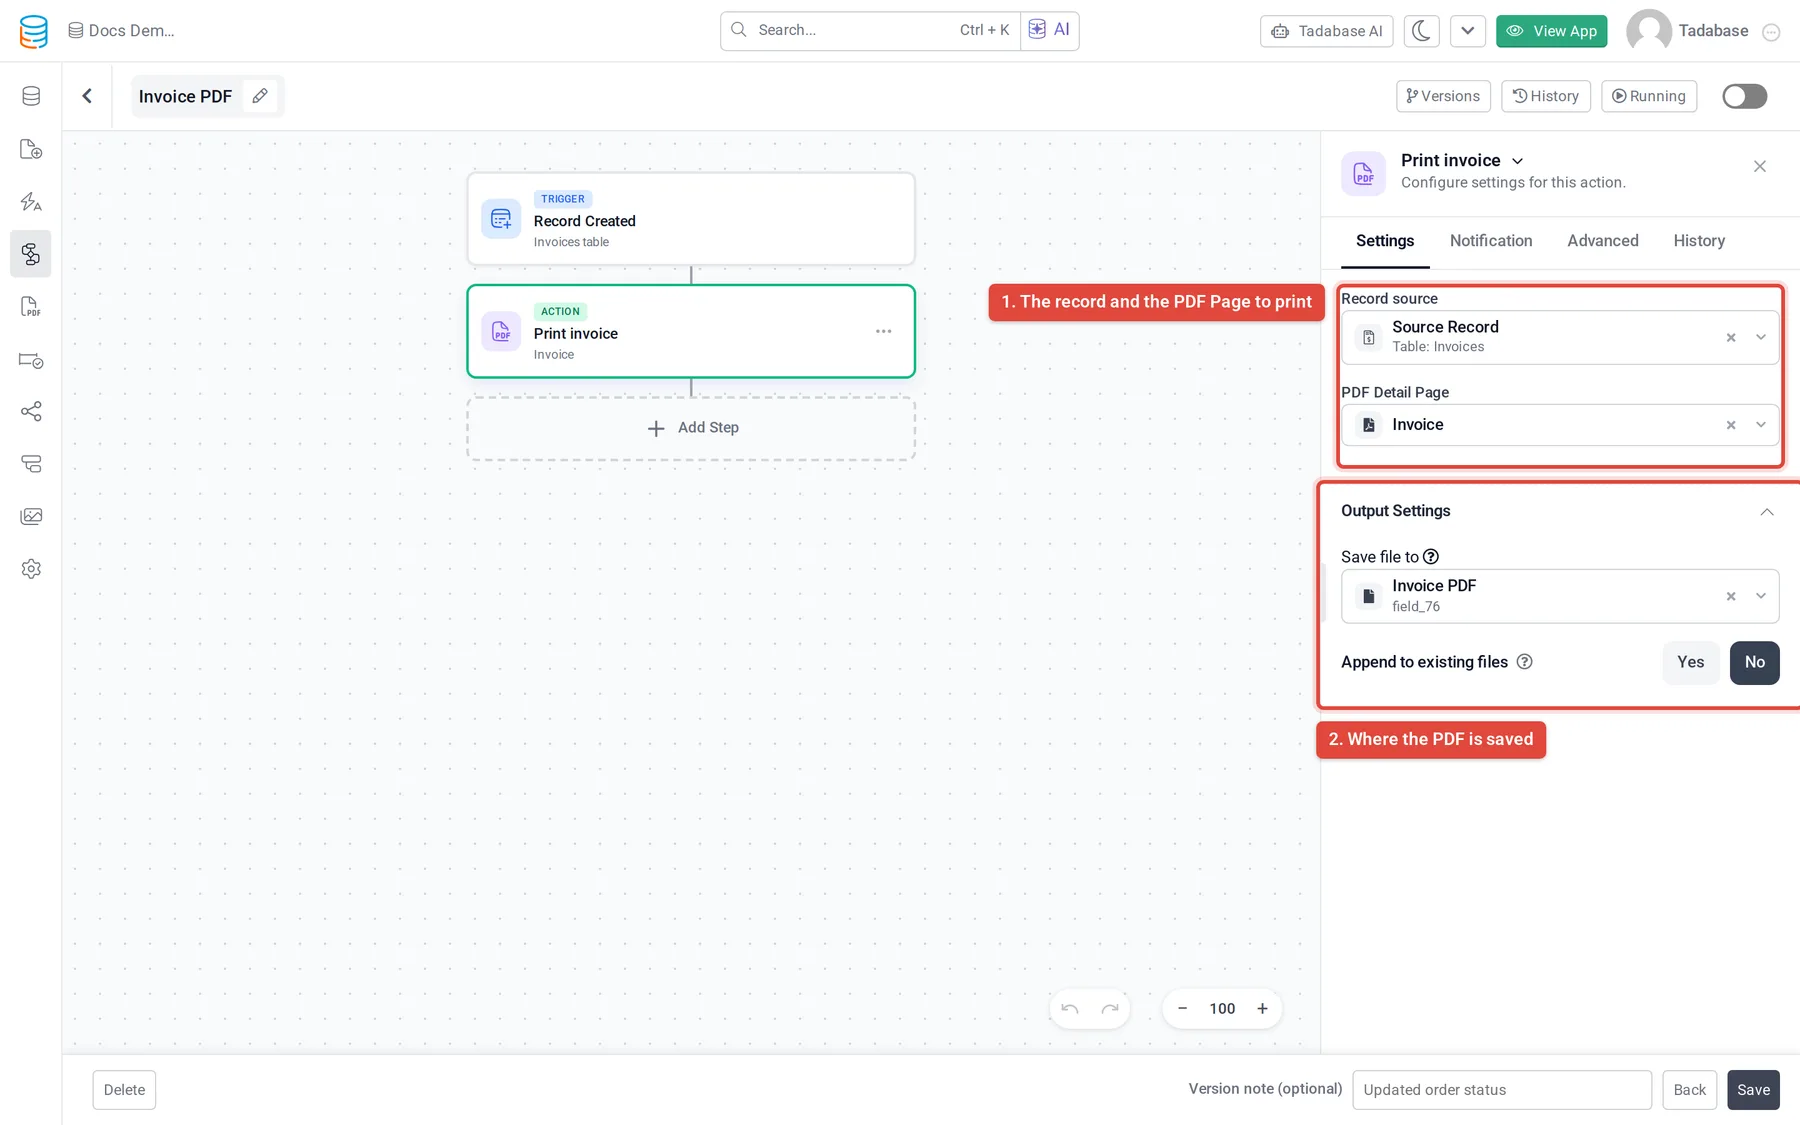
- Add the action Add a step, click Add Action, then under Documents choose Create PDF Page.
- Choose the record Under Record source, choose the record to print: the Source Record, a record from an earlier step under Step Data, or a connected record. Only records whose table has a PDF Page are offered.
- Choose the PDF Page Under PDF Page, pick the page to print.
- Choose where the file goes Under Output Settings, see Save the PDF on the record.
Create PDF Form #
- Add the action Add a step, click Add Action, then under Documents choose Create PDF Form.
- Choose the form Under PDF Form, pick the form. Field Mappings lists one card for each field on the form.
- Fill each form field Open a card and choose where its value comes from, for example a field of the workflow's record, a fixed value or a result of an earlier step. See Using workflow data.
- Choose where the file goes Under Output Settings, see below.
Save the PDF on the record #
Both actions have an Output Settings section:
- Save file to: pick a file field of the workflow's record to store the PDF in. Leave it on None (use action output only) to only pass the PDF to later steps.
- Append to existing files: shown for fields that hold several files. Yes adds the PDF next to the files already there; No replaces them. A field that holds one file is always replaced.
Email the PDF #
- Add Send Email after the PDF step The email step must come after the PDF step.
- Attach it In the email's Attachments, click Add Attachment and pick the PDF step. See Send an email from a workflow.
Later steps can also use the PDF's address (PDF File URL) as a value, or check the step's Status in a condition.
Check that it worked #
Open the step's History tab or the workflow's run history to see the file that was made and where it was saved. See Workflow history and logs.
Was this page helpful?
Something wrong or missing on this page? Tell us.