
Fill an uploaded PDF with record data
Upload a PDF, place Text, Checkbox, Image and Signature placeholders on it, test it, and fill it from your records with a workflow.
- Verified Nov 17, 2026
- Classic builder
On this page
A PDF Form is a PDF file you upload, such as a contract, certificate or government form, with placeholders that are filled with values from your app. Use it when the document's design already exists as a PDF. To design a document from components instead, use a PDF Page.
Upload a PDF #
- Open PDF Forms In the builder's left bar, click the PDF icon, then PDF Forms.
- Add a form Click Add New PDF Form.
- Fill in the details Enter a Name and, if you like, a Description, and choose the file under PDF. Only PDF files are accepted.
- Save Click Save. The form appears in the list with its ID and PDF ID; click either value to copy it.
Place the placeholders #
Click a form in the list to open its editor. The PDF Builder tab shows the PDF with Controls on the left:
| Control | Use it for | Main options |
|---|---|---|
| Text | Names, addresses, numbers, dates and money | Field Name, Default, Contains Date/ |
| Checkbox | Yes or no values | Field Name, True Value, False Value |
| Image | A logo, photo or other image from a record | Field Name, Keep Aspect Ratio, size and position |
| Signature | A signature captured in your app | Field Name, size and position |
| Watermark | An image printed across the page, such as DRAFT | Upload Image, Opacity, Angle, Enable Repeat with X Spacing and Y Spacing |
- Add a placeholder Click a control, then place it on the page where the value should print.
- Set its options With the placeholder selected, set its options in the left panel. Give it a clear Field Name: you map values to placeholders by this name.
- Save Type an optional Version comment and click Save.
If the uploaded PDF already has fillable form fields, open the menu next to the form's name and choose Form Fields. Pick the fields to keep and click Apply Form Fields to turn them into placeholders, instead of placing each one by hand.
Password, replacing the file and copies #
The menu next to the form's name in the editor holds:
| Item | What it does |
|---|---|
| Duplicate | Makes a copy of the PDF Form after you confirm. |
| Form Fields | Shown when the PDF has fillable fields; see above. |
| Upload New PDF | Replaces the PDF file of this form. Drop a PDF on the Load New pdf window and click Upload. |
| Protected | Opens PDF Password Protection. Enter a password and click Save Password; filled PDFs then need it to open. Leave it empty to remove the password. |
Version history #
Each save keeps a version. Open PDF History at the top of the editor to view an earlier version, and Go to Current PDF to return. To keep an earlier version, open it and save.
Test the form #
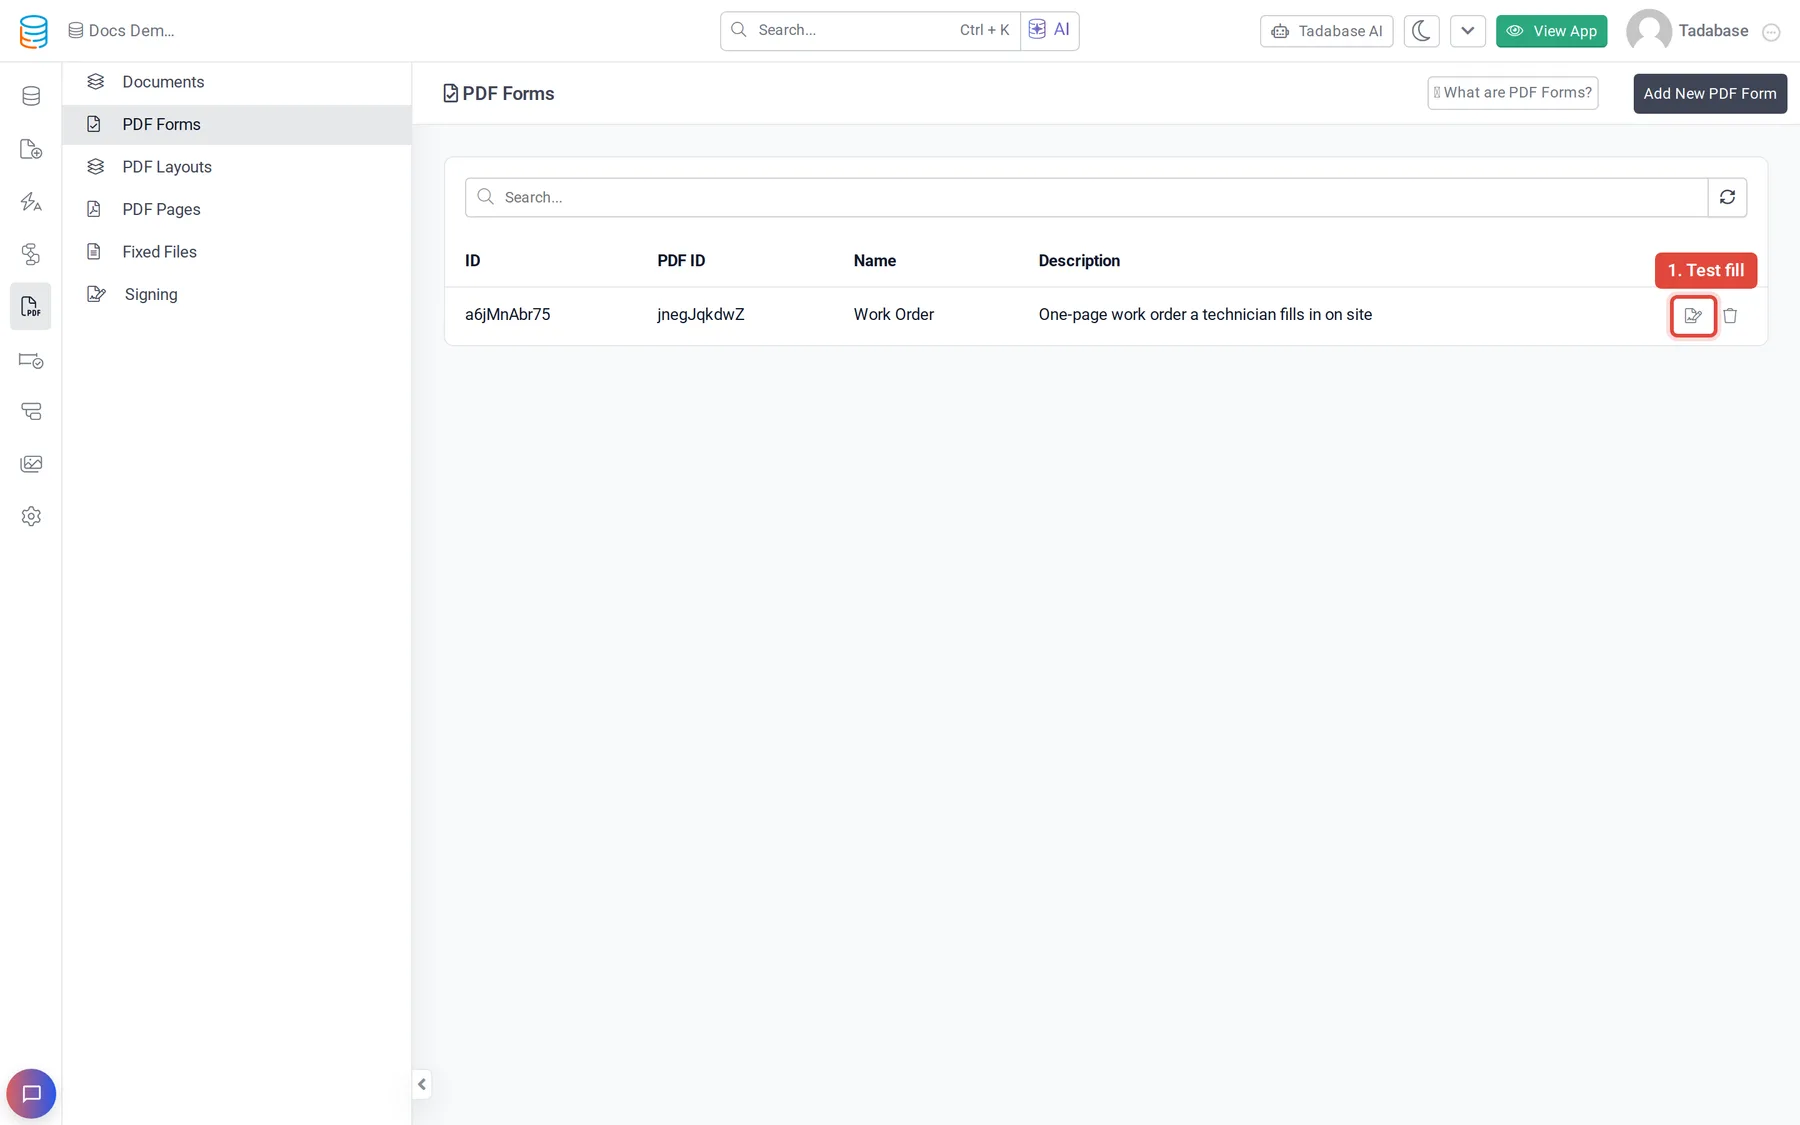
- Open Test fill In the PDF Forms list, click the Test fill icon on the form's row.
- Pick a record (optional) Choose a Data Table (optional) and a Record. Placeholders whose name matches a field's name or slug are filled from that record.
- Type any other values Each placeholder has a box; type a value to fill it or to replace the record's value.
- Fill Click Fill. The filled PDF shows below; click Download to save it.
Fill it from your records #
In your app, a PDF Form is filled by the Create PDF Form workflow action. Add the action to a workflow, choose the PDF Form, and under Field Mappings choose where each placeholder's value comes from, such as a field of the record or a custom value. Later steps can save the filled PDF to a file field or attach it to an email. See Document actions and Attach a PDF to an email.
Check each fill in the logs #
The editor's Logs tab lists every time the form was filled, with ID, Status, Time Taken, File Size and Date. Filter by Status (All, Success, Error) or search. Open a log to see its details, including the Form Data that was sent and Device Info.
Delete a PDF Form #
Click the Delete icon on the form's row in the list, or Delete in the editor, and confirm. Remove or update any workflow step that uses the form.
Plans #
PDF Forms need a plan that includes them, and each plan allows a set number of PDF Forms. The Create PDF Form workflow action also needs a plan that allows PDF generation in workflows. See Plans.
Was this page helpful?
Something wrong or missing on this page? Tell us.