
Let users export records from the live app
Add an Export component so people using your app can export records with one of your export templates and download the file.
- Verified Nov 17, 2026
- Classic builder
The Export component puts an export button on a page, so people using your app can download records without opening the builder. Which records and columns go into the file is set by an export template you create in the Data Builder.
Before you start #
Create an export template for the table first. The component only lists tables that have an export template; with none, it says There are no data tables with export templates added to this app yet.
Add the Export component #
- Add the component In the Page Builder, click Add Component in a column and choose Export under Data Components.
- Choose the table Under Select the data table to be used for export:, pick the table, then click Customize.
- Choose the template On the Data Source tab, choose the Export Template.
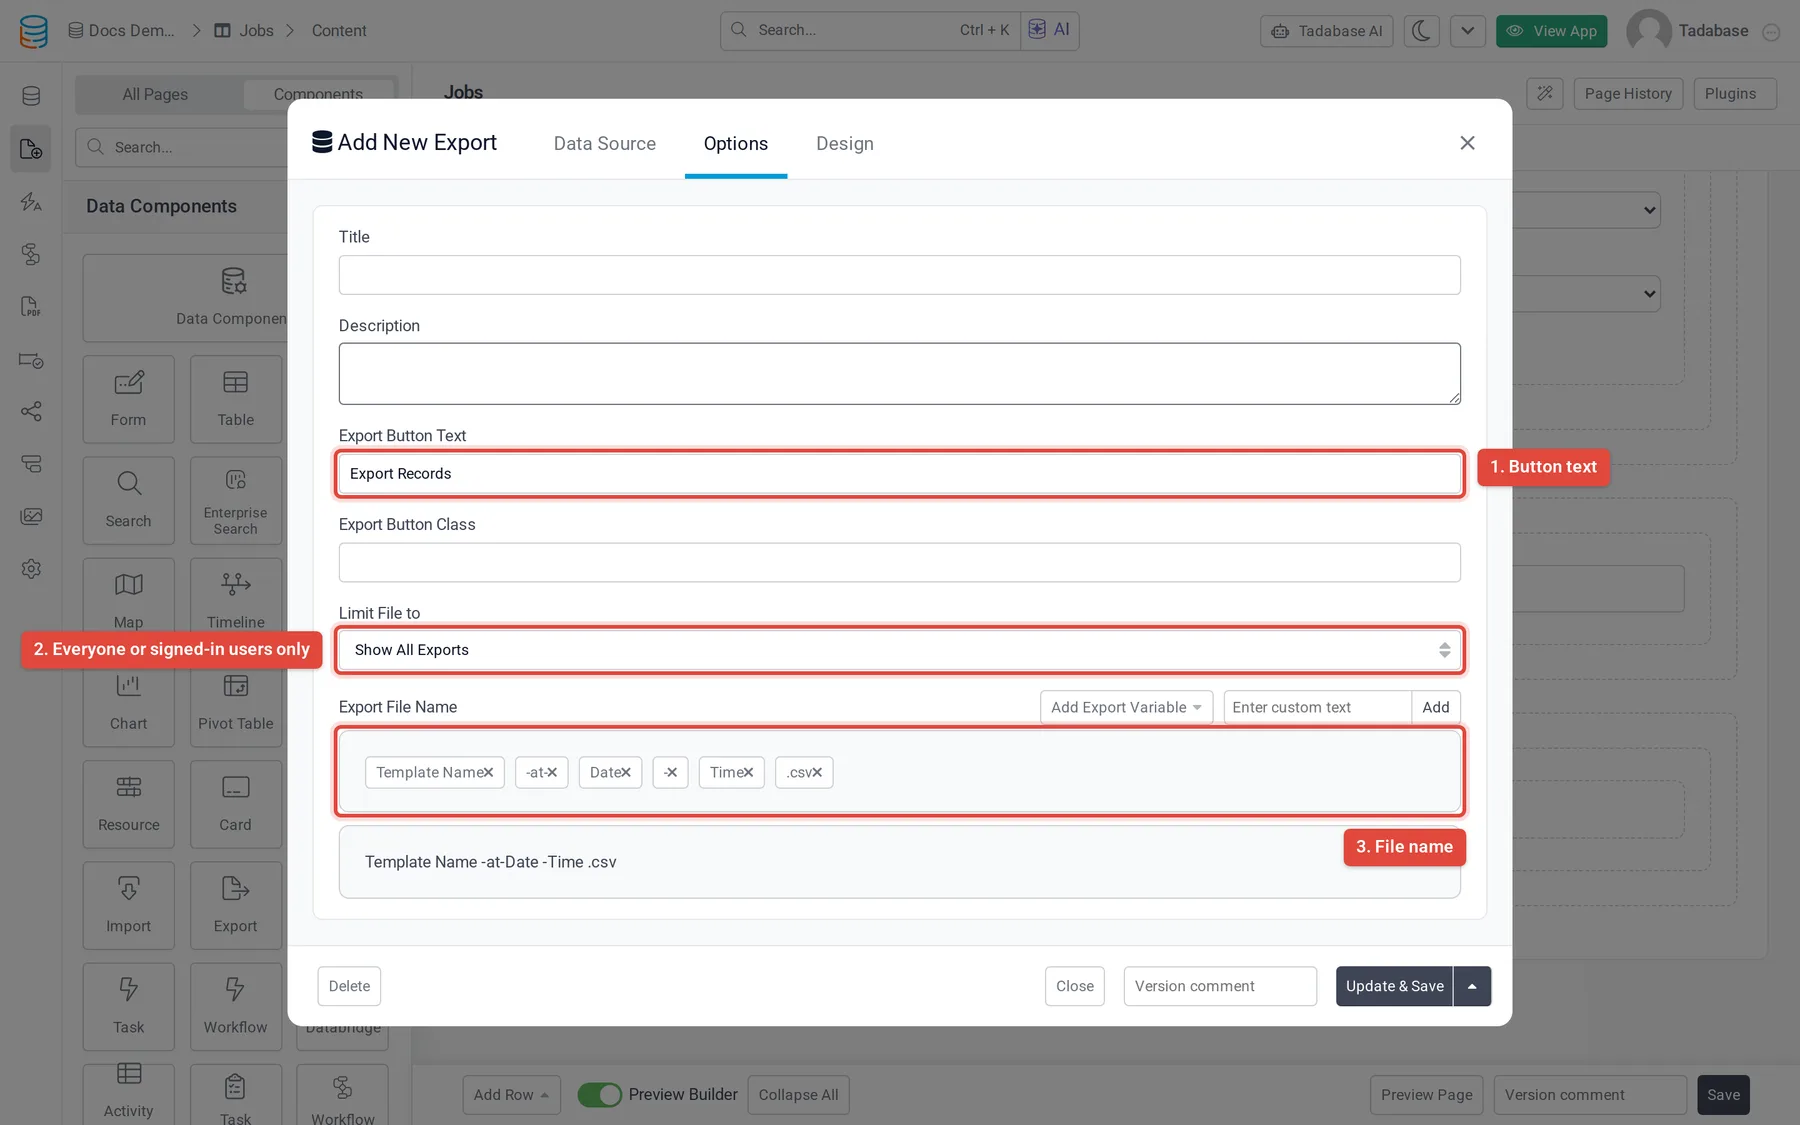
- Set the options On the Options tab, set the title, the button and the file name (see below).
- Save Click Update & Save.
Options #
| Option | What it does |
|---|---|
| Title and Description | Text shown above the export button. |
| Export Button Text | The button's label. Default: Export Records. |
| Export Button Class | CSS classes added to the button, to style it. |
| Limit File to | Show All Exports (default), or Exports by Logged In User, which only lets signed-in users export. People who are not signed in see Please log in to export records. |
| Export File Name | The name of the downloaded file, built from pieces. Add Export Variable adds Template Name, Data Table Name, Logged In User Name, Date or Time; type text in Enter custom text and click Add to add your own. Drag the pieces to reorder them. |
The default file name is the template name, -at-, the date, -, the time and .csv.
What people see in the app #
- Start the export They click the export button. The file is built in the background, and the component shows its progress.
- Open the downloads They click View Downloads. The Export File List shows each file with its type and when it was created, and a progress bar while it is being built.
- Download When the file is ready, they click Download.
View Downloads lists this table's exports from the app in the last 48 hours. A signed-in user sees only the files they exported.
Was this page helpful?
Something wrong or missing on this page? Tell us.