
Save an export as an export template
Choose the fields, column names, conditions and sort order of an export once, then run it from the Data Builder or from your app.
- Verified Nov 17, 2026
- Classic builder
On this page
An export template saves which fields an export includes, what the columns are called, which records it takes and in what order. Use one for an export you repeat, such as last week's jobs every Monday, or to let people in your app export exactly the records they should see.
Create an export template #
- Open export templates Go to Automation > Export Templates and click Add New Template.
- Fill in General Enter a Name, an optional Description, and pick the Data Table to export from.
- Choose which records If the table has connections, Which records should this export include? appears. Keep All records in this ... table, or limit the export to records connected to the record it is run from, to related records further down a connection, or to records connected to the logged-in user. This choice cannot be changed after saving.
- Choose the sort order Under Sort By, pick a field and ASC or DESC.
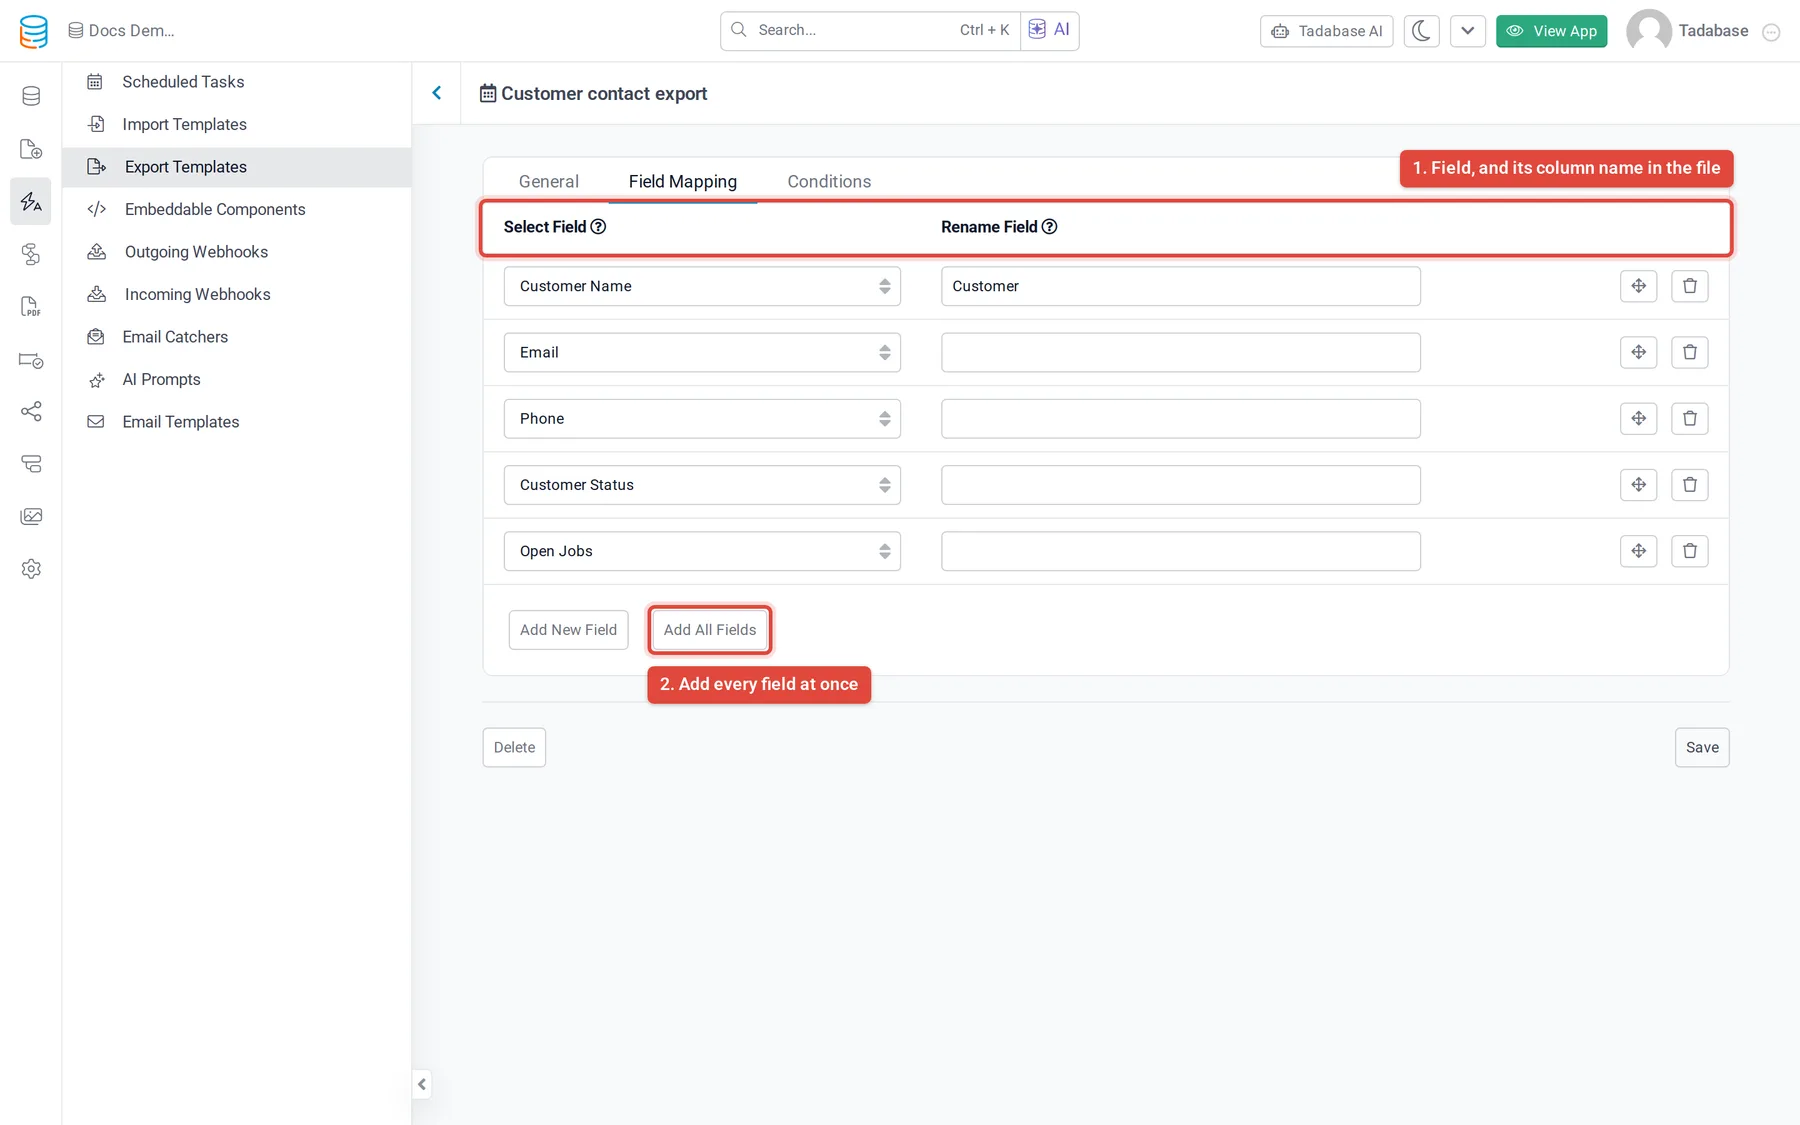
- Pick the fields On Field Mapping, click Add New Field or Add All Fields (see below).
- Add conditions (optional) On Conditions, click Add Condition to export only the records that meet it.
- Save Click Save.
How many export templates an app can have depends on your plan.
Choose fields and column names #
- Each row has Select Field (the field) and Rename Field (the column heading in the file). The heading starts as the field's name.
- Drag rows by the arrows icon to change the column order. Click the trash icon to remove a row.
- For a Date field, choose the date format:
MM/dd/yyyy(the default),MMM dd, yyyyordd/MM/yyyy. For a Time field, choosehh:mm a(the default) orHH:mm. - For a Dynamic field with several templates, choose which Template to export.
Export with a template in the Data Builder #
Open the table, click Export, pick the template in the list next to the Export button (instead of -- All Records --) and click Export. The file appears in the window's list as Template (name). See Export records to CSV for downloading and how long files stay listed.
Let app users export with a template #
- Table component: turn on Enable Export in the component's settings, then choose the templates under Select Template. See Table component.
- Export component: add it to a page and choose its Export Template. You can also set the Export Button Text and the Export File Name.
When the template is run from a page that shows one record, or by a logged-in user, its record and user choices apply to that record or user.
Was this page helpful?
Something wrong or missing on this page? Tell us.