
Add or subtract time with a Date Formula
Work out the time between two dates, or a date plus or minus days, hours, minutes or seconds, and show it as days, hours, seconds or a date.
- Verified Nov 17, 2026
- Classic builder
On this page
A Date Formula field calculates with dates. Use it for the time between two dates, such as how long a job took, or for a date plus or minus some time, such as a follow-up date two weeks after a job is completed.
Add a Date Formula field #
In this example the Jobs table, which has Started and Finished date and time fields, gets a Time on Site field in hours.
- Open the table In the Data Builder, open the Jobs table and click the Fields tab.
- Choose the field type Click Add New Field. Under Equation, click Date Formula, then click Add and Configure.
- Name it Enter a Name, for example
Time on Site. - Choose how to show the result Set Display Output to Hour, then pick an Hour Format.
- Build the formula Next to Formula, click Add Field and pick Finished. Click
-. Click Add Field again and pick Started. - Save Click Save.
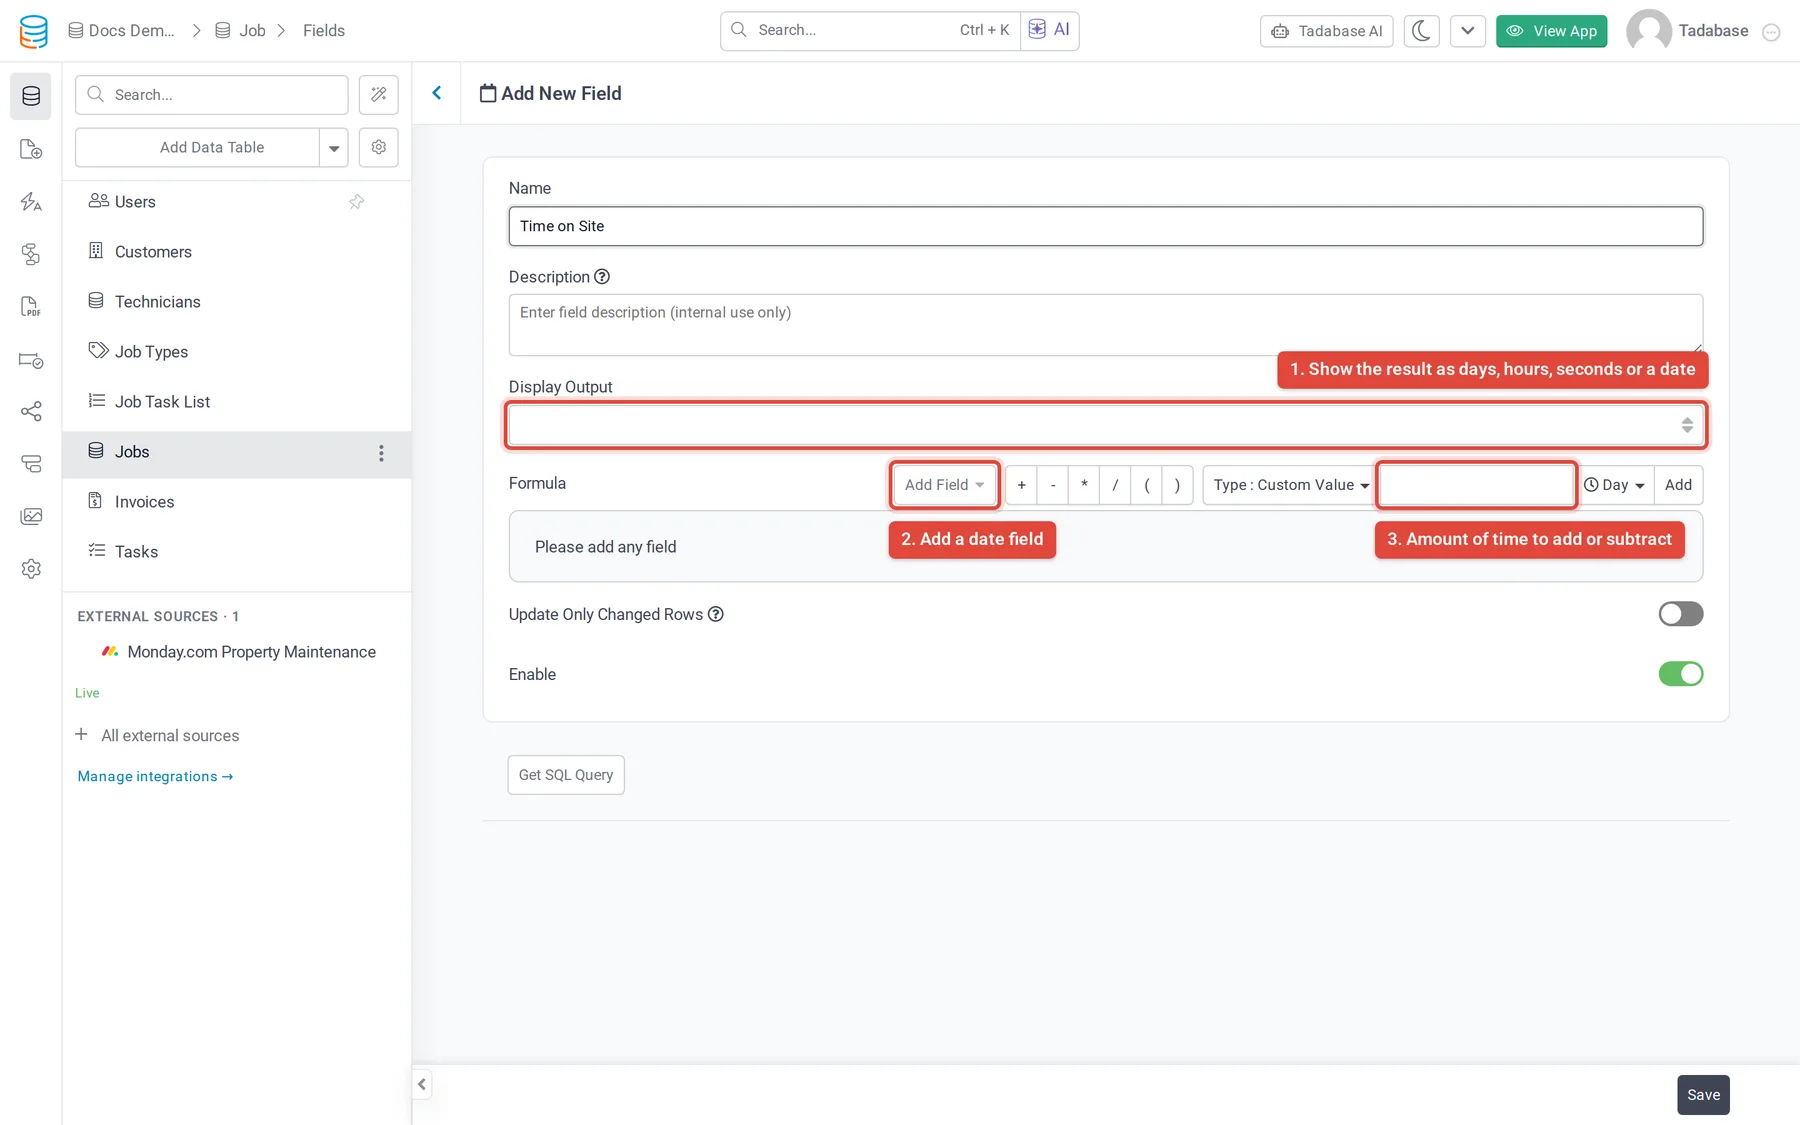
Add or subtract time #
To move a date forward or back, add the date field, an operator, and then an amount of time. The amount can be a fixed number or the value of a Number field.
- Add the date Click Add Field and pick the date, for example Finished. Click
+(or-to go back in time). - Choose fixed number or field The button next to the operators shows Type : Custom Value. Leave it to type a number, or switch it to Field and use Choose Field to pick a Number field.
- Choose the unit Enter the number (for Custom Value), then use the clock button to pick Day, Hour, Minute or Second. Day is selected to begin with.
- Add it Click Add. The part appears in the formula with its unit, for example
14 (Day). - Show it as a date Set Display Output to Date and click Save.
With a Number field, each record uses its own value. For example, a Reminder Days number field lets each job set its own follow-up delay.
Display Output #
| Display Output | Shows | Use it for |
|---|---|---|
| Day | The result as a number of days | The difference between two dates |
| Hour | The result in hours. Hour Format chooses a number of hours, HH:mm or HH:mm:ss. | Durations such as time on site or hours worked |
| Second | The result as a number of seconds | Exact durations, or a value to use in other calculations |
| Date | The result as a date, in your app's date format | A date plus or minus some time |
Fields you can use #
- Add Field lists Date and Date & Time fields from this table and from connected tables.
- Choose Field (for an amount of time) lists Number fields from this table and from connected tables. Auto Increment is not offered.
- A field from a connected table is read from one connected record. To use the earliest or latest date of all connected records, use a Rollup with Minimum Value or Maximum Value.
Other field types, such as Time and Date Range, are not offered. For those, and for date functions, use an Equation.
Other settings #
- Drag a part of the formula to move it, and click its x to remove it.
- Enable is on by default. Turn it off to stop the field recalculating when records change; values already saved stay as they are.
Use the result in a Number Formula #
A Number Formula in the same table can use a Date Formula field in seconds, minutes, hours or days. For example, Time on Site (in hours) * Rate gives the labor cost of a job.
Was this page helpful?
Something wrong or missing on this page? Tell us.