
Import from an API or another app
Pull records into a table from a REST API or from Airtable, Stripe, HubSpot and other apps, and save the setup as an import connector you can run again.
- Verified Nov 17, 2026
- Classic builder
On this page
Besides files, the import wizard can fetch records straight from a REST API or from another app such as Airtable, Stripe or HubSpot. Save that setup as an import connector and you can run the same fetch again from the builder or from a page in your app.
Sources you can import from #
| Source | How you connect | What you pick |
|---|---|---|
| API endpoint | None, or a saved authentication: API Key, Bearer Token, Username and Password, Expiring / Custom Token or OAuth 2.0 (your own provider) | Endpoint URL, method (GET, POST or PUT), URL Parameters, Headers and Pagination |
| Airtable | Personal access token | Base, table, optional sort and filter formula |
| Caspio | Access Token or Client Credentials with your Account ID | Table, optional sort and filter |
| ClickUp | Personal API token | Workspace or team, and a list (or All Lists) |
| Freshdesk | Domain and API key | The data endpoint |
| HubSpot | Private app access token | Object Type: contacts, companies, deals, tickets and others |
| Knack | Application ID and REST API Key | An object, or a scene and view |
| Quickbase | Realm Hostname, App ID and a User Token | The table |
| Shopify | Shop Domain and a private app access token | Resource Type, such as orders or collections |
| Stripe | Secret API Key | Data Type: customers, charges, invoices, subscriptions, products, prices, payment intents or balance transactions |
| Trello | API key and access token | Board, and a list (or All Lists) |
Most app sources also have a Record Limit; leave it blank to import everything.
Import from an app or an API #
- Open the wizard Open the table in the Data Builder and click Import.
- Pick the source Pick API endpoint under Files & endpoints, or an app under Apps & databases. The pane shows what that source needs.
- Connect Enter the key or token the source asks for. Under Save this connection, give it a Connection name and click Save to keep it for next time, or click Use without saving.
- Pick the data Choose the base, table, list or object to import, and set any filter or Record Limit. The wizard loads a sample so you can check it.
- Map and run Continue to map the fields, choose how matching records are handled, and confirm, as for a file. See Import records from a CSV file.
- Save it as a connector On Confirm your import, turn on Save as Import Template and enter a Template name. The source, connection and field mapping are saved as an import connector.
Saved connections for a source appear under Saved Connections the next time you pick it. Choose one to reuse it, or select it and click Delete Selected to remove it. Secret values are stored encrypted, and when you edit a saved API authentication its secret fields stay blank: leave them blank to keep the saved values.
Create and manage import connectors #
Import connectors are listed under Automation > Import Templates, on the API tab, with their Connector, Data Table and dates. Use the Data Table button to show one table's connectors.
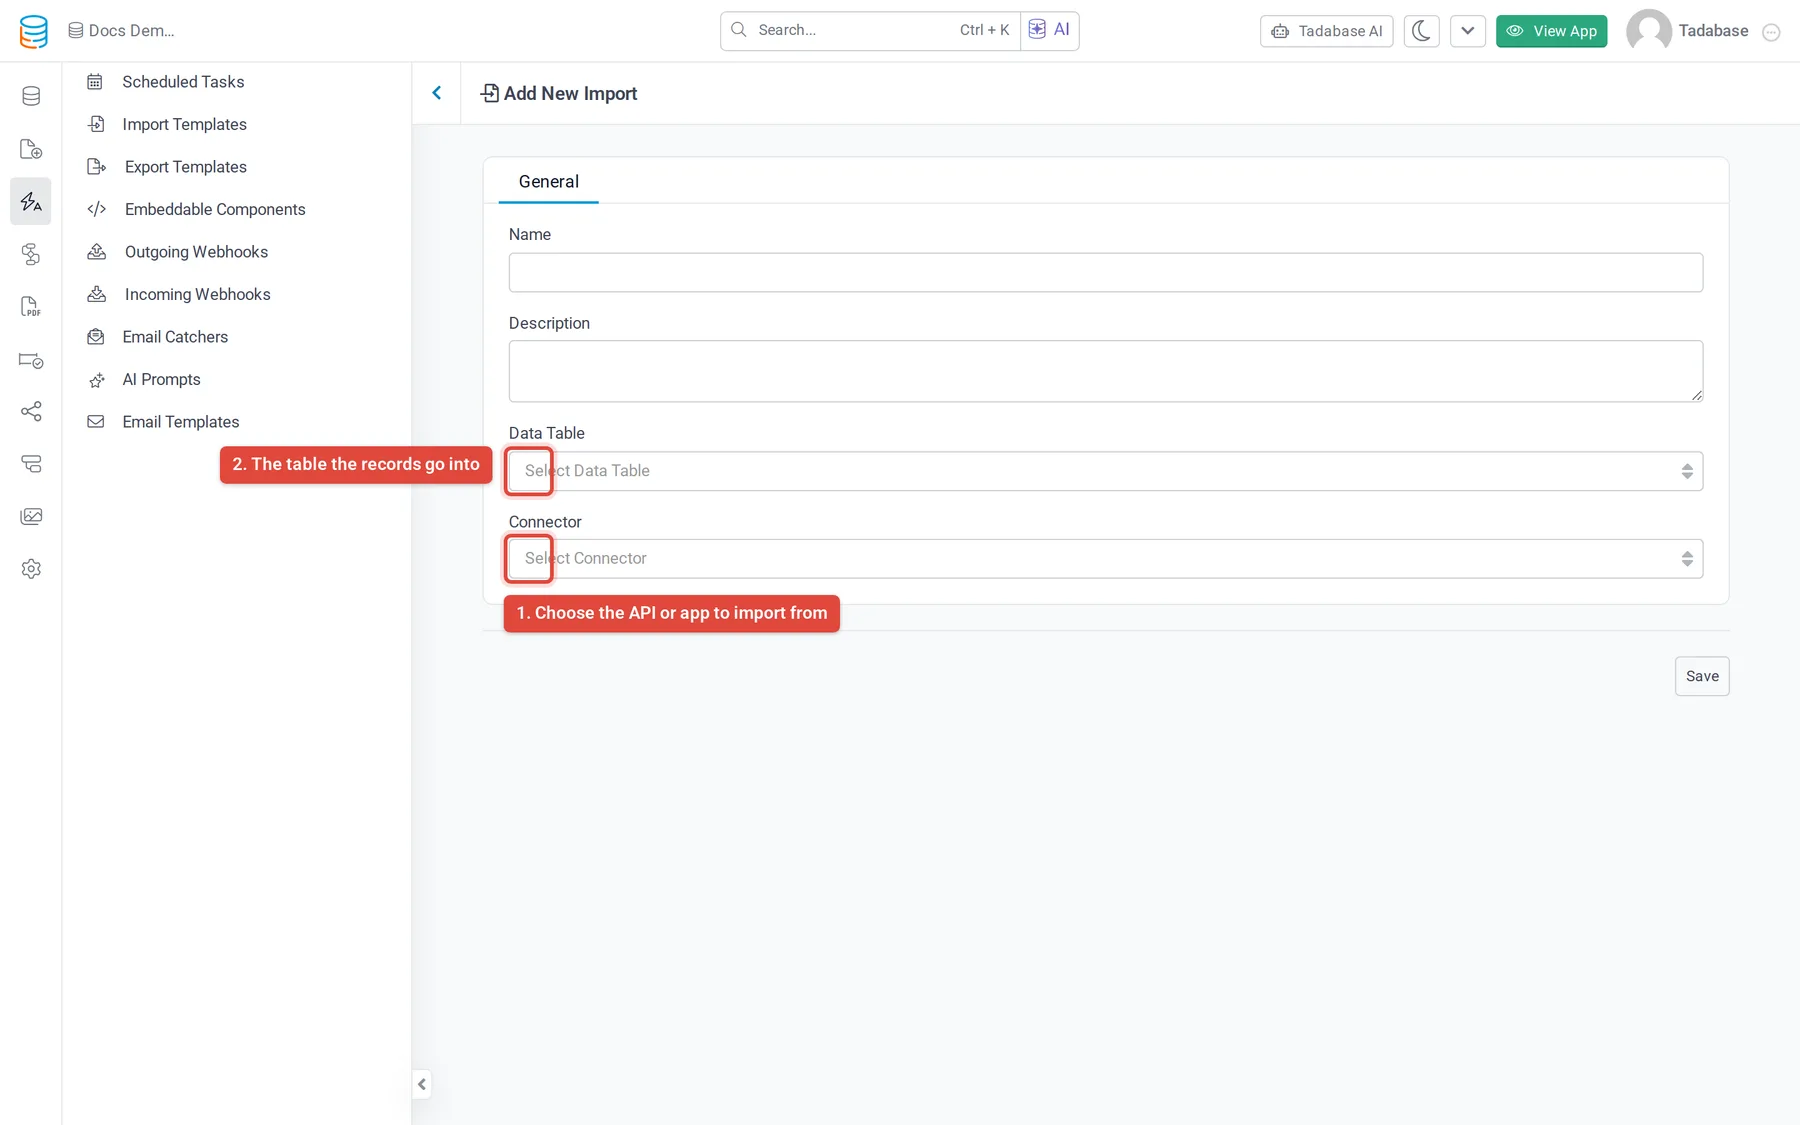
- Add a connector On the API tab, click Add New Template.
- Fill in General Enter a Name, an optional Description, the Data Table and the Connector (for example REST API, Stripe or Airtable). The table and connector cannot be changed after saving.
- Configure the source On Connector Config, enter the connection details for that source, and choose what happens to a row that fails: Skip Row on Error or Stop on Error.
- Map the fields On Field Mapping, map each field to a column of the fetched data, a Custom Value or a Logged In User's Field, as in an import template. Add Conditions to import only some rows.
- Save Click Save.
Run a saved connector #
- From the list: on the API tab, click Run on the connector's row and confirm. The import is added to the queue; follow it with Show Logs.
- From the import wizard: pick the same source; its saved templates can be chosen in the source's panel. The wizard skips fetching and mapping and goes straight to confirming.
- From the classic importer: set Import Type to API Connection and pick the Import Connector.
- From your app: an Import component can use a connector for its table. See Import component.
A connector fetches the data each time it runs. It does not run on a schedule by itself.
Plans #
Import connectors need a plan that includes importing, and they count toward the plan's number of import templates. If the screen shows an upgrade button instead of Add New Template, your plan does not include more.
Was this page helpful?
Something wrong or missing on this page? Tell us.