
Show app logs with the Log Table component
Add a Log Table to a page to show page views, logins, record changes, emails, exports and other app logs in a table.
- Verified Nov 17, 2026
- Classic builder
On this page
The Log Table component shows one of your app's logs, such as page views, user logins or record changes, as a table on a page. Use it to give admins or users a view of activity without opening the builder.
Which logs you can show #
When you add the component, it lists the logs by group:
| Group | Logs |
|---|---|
| Security & Access Logs | Page Views, Blocked IP Logs, Blocked User Account Logs, User Failed Login Logs, User Login Logs, Magic Link Token Access Logs, Access Token Logs |
| Data & Record Management Logs | Delete Record Logs, Record Change Logs, Equation Logs, Task Record History, Import Template Logs, Task Run History, Email Logs, File Upload Logs, Secure File Download Logs, Outgoing Webhook Logs, App Export Logs |
| Builder & App Activity Logs | Builder Activity Logs, Page Version Logs, App Restore Logs, Backup Logs |
| Batch Operations | Batch Update, Batch Delete |
A log only has entries when that kind of logging is on for your app. For example, Record Change Logs only fill up for tables with record change logging turned on. For the columns of each log, see Show logs in your app.
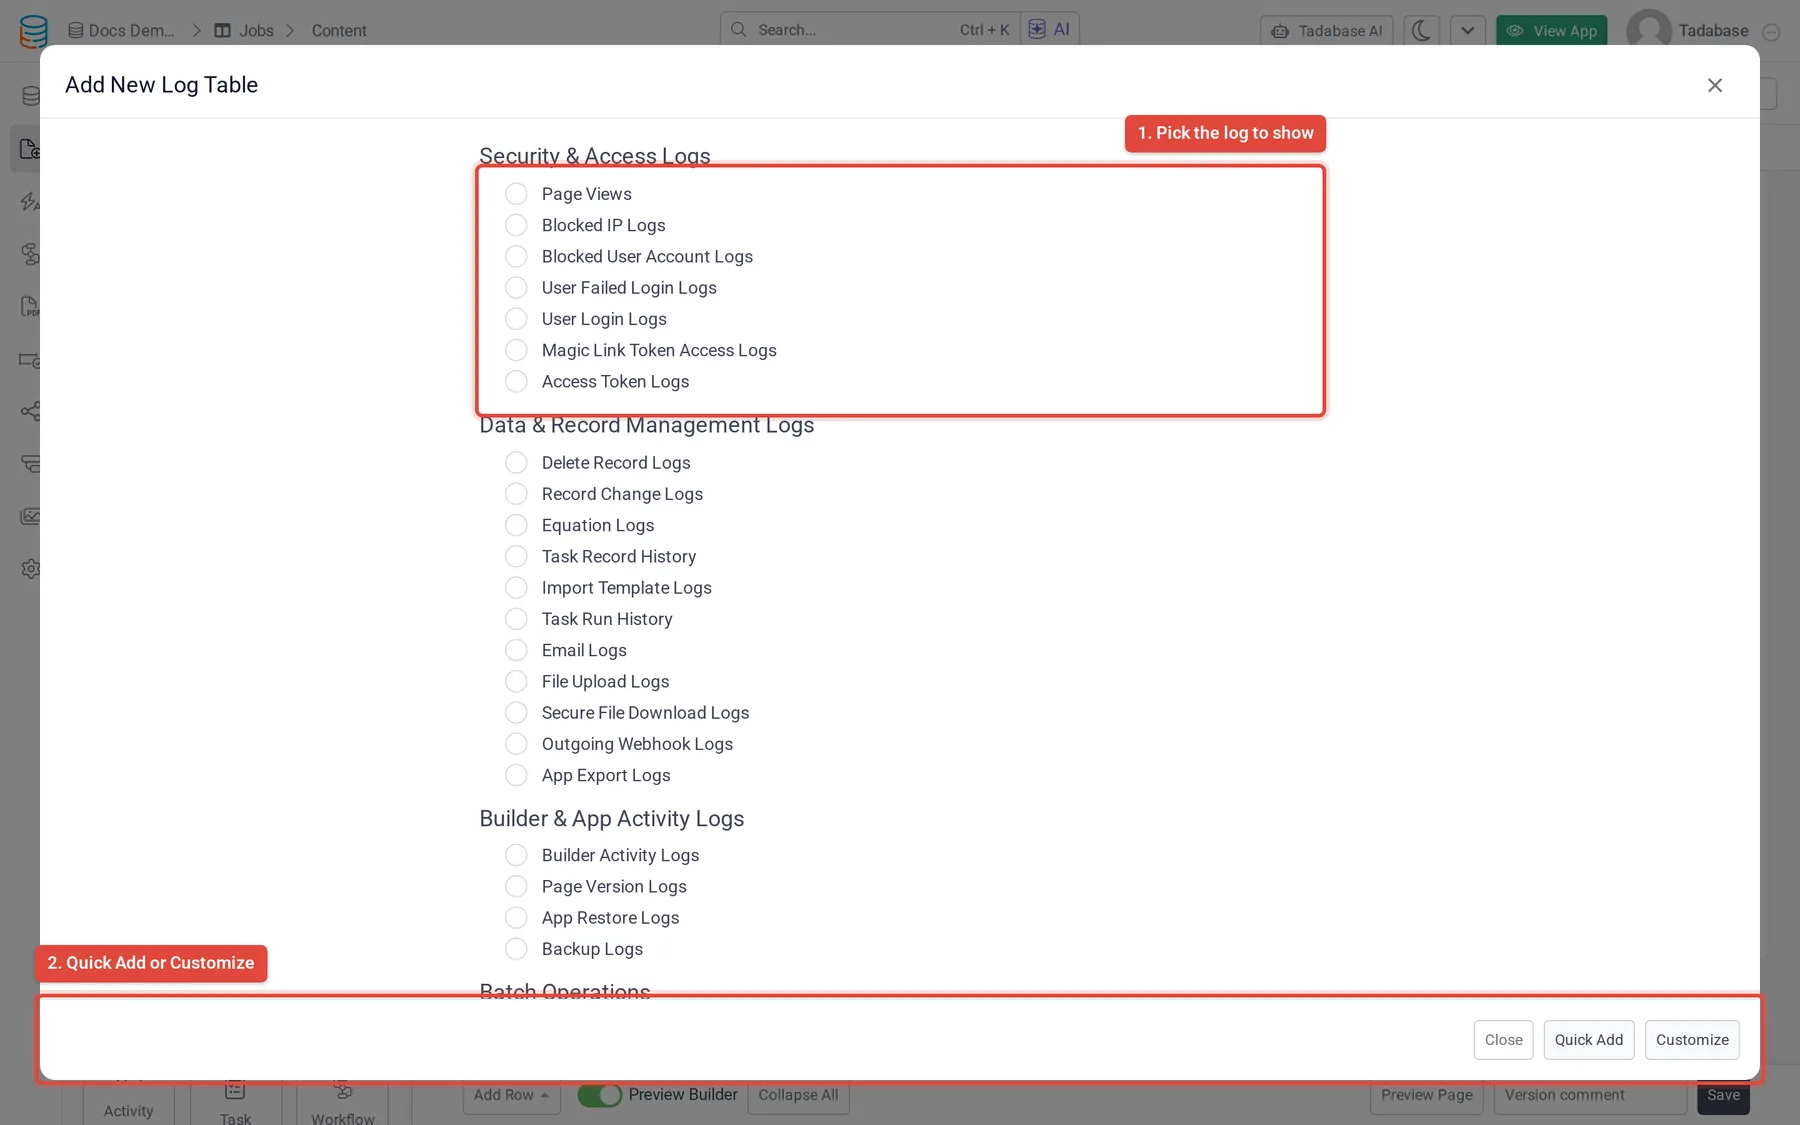
Add a Log Table #
- Add the component In the Page Builder, click Add Component in a column and choose Log Table under Data Components.
- Choose the log Pick the log to show. Its description appears when you select it. Click Customize.
- Filter the entries On the Data Source tab, open Filters and click Add New Filter Group to show only some entries, for example the logged-in user's own logins. Under Data Table, Limit Records can cap how many entries load.
- Choose the columns On the Columns tab, click a field in the Fields list to add it as a column. Click a column to change it, and drag columns to reorder them.
- Set the display options On the Options tab, set the paging and the empty message (see below).
- Save Click Update & Save.
Options #
| Option | What it does |
|---|---|
| No Records Found Text | The message shown when no log entries match. |
| Record Limit Per Page | How many entries show per page: 10, 25, 50, 100, 150, 200 or 250. |
| Pagination | Where the page buttons go: Top, Bottom, Top and Bottom or Hide. |
| Record Name | The Plural and Singular words used for the entries. |
Plans #
The Log Table component needs a plan that includes it. Without it, the component shows a warning icon in the Page Builder, and the live app shows a plan message instead of the table.
Was this page helpful?
Something wrong or missing on this page? Tell us.