
Let people sign up for your app
Use the Signup component so people can create their own account: choose the fields, log them in right away and send them to a page after they sign up.
- Verified Nov 17, 2026
- Classic builder
On this page
The Signup component is a form that creates a new record in your app's Users table, so people can register themselves. Use it when you want users to create their own accounts instead of adding each one yourself.
The default Sign Up page #
Every new app has a Sign Up page under Default Pages in the Page Builder, next to Login and Profile. It holds a Signup component. You can edit it, but you can't delete it.
To let people find it, use one of these:
Add a Signup component to a page #
- Open the page In the Page Builder, open the page where the form should go.
- Add the component Add a component to a column and choose Signup. It is listed with Login and Profile.
- Check the fields The form editor opens with the title Signup. It starts with the Users table's Name, Email and Password fields, all required. The password field asks users to type their password twice.
- Add other fields On the Inputs tab, add any other Users table field you want new users to fill in, such as a phone number.
- Save Click Update & Save. The form's button says
Signupuntil you change it.
The Signup component is built like a Form component: it has the same Inputs, Rules, Notifications, Options and Design tabs. The sections below cover what is specific to signing up.
Log new users in right away #
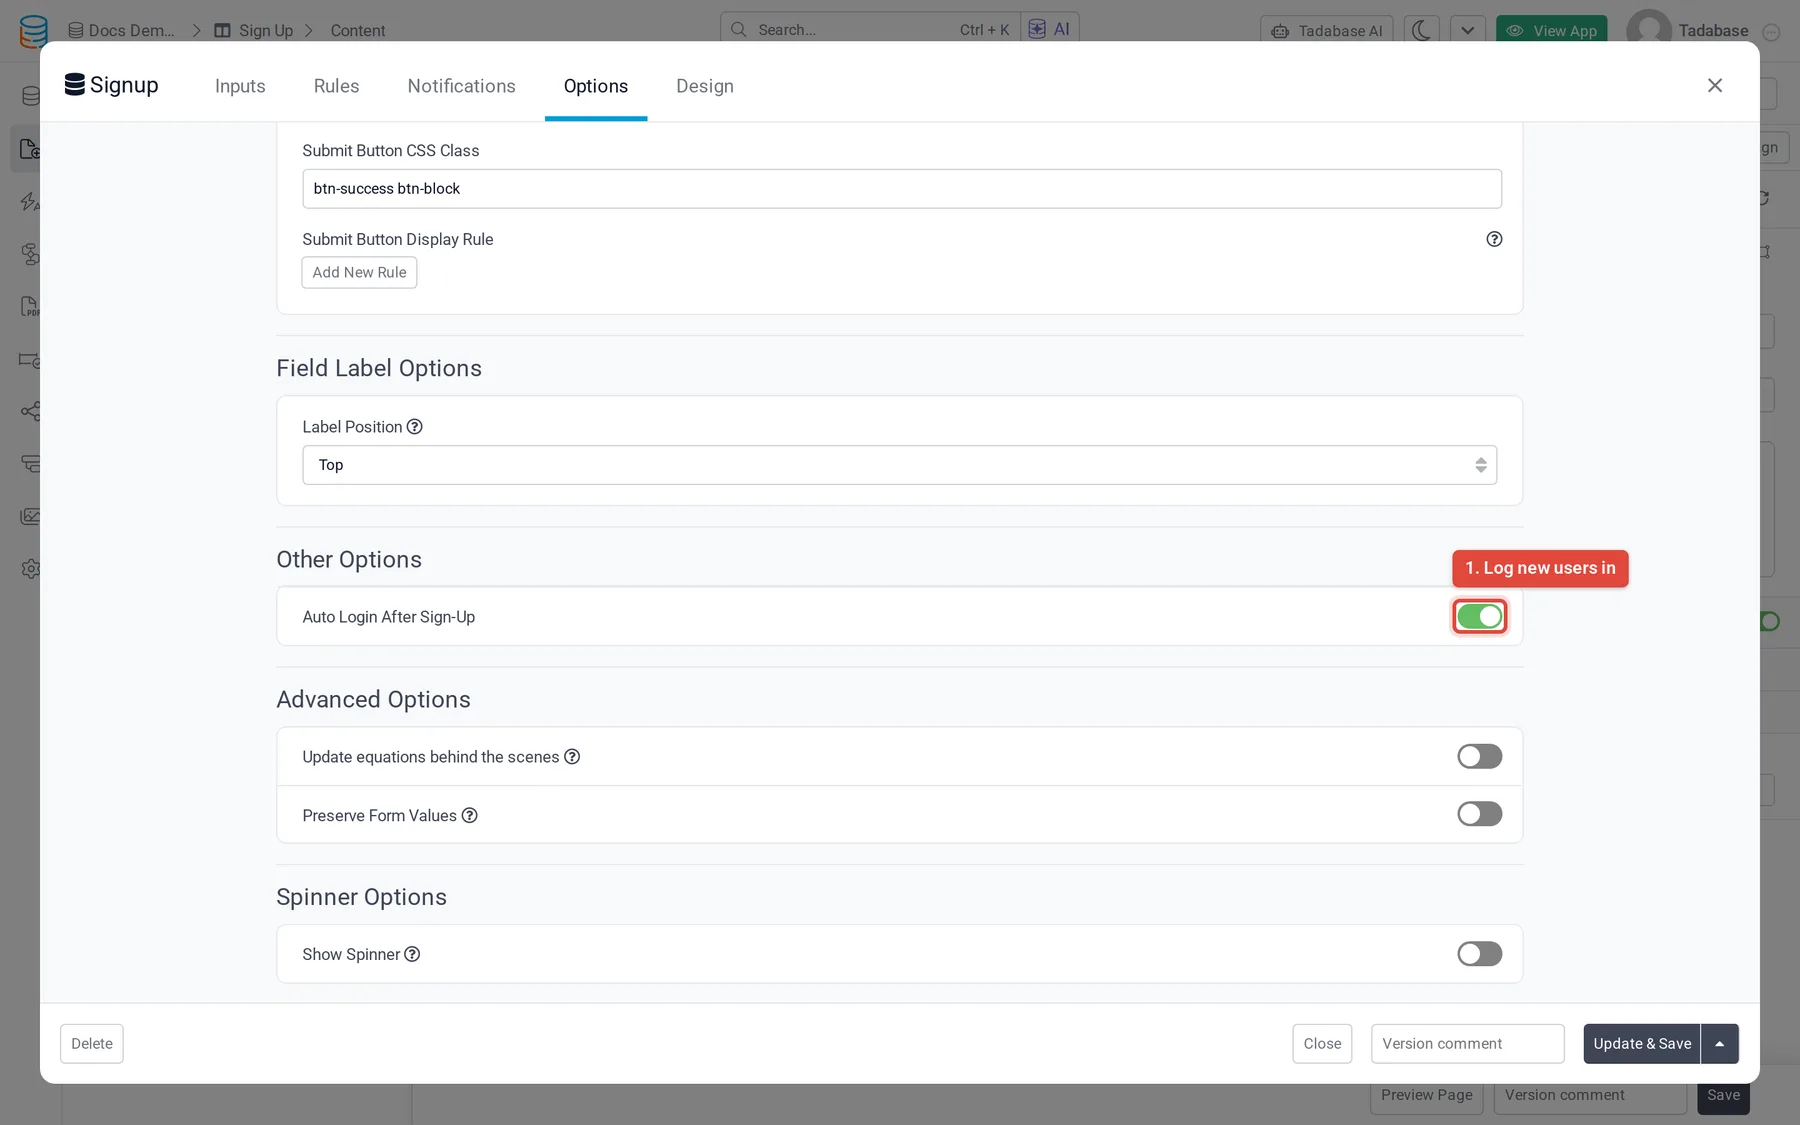
On the Options tab, under Other Options, Auto Login After Sign-Up decides what happens after someone signs up:
- On: the new user is logged in as soon as the form is saved.
- Off: the account is created, and the user has to log in through a Login component.
Send new users to a page #
- Open the submit rules Go to the Rules tab and open Submit Rules.
- Add a rule Click Add New Submit Rule.
- Choose the action In Action, choose Show a confirmation message and write the Message, or choose the Redirect to existing option and pick the Page, or Redirect to another website URL.
- Save Click Update & Save.
Add a Condition to a rule to show a different message or page depending on what the user entered.
Roles for new users #
The Signup component has no setting that picks a role for new users. Check new accounts in the Users table and give them their roles there; see Create user roles and assign users to them.
Password rules and single sign-on #
- The password rules you set for the app (length, character types) are checked when someone signs up. See Set password rules for app users.
- When a single sign-on provider is on, the Inputs tab offers a Signup With button for each provider. If email logins are turned off, the editor shows a Single Sign On (SSO) section for those buttons and warns that the email form will not appear in your live app. See Let users log in with single sign-on (SSO).
Check that it works #
- Sign up as a test user Open the live app in a private browser window, go to the Sign Up page and create an account with an email you can read.
- Check the result You should be logged in (if Auto Login After Sign-Up is on) and see your message or page. The new user appears in the Users table.
Was this page helpful?
Something wrong or missing on this page? Tell us.