
Create your first workflow
Build a workflow that emails the customer when a job is created and then updates the job, turn it on and check that it ran.
- Verified Nov 17, 2026
- Classic builder
On this page
This walkthrough builds a workflow on the Jobs table: when a job is created, it emails the customer and then sets the job's status. It takes about five minutes and shows every part of the editor you will use again.
Create the workflow and choose its trigger #
- Open Workflows In the builder, click the Workflows icon in the left-hand bar.
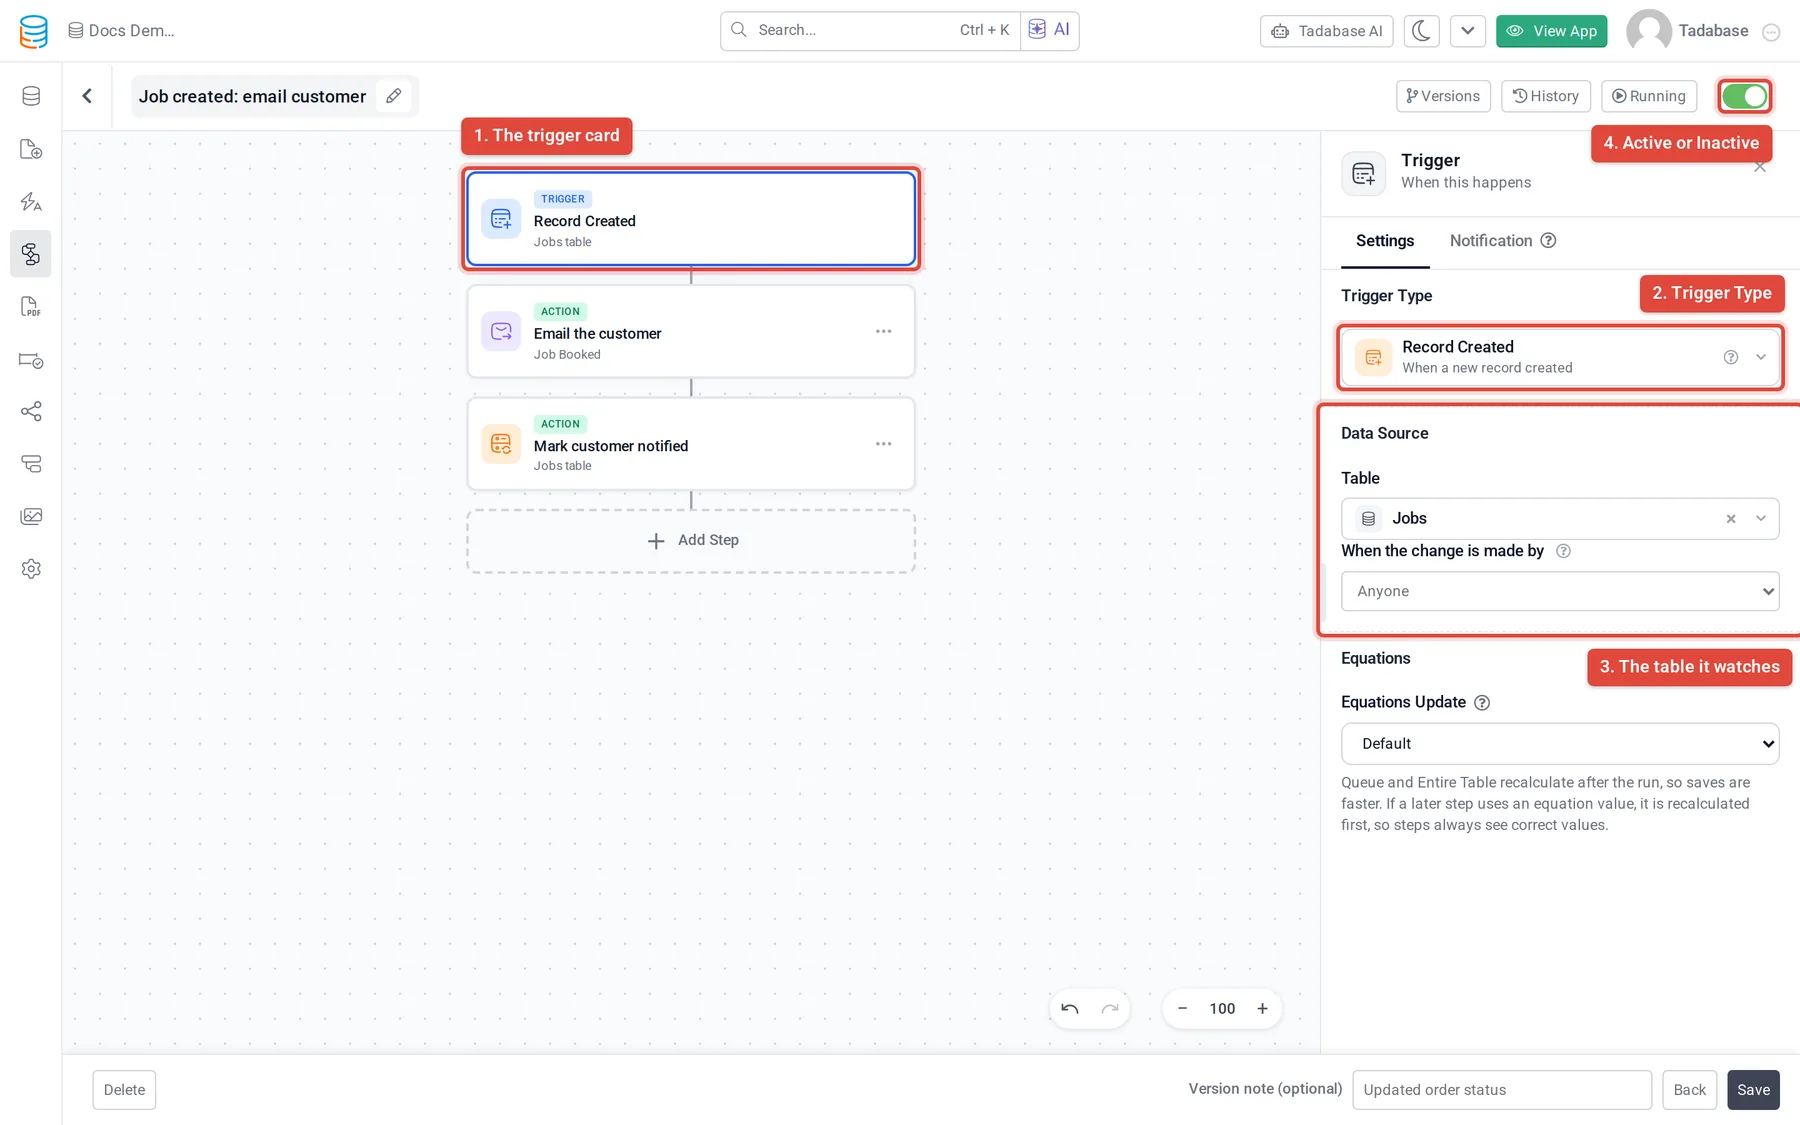
- Start a new workflow Click New Workflow at the top right (in an app with no workflows yet, click Create workflow). The editor opens with a Trigger card that says Choose a trigger, and the settings panel on the right.
- Pick the trigger Under Trigger Type, open the list and choose Record Created in the Records group.
- Pick the table Under Data Source, set Table to Jobs. You pick the trigger first and the table second: the Table setting only appears for triggers that need one.
- Name it Tadabase fills in a name from the trigger and table. To change it, click the pencil next to the name at the top left, type a new name such as "Job created: email customer" and click Save.
Add the email step #
- Add a step Click Add First Step under the trigger card. The panel shows Choose Step Type.
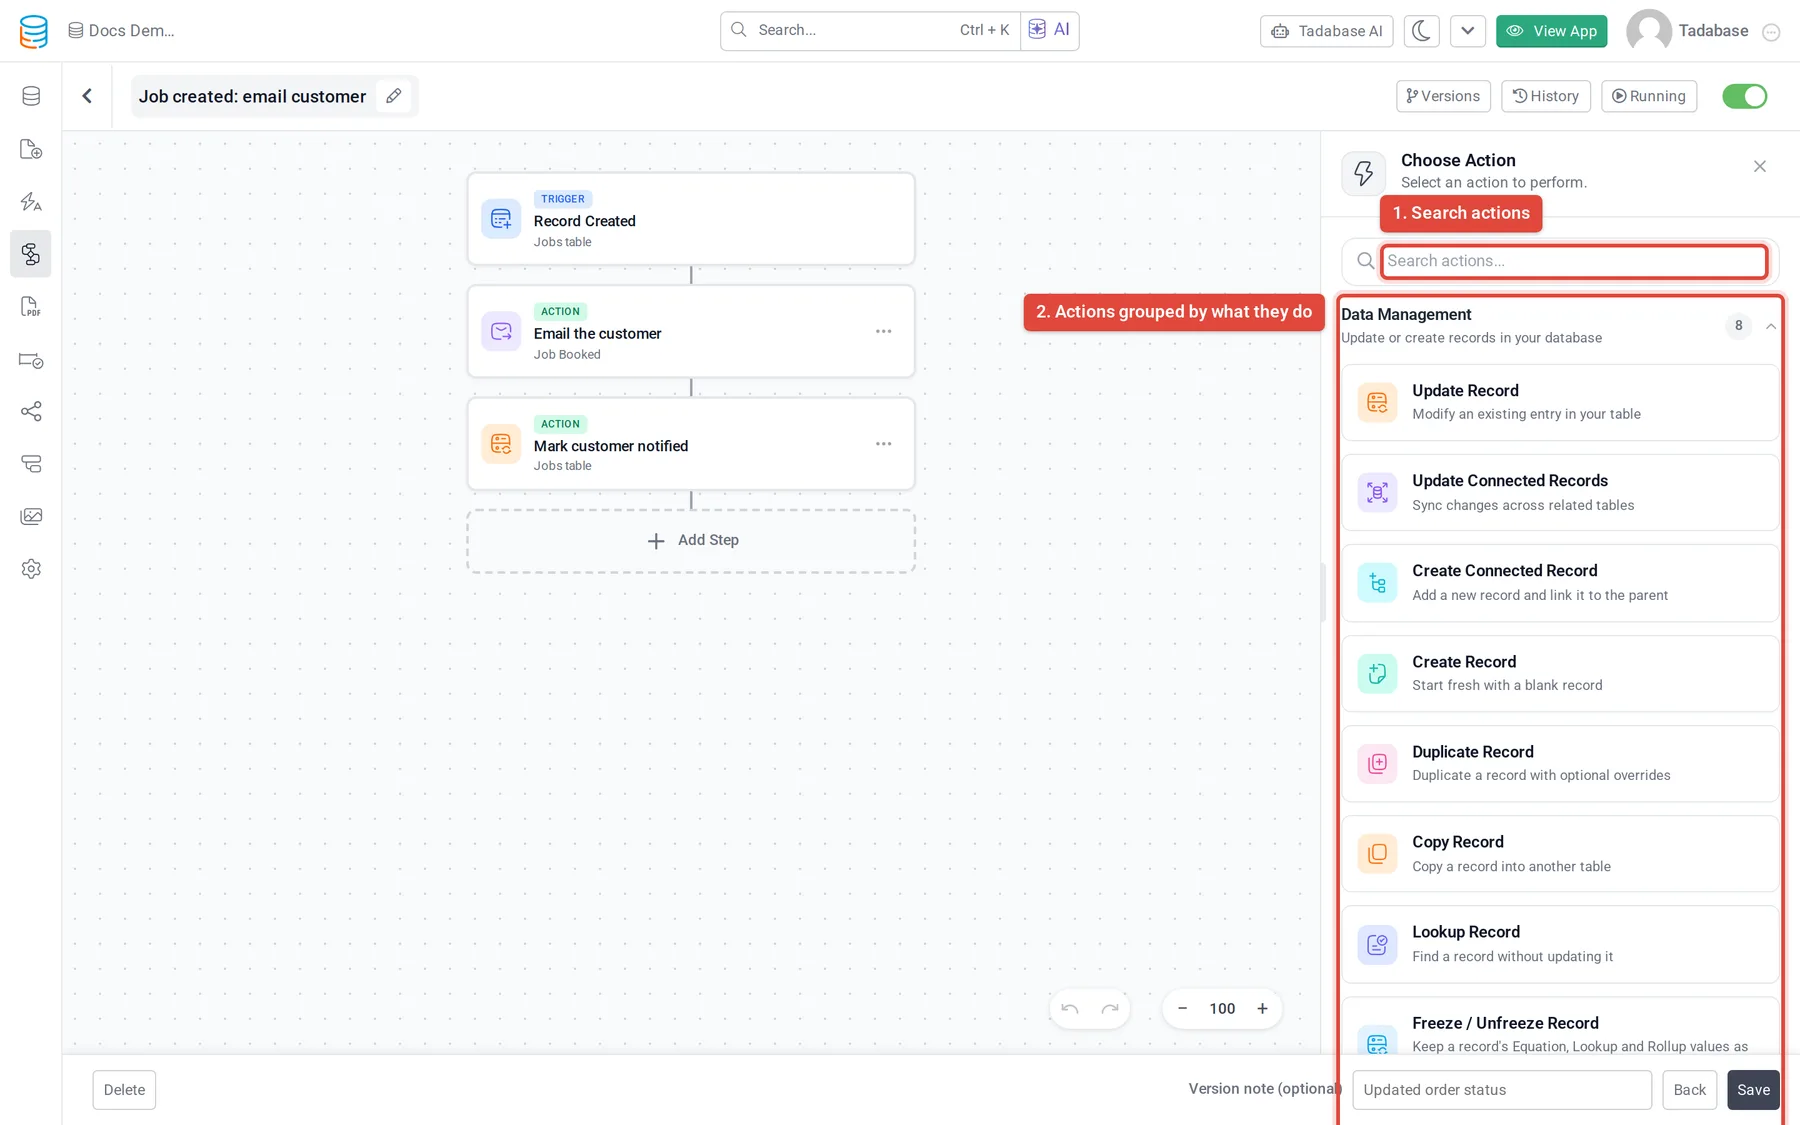
- Choose an action Click Add Action. The actions are grouped: Data Management, Communication, Documents, Utilities and User Experience. You can also type in Search actions....
- Pick Send Email Open Communication and click Send Email.
- Fill in the email Under Email source, pick an email template or build a custom email. Fill in Subject, then under Send To choose the customer's email from the record. Write the Content. Fields marked * are required.
Add a second step to update the job #
- Add another step Click Add Step under the email step, then Add Action.
- Pick Update Record Open Data Management and click Update Record.
- Choose the record Set Record to update to Source Record: the job that started the run.
- Set the value Under Set field values, choose your status field and set it to a value such as "Customer notified".
Steps run from top to bottom, so the status changes only after the email step has run. For the other ways to fill in a value, see Create, update and copy records in a workflow.
Save and turn it on #
- Switch it to Active At the top right, switch the status from Inactive to Active. New workflows start as Inactive and do not run until you switch them on.
- Save Click Save at the bottom right. If the button is greyed out, the editor shows Complete required fields to save.: open the steps marked with an error and fill in the missing fields.
Test it #
- Create a job Add a record to the Jobs table, from a form in your app or in the Data Builder.
- Watch the run In the workflow editor, click Running to see runs that are queued or in progress.
- Check the result Click History. Each run shows its status and what every step did. Open a run to see the email that was sent and the field that was updated, or the error if a step failed.
Next steps #
- Only email some customers: add a condition before the email. See Conditions and branches.
- Use values from earlier steps: see Using workflow data.
- Explore the other actions: see Workflow actions at a glance.
Was this page helpful?
Something wrong or missing on this page? Tell us.