
Start a workflow from an incoming webhook
Give a workflow its own URL so another system can start it by sending data, capture a sample payload, use its values in steps and secure the URL.
- Verified Nov 17, 2026
- Classic builder
The Incoming Webhook trigger gives a workflow its own URL. When another system sends a request to it (a form tool, a payment provider, Zapier or Make, your own code), the workflow runs and its steps can use the data that was sent.
Set it up #
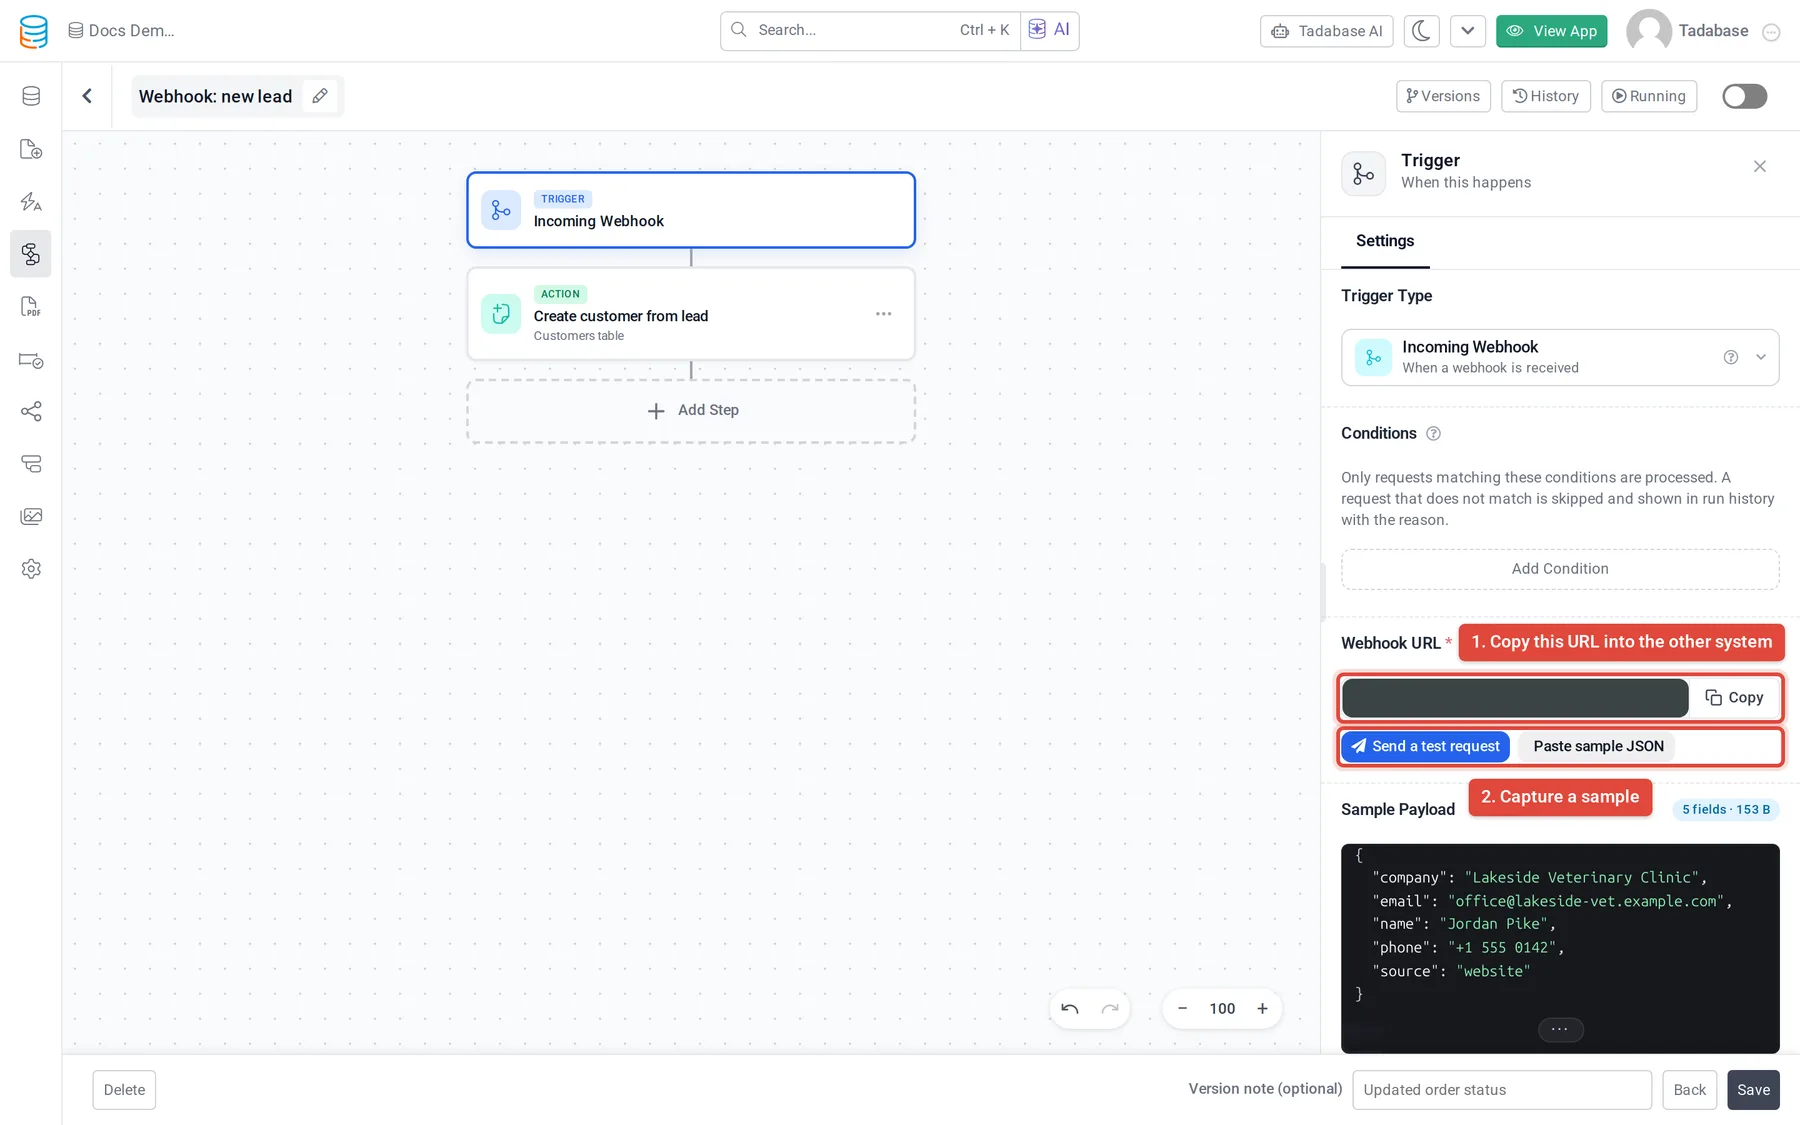
- Choose the trigger Click the Trigger card and choose Incoming Webhook in the Integrations group. This trigger has no table. Tadabase saves the workflow and generates its URL.
- Copy the URL Under Webhook URL, click Copy. Paste it into the other system as the address it should send to.
- Capture a sample Click Send a test request. The window shows the test URL and a sample cURL command; send a request from the other system, or click Send test request. When the request arrives, click Use this sample. You can also click Paste sample JSON and paste an example body.
- Build the steps Once there is a sample, every value in it appears in the field pickers of your steps, conditions and loops, under the trigger. For example, map the sender's email into a Create Record step.
- Secure it, switch on and save Set the security options below, switch the workflow to Active and click Save.
Keep the URL private #
Anyone who has the URL can start the workflow until you turn on a security option. Open Security:
| Setting | What it does |
|---|---|
| Verification method | Secret header (simple): the sender puts a secret in a header. Signed requests, HMAC-SHA256 (recommended): the sender signs each request body with the secret, so a copied or changed request is refused. Choose the Signature format the sender uses. Regenerate makes a new secret; the old one keeps working for 24 hours. |
| IP addresses | Only allow these IPs or Block these IPs, one address or range per line. |
| Allowed hosts | Only accept requests whose Host header matches one of these. |
| Allowed user agents | Only accept requests whose User-Agent header exactly matches one of these. |
| Require basic authentication | The sender must supply the Username and Password with HTTP Basic auth. |
Use Conditions on the trigger to run only for some requests, for example only when a field has a certain value. Requests that do not match are skipped and shown in run history with the reason.
What the sender gets back #
By default the workflow is queued and the sender gets a reply straight away. Two settings change that:
- Delivery › Allow Immediate Processing: runs the workflow while the request is open and replies with the result. Use it only for short workflows; a long one keeps the sender waiting.
- Response: Standard sends the usual JSON reply with status 200 (finished) or 202 (queued). Add message adds your message to it. Custom JSON lets you write the whole reply and insert values with Variables. Choose the Status code and Content type, and use Preview output to check it.
Tadabase always adds a trace header to the reply, which you can use to find the run in History.
Check that it worked #
- Activity (last 24h) on the trigger shows how many requests arrived, how many were rejected and why, and the average run time.
- History shows each run with the data that was received and what every step did.
- Failure Notification › Email on failure emails the workflow owner, the app owner or other addresses when a run fails.
Plans #
The Incoming Webhook trigger depends on your plan. If your plan does not include it, it shows a lock in the trigger list.
Was this page helpful?
Something wrong or missing on this page? Tell us.