
Filter, sort and limit the records a component shows
Use a data component's Data Source tab to filter its records with conditions and filter groups, choose their sort order and cap how many load.
- Verified Nov 17, 2026
- Classic builder
On this page
A data component starts with every record you chose when you added it. On its Data Source tab you narrow those records with filters, set the order they come in, and cap how many are loaded.
The table or connection a component uses is picked when you add it and cannot be changed later. See Choose which table and records a component shows.
Open the Data Source tab #
- Edit the component In the Page Builder, hover over the component and click the pencil (Edit). The settings window opens on the Data Source tab.
- Pick a part of the tab On the left, Data Table holds the table, Sort By and Limit Records. Filters holds the filter groups. Pipes connects a pipe to the component and is not covered here.
- Save Click Update & Save at the bottom of the window.
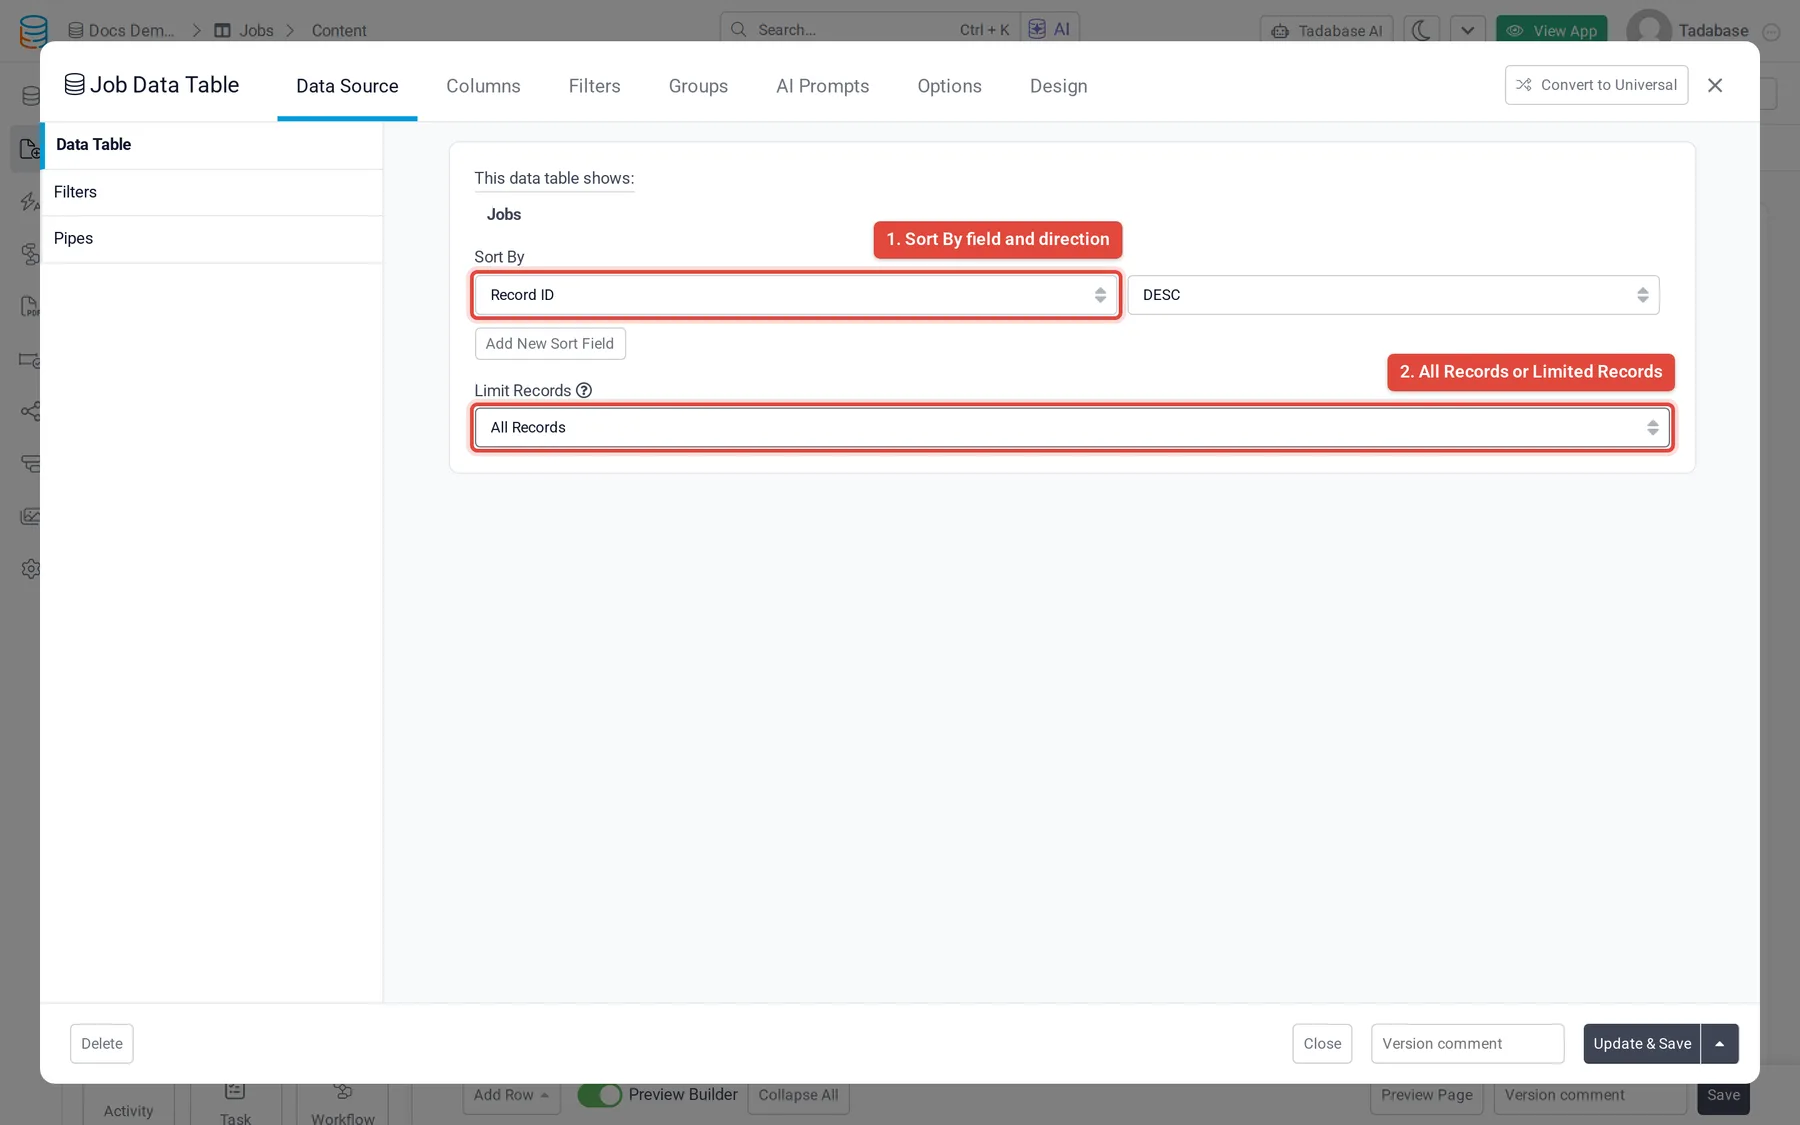
Tables, lists, accordions, kanbans, timelines, log tables and custom components have Sort By and Limit Records. Calendars, maps, charts, pivot tables and resource components have data source filters too. The labels below are the ones on a table.
Filter the records #
Filters keep only the records that match your conditions. A condition is a field, an operator and a value, for example Status is Open.
- Open Filters On the Data Source tab, click Filters on the left.
- Add a filter group Click Add New Filter Group. Once a group exists, add more with Add Filter Group (on a list the button reads Add Filter).
- Set the condition Choose a field in -- Select a field --, then an operator, then the value. The operators depend on the field type; see Filter conditions for each field type.
- Add more conditions Click Add Another Condition for each extra condition in the group.
- Choose Match All or Match Any With two or more conditions, Match All keeps records that meet every condition and Match Any keeps records that meet at least one.
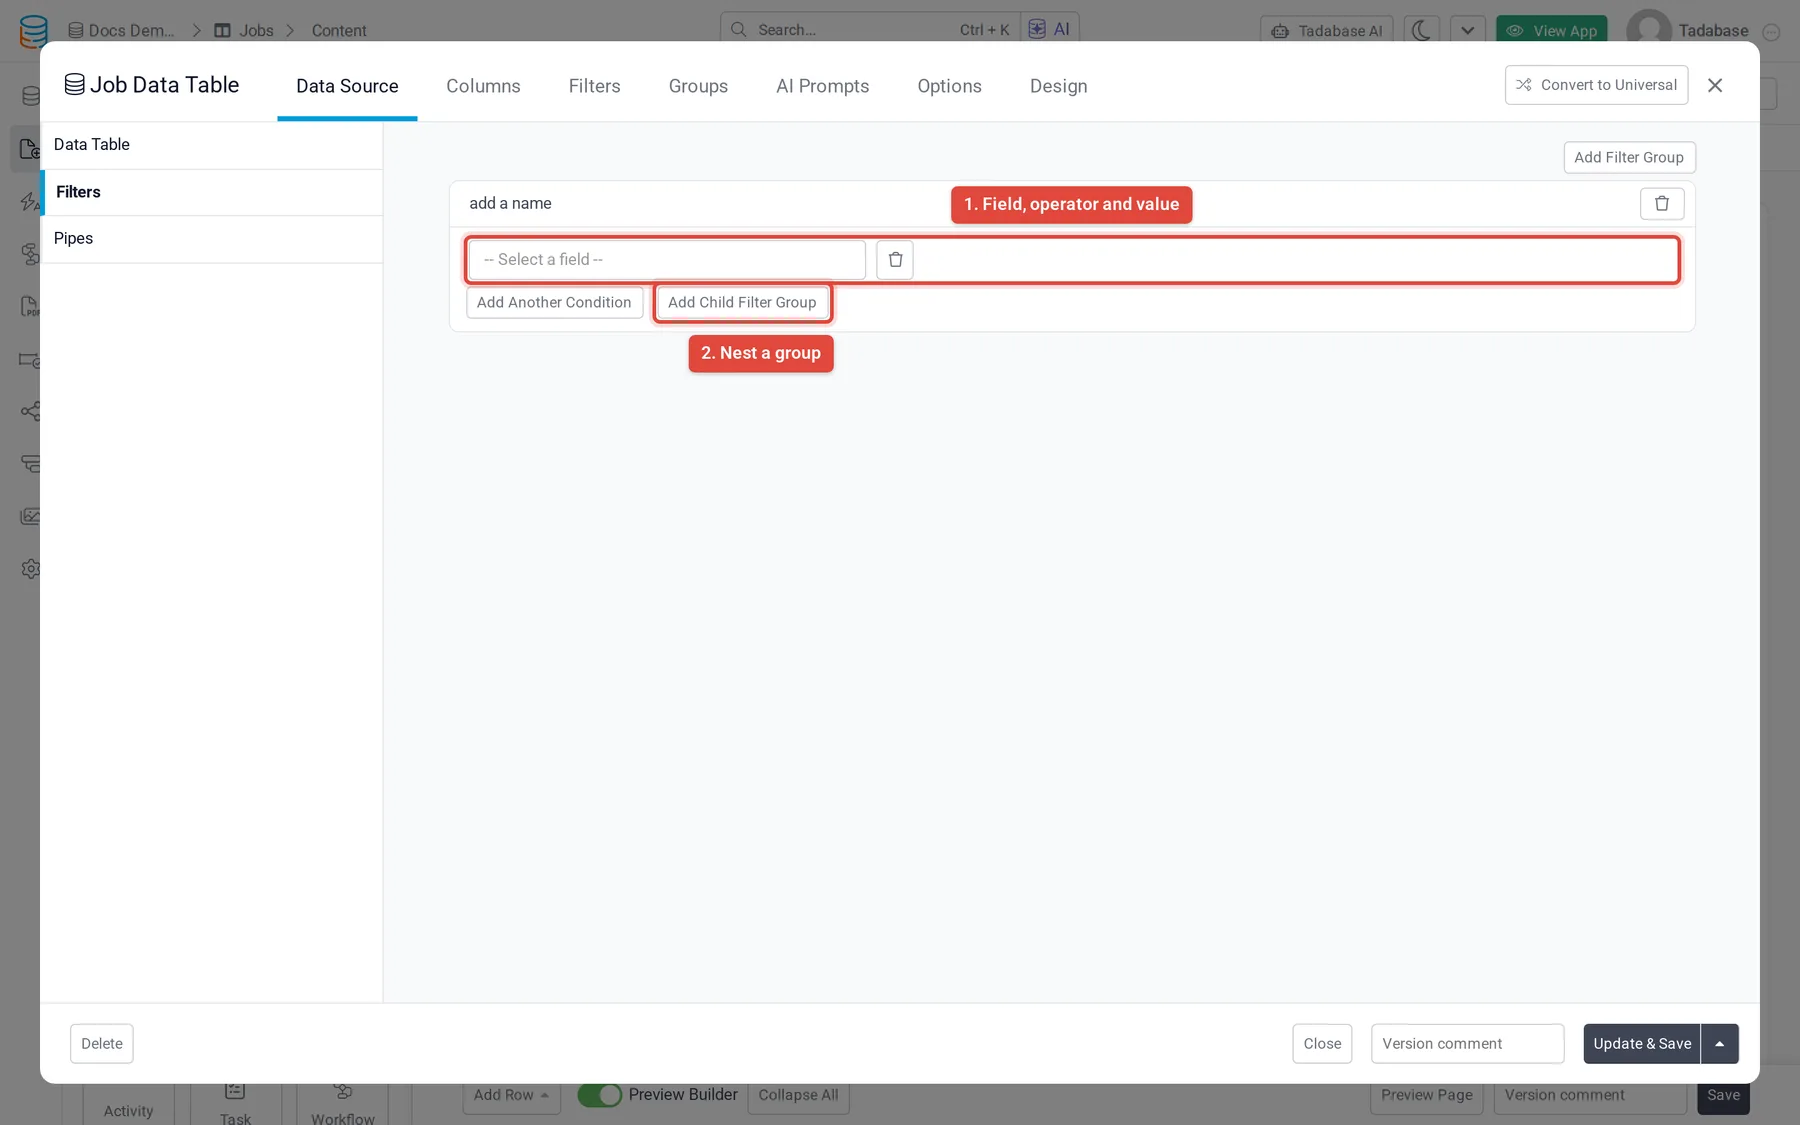
The field list also offers fields from connected tables, grouped under the connection's name, so you can filter jobs by a value on their customer.
The value can be a typed value (Custom) or, when the table has connections, a Connected Value taken from a connected record. On a page that shows one record, you can also tick This Page Record Value and pick a field of the page's record to compare against. It is not offered with relative date operators such as is today.
Combine conditions with groups #
- Several filter groups: a record must match every group.
- Child filter groups: click Add Child Filter Group inside a group to nest a group in it. The child group counts as one more condition of its parent and is combined with the parent's other conditions by the parent's Match All or Match Any setting. A child group can hold its own child groups.
Example: to show jobs whose title contains Video and whose status is Open or Pending, set the parent group to Match All with Title contains Video, then add a child group set to Match Any with Status is Open and Status is Pending.
Sort the records #
Under Sort By on the Data Table part of the tab, choose a field and ASC (lowest or earliest first) or DESC (highest or latest first). Click Add New Sort Field to sort by more than one field; the trash button removes a sort field when there is more than one.
The sort is applied before the limit, so together they decide which records are kept: sort by a date DESC and limit to 5 to show the five latest records.
Limit how many records load #
Limit Records is All Records by default. Choose Limited Records and enter a number to load at most that many records.
This is the total the component can show. How many records show on each page is a separate setting: on a table it is Record Limit Per Page on the Options tab.
Was this page helpful?
Something wrong or missing on this page? Tell us.