
Let users edit their own profile
Use the Profile component so logged-in users can see and update their own details, choose which fields it shows, and hide fields from some roles.
- Verified Nov 17, 2026
- Classic builder
On this page
The Profile component is a form that shows the logged-in user's own record from the Users table and lets them update it. Use it so users can change their name, email, password or other details without asking you.
The default Profile page #
Every new app has a Profile page under Default Pages in the Page Builder, next to Login and Sign Up. It holds a Profile component and is set to require login, because it shows the logged-in user's data. You can edit it, but you can't delete it.
To let users find it, use one of these:
Add a Profile component to a page #
- Open the page In the Page Builder, open a page that requires login.
- Add the component Add a component to a column and choose Profile. It is listed with Login and Signup.
- Check the fields The form editor opens with the title Profile. It starts with the Users table's Name and Email fields.
- Save Click Update & Save. The form's button says
Saveuntil you change it.
The Profile component is built like a Form component, with the same Inputs, Rules, Notifications, Options and Design tabs. For example, use Submit Rules on the Rules tab to show a message after users save.
Choose which fields users see and change #
- On the Inputs tab, add any visible field of the Users table, or remove one you don't want shown.
- Add the Password field to let users change their password. Your app's password rules apply to the new password; see Set password rules for app users.
- Name, Email and Password are made required when you add them.
- To show a field without letting users change it, click the field and turn on Disabled/Read-Only.
Show a field only to some roles #
For example, staff can see and update an Employee ID field, while customers using the same profile page don't see it.
- Open the field In the Profile component's Inputs tab, click the field.
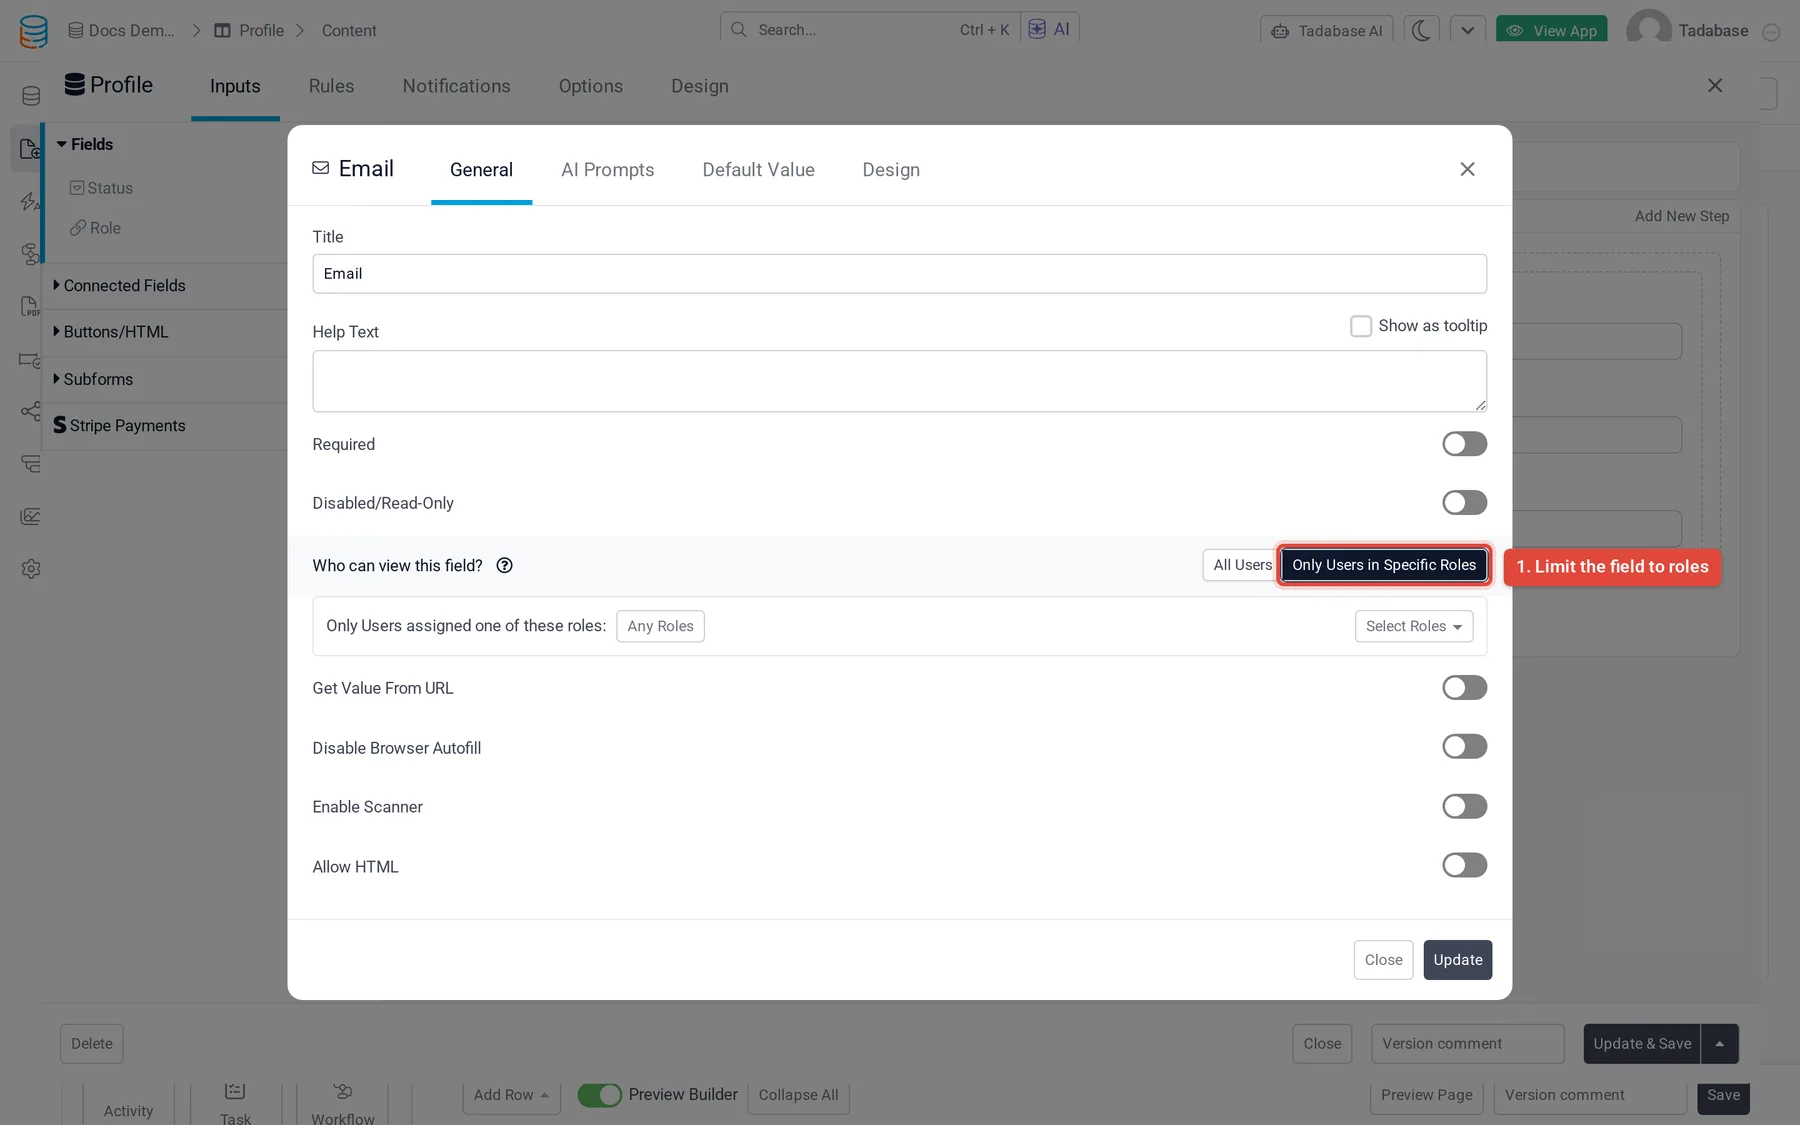
- Limit it On the General tab, set Who can view this field? to Only Users in Specific Roles. It is All Users by default.
- Pick the roles Use Select Roles to add each role that should see the field.
- Save Close the field settings and click Update & Save.
Check that it works #
- Log in as a test user In the live app, log in as a user with a role that should not see a limited field.
- Open the profile Go to the Profile page. The user's own details are filled in, and fields limited to other roles are not shown.
- Save a change Change a value and save. The change appears in that user's record in the Users table.
Was this page helpful?
Something wrong or missing on this page? Tell us.